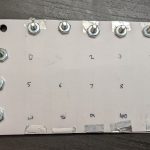
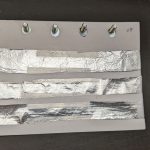
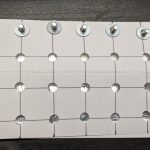
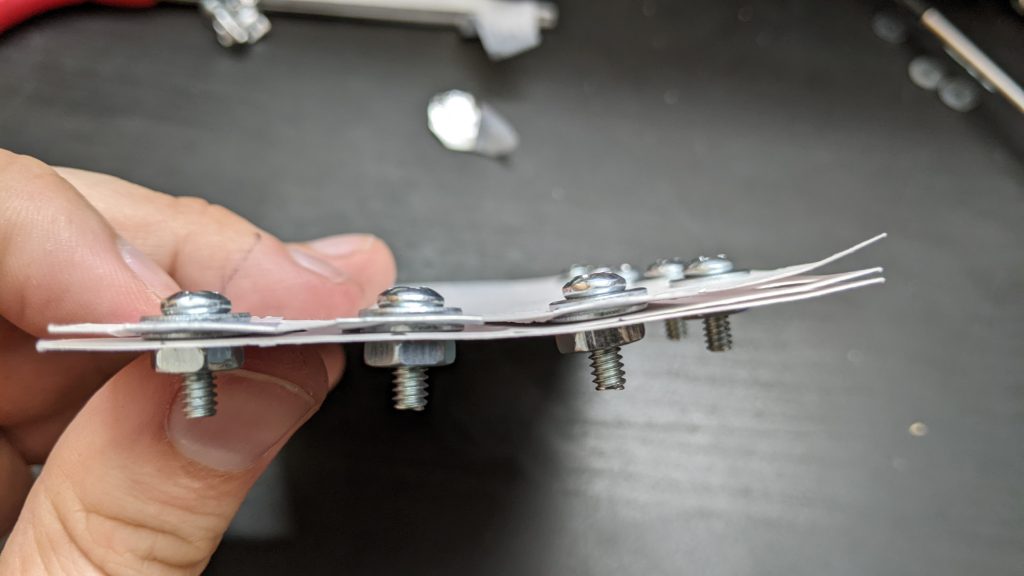
qr-backup

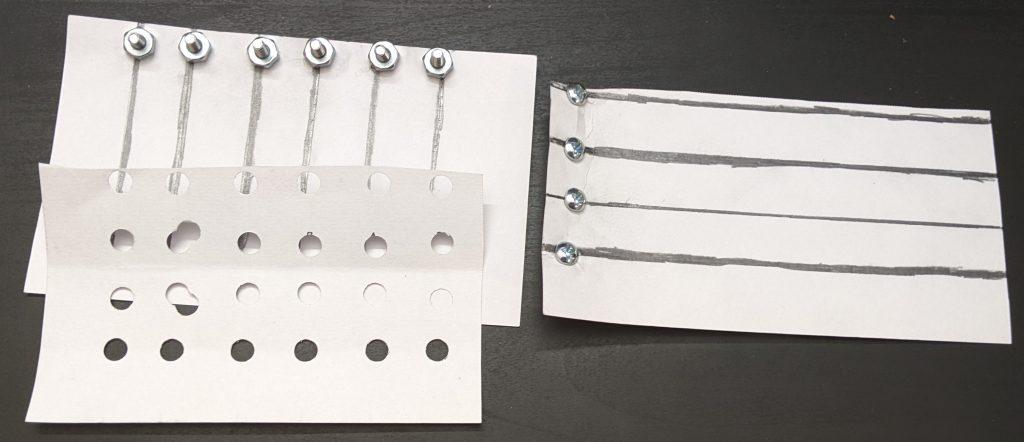
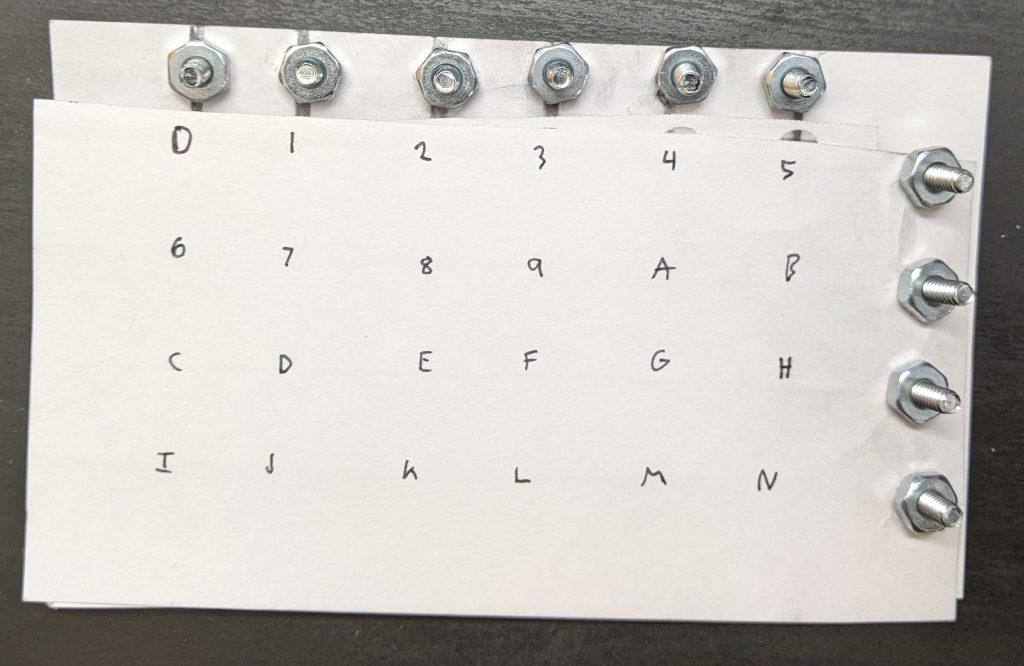
qr-backup is a program to back up digital documents to physical paper. Restore is done with a webcam, video camera, or scanner. Someday smart phone cameras will work.

I’ve been making some progress on qr-backup v1.1. So far I’ve added:

  • --restore, which does a one-step restore for you, instead of needing a bash one-line restore process
  • --encrypt provides password-based encryption
  • An automatic restore check that checks the generated PDF. This is mostly useful for me while maintaining qr-backup, but it also provides peace-of-mind to users.
  • --instructions to give more fine-tuned control over printing instructions. There’s a “plain english” explanation of how qr-backup works that you can attach to the backup.
  • --note for adding an arbitrary message to every sheet
  • Base-64 encoding is now per-QR code, each QR is self-contained.
  • Codes are labeled N01/50 instead of 01/50, to support more code types in the future.
  • Code cleanup of QR generation process.
  • Several bugfixes.

v1.1 will be released when I make qr-backup feature complete:

  • Erasure coding, so you only need 70% of the QRs to do a restore.
  • Improve webcam restore slightly.

v1.2 will focus on adding a GUI and support for Windows, Mac, and Android. Switching off zbar is a requirement to allow multi-platform support, and will likely improve storage density.

USB Flash Longevity Testing – Year 2

Year 0 – I filled 10 32-GB Kingston flash drives with random data.
Year 1 – Tested drive 1, zero bit rot. Re-wrote the drive with the same data.
Year 2 – Re-tested drive 1, zero bit rot. Tested drive 2, zero bit rot. Re-wrote both with the same data.

They have been stored in a box on my shelf, with a 1-month period in a moving van (probably below freezing) this year.

Will report back in 1 more year when I test the third 🙂

FAQs:

  • Q: Why didn’t you test more kinds of drives?
    A: Because I don’t have unlimited energy, time and money :). I encourage you to!
  • Q: You know you powered the drive by reading it, right?
    A: Yes, that’s why I wrote 10 drives to begin with. We want to see how something works if left unpowered for 1 year, 2 years, etc.
  • Q: What drive model is this?
    A: The drive tested was “Kingston Digital DataTraveler SE9 32GB USB 2.0 Flash Drive (DTSE9H/32GBZ)” from Amazon, model DTSE9H/32GBZ, barcode 740617206432, WO# 8463411X001, ID 2364, bl 1933, serial id 206432TWUS008463411X001005. It was not used for anything previously–I bought it just for this test.
  • Q: Which flash type is this model?
    A: We don’t know. If you do know, please tell me.
  • Q: What data are you testing with?
    A: (Repeatable) randomly generated bits
  • Q: What filesystem are you using? / Doesn’t the filesystem do error correction?
    A: I’m writing data directly to the drive using Linux’s block devices.

2021 books

Here’s a list of books I read in 2021. The ones in bold I recommend.

Fiction:

Enigma by Graeme Base
City of Stairs by Robert Jackson Bennett
Look to Windward (Culture 7) by Ian Banks
Surface Detail (Culture 8) by Ian M Banks
Pump Six by Paolo Bacigalupi
Six of Crows by Leigh Bardugo
Lexicon by Max Barry
Mage Errant 1 by John Bierce
Mage Errant 2 by John Bierce
Mage Errant 3 by John Bierce
Mage Errant 4 by John Bierce
Mage Errant 5 by John Bierce
The Atlas Six by Olivie Blake
Lilith’s Brood (Xenogenesis 1) by Octavia E Butler
Elegy Beach (Change 2) by Steven Boyett
Curse of Charion by Louis Bujold
Xenocide by Orson Scott Card
Bohemian Gospel by Dan Carpenter
Convergence (Foreigner 18) by C J Cherryh
Emergence (Foreigner 19) by C J Cherryh
Convergence (Foreigner 21) by C J Cherryh
Iron Prince by Bryce O’Conner and Luke Chmilenko
Murder on the Orient Express by Agatha Christie
The Alchemist by Paulo Coelho
Artemis Fowl (Artemis Fowl 1) by Eoin Colfer
The Arctic Incident (Artemis Fowl 2) by Eoin Colfer
Eternity Code (Artemis Fowl 3) by Eoin Colfer
Opal Deception (Artemis Fowl 4) by Eoin Colfer
Space Between Worlds by J Conrad and Micaiah Johnson
Little Brother by Cory Doctrow
Homeland (Little Brother 2) by Cory Doctrow
Children of Chaos by Dave Duncan
The Alchemist’s Apprentice by Dave Duncan
The Alchemist’s Code by Dave Duncan
The Alchemist’s Pursuit by Dave Duncan
The Cutting Edge by Dave Duncan
Upland Outlaws by Dave Duncan
The Stricken Field by Dave Duncan
Queen of Blood by Sarah Beth Durst
Vita Nostra by Maryna and Serhiy Dyachenko
How Rory Thorne Destroyed the Multiverse by K. Eason
Malazan (Malazan 1) by Steven Erikson
Daughter of the Empire by Raymond Feist and Janny Wurts
Mistress of the Empire by Raymond Feist and Janny Wurts
Servant of the Empire by Raymond Feist and Janny Wurts
Dragon’s Egg (Cheela 1) by Robert L Forward
Mother of Learning by Domagoj Kurmaic/nobody103
Books of Magic by Neil Gaiman
The Midnight Library by Matt Haig
The Warehouse by Rob Hart
Forging Hephestus by Drew Hayes
Super Powereds, v1 by Drew Hayes
Super Powereds, v2 by Drew Hayes
Super Powereds, v3 by Drew Hayes
Super Powereds, v4 by Drew Hayes
Johannes Cabal by Johnathan L. Howard
The Medusa Plague by Mary Kirchoff
Six Wakes by Muir Lafferty
King of Thorns by Mark Lawrence
Emperor of Thorns by Mark Lawrence
First Contacts by Murray Leinster
Futurological Congress by Stanislaw Lem
Perfect Vacuum by Stanislaw Lem
Tuf Voyaging by George R R Martin
Memory of Empire by Arkady Martine
A Desolation Called Peace by Arkady Martine
Middlegame by Seanan McGuire
The Host by Stephanie Meyers
The city & the city by China Mieville
*The House that Made the 16 Loops of time by Tamsyn Muir
Harrow the Ninth by Tamsyn Muir
Convenience Store Woman by Sayaka Murata
A Deadly Education by Naomi Novik
The Last Graduate (Schoolomance 2) by Naomi Novik
Stiletto (Chequey, book 2) by Daniel O’Malley
Special Topics in Calamity Physics by Marisha Pessl
Carpe Jugulum by Terry Pratchett
Guards! Guards! by Terry Pratchett
Jingo by Terry Pratchett
The Last Continent by Terry Pratchett
Monsterous Regiment by Terry Pratchett
Men at Arms by Terry Pratchett
Night Watch by Terry Pratchett
Snuff by Terry Pratchett
Sourcery by Terry Pratchett
The Truth by Terry Pratchett
The Woven Ring (Sol’s Harvest 1) by M D Presley
Years of Rice + Salt by Kim Stanley Robinson
The Torch That Ignites the Stars by Andrew Rowe
Sleep Donation by Karen Russell
A Darker Shade of Magic by V E Schwab
Invisible Life of Addie LaRue by V E Schwab
Vicious by V E Schwab
Vengeance by V E Schwab
Grasshopper Jungle by Andrew Smith
Why Is This Night Different Than All Other Nights? by Lemony Snicket
Dark Storm (Rhenwars 1) by M L Spenser
Anathem by Neal Stephenson
Cryptonomicon by Neal Stephenson
Nimona by Noele Stevenson
Hunter x Hunter manga v1-36 by Yoshihiro Togashi
Worth the Candle by Alexander Wales
Educated by Tara Westover
Soulsmith (Cradle 2) by Will Wight
Blackflame (Cradle 3) by Will Wight
Skysworn (Cradle 4) by Will Wight
Ghostwater (Cradle 5) by Will Wight
Underlord (Cradle 6) by Will Wight
Uncrowned (Cradle 7) by Will Wight
Wintersteel (Cradle 8) by Will Wight
Bloodlines (Cradle 9) by Will Wight
Reaper (Cradle 10) by Will Wight
The Crimson Vault (Travelers Gate 2) by Will Wight
*Dinosaurs by Walter Jon Williams
Blind Lake by Robert Charles Wilson
Thousand Li by Tao Wong
Thousand Li 2 by Tao Wong
Thousand Li 3 by Tao Wong
Thousand Li 4 by Tao Wong
Thousand Li 5 by Tao Wong
Sorcerer’s Legacy by Janny Wurts (see also Feist)
Heretical Edge by ceruleuanscrawling
Mark of the Fool by UnstoppableJuggernaut
there is no antimemetics division by qntm
Only Villains Do That by Webbonomicon
Worm by wildbow

Nonfiction:

Compiling with Continuations by Andrew W. Appel
The Rule of Benedict by St Benedict (read the front material only)
Programming Pearls by Jon Bentley
Whole Brain Emulation Roadmap by Nick Bostrom
Data Matching by Peter Christen
Attack and Defense by James Davies and Akira Ishida
Engines of Creation by K. Eric Drexler
Class by Paul Fussell
The Food Lab by J Kenzi Lopez-Alt
Primitive Technology by John Plant
Monero whitepaper by Nicolas van Saberhagen
Secrets and Lies by Bruce Schneier
The Cuckoo’s Egg by Clifford Stoll

Testing scrapers faster

Recently I wrote a scraper. First, I downloaded all the HTML files. Next, I wanted to parse the content. However, real world data is pretty messy. I would run the scraper, and it would get partway though the file and fail. Then I would improve it, and it would get further and fail. I’d improve it more, and it would finish the whole file, but fail on the fifth one. Then I’d re-run things, and it would fail on file #52, #1035, and #553,956.

To make testing faster, I added a scaffold. Whenever my parser hit an error, it would print the filename (for me, the tester) and record the filename to an error log. Then, it would immediately exit. When I re-ran the parser, it would test all the files where it had hit a problem first. That way, I didn’t have to wait 20 minutes until it got to the failure case.

if __name__ == "__main__":
    if os.path.exists("failures.log"):
        # Quicker failures 
        with open("failures.log", "r") as f:
            failures = set([x.strip() for x in f])
        for path in tqdm.tqdm(failures, desc="re-checking known tricky files"):
            try:
                with open(path) as input:
                    parse_file(input)
            except Exception:
                print(path, "failed again (already failed once")
                raise

    paths = []
    for root, dirs, files in os.walk("html"):
        for file in sorted(files):
            path = os.path.join(root, file)
            paths.append(path)
    paths.sort()

    with open("output.json", "w") as out:
        for path in tqdm.tqdm(paths, desc="parse files"): # tqdm is just a progress bar. you can also use 'for path in paths:
            with open(input, "r") as input:
                try:
                    result = parse_file(input)
                except Exception:
                    print(path, "failed, adding to quick-fail test list")
                    with open("failures.log", "a") as fatal:
                        print(path, file=fatal)
                    raise
                json.dump(result, out, sort_keys=True) # my desired output is one JSON dict per line
                out.write("\n")

Understanding gzip

Let’s take a look at the gzip format. Why might you want to do this?

  1. Maybe you’re curious how gzip works
  2. Maybe you’re curious how DEFLATE works. DEFLATE is the “actual” compression method inside of gzip. It’s also used in zip, png, git, http, pdf… the list is pretty long.
  3. Maybe you would like to write a gzip/DEFLATE decompressor. (A compressor is more complicated–understanding the format alone isn’t enough)

Let’s work a few examples and look at the format in close detail. For all these examples, I’m using GNU gzip 1.10-3 on an x86_64 machine.

I recommend checking out the linked resources below for a deeper conceptual overview if you want to learn more. That said, these are the only worked examples of gzip and/or DEFLATE of which I’m aware, so they’re a great companion to one another. In particular, you may want to learn what a prefix code is ahead of time.

References:
[1] RFC 1951, DEFLATE standard, by Peter Deutsch
[2] RFC 1952, gzip standard, by Peter Deutsch
[3] infgen, by Mark Adler (one of the zlib/gzip/DEFLATE authors), a tool for dis-assembling and printing a gzip or DEFLATE stream. I found this useful in figuring out the endian-ness of bitfields, and somewhat in understanding the dynamic huffman decoding process. Documentation is here.
[4] An explanation of the ‘deflate’ algorithm by Antaeus Feldspar. A great conceptual overview of LZ77 and Huffman coding. I recommend reading this before reading my DEFLATE explanation.
[5] LZ77 compression, Wikipedia.
[6] Prefix-free codes generally and Huffman‘s algorithm specifically
[7] After writing this, I learned about puff.c, a reference (simple) implementation of a DEFLATE decompressor by Mark Adler.

Gzip format: Basics and compressing a stream

Let’s take a look at our first example. If you’re on Linux, feel free to run the examples I use as we go.

echo "hello hello hello hello" | gzip

The bytes gzip outputs are below. You can use xxd or any other hex dump tool to view binary files. Notice that the original is 24 bytes, while the compressed version is 29 bytes–gzip is not really intended for data this short, so all of the examples in this article actually get bigger.

Byte012345678910111213141516171819202122232425262728
Hex1f8b0800000000000003cb48cdc9c957c84027b9000088590b18000000
hello (1) – gzip contents

The beginning and end in bold are the gzip header and footer. I learned the details of the format by reading RFC 1952: gzip

  • Byte 0+1 (1f8b): Two fixed bytes that indicate “this is a gzip file”. These file-type indicators are also called “magic bytes”.
  • Byte 2 (08): Indicates “the compression format is DEFLATE”. DEFLATE is the only format supported by gzip.
  • Byte 3 (00): Flags. 8 single-bit flags.
    • Not set: TEXT (indicates this is ASCII text. hint to the decompressor only. i think gzip never sets this flag)
    • Not set: HCRC (adds a 16-bit CRC to the header)
    • Not set: EXTRA (adds an “extras” field to the header)
    • Not set: NAME (adds a filename to the header–if you compress a file instead of stdin this will be set)
    • Not set: COMMENT (adds a comment to the header)
    • There are also three reserved bits which are not used.
  • Byte 4-7 (00000000): Mtime. These indicate when the compressed file was last modified, as a unix timestamp. gzip doesn’t set an associated time when compressing stdin. Technically the standard says it should use the current time, but this makes the output the same every time you run gzip, so it’s better than the original standard.
  • Byte 8 (00): Extra flags. 8 more single-bit flags, this time specific to the DEFLATE format. None are set so let’s skip it. All they can indicate is “minimum compression level” and “max compression level”.
  • Byte 9 (03): OS. OS “03” is Unix.
  • Byte 10-20: Compressed (DEFLATE) contents. We’ll take a detailed look at DEFLATE below.
  • Byte 21-24 (0088590b): CRC32 of the uncompressed data, “hello hello hello hello\n”. I assume this is correct. It’s worth noting, there are multiple things called “CRC32”.
  • Byte 25-28 (18000000): Size of the uncompressed data. This is little-endian byte order, 0x00000018 = 16*1+1*8 = 24. The uncompressed text is 24 bytes, so this is correct.
Byte1011121314151617181920
Hexcb48cdc9c957c84027b900
Binary1100101101001000110011011100100111001001010101111100100001000000001001111011100100000000
R. Bin.1101001100010010101100111001001110010011111010100001001100000010111001001001110100000000
hello (1) – DEFLATE contents

DEFLATE format: Basics and fixed huffman coding

DEFLATE is the actual compression format used inside gzip. The format is detailed in RFC 1951: DEFLATE. DEFLATE is a dense format which uses bits instead of bytes, so we need to take a look at the binary, not the hex, and things will not be byte-aligned. The endian-ness is a little confusing in gzip, so we’ll usually be looking at the “reversed binary” row.

  • As a hint, whenever we read bits, we use the “reverse” binary order. For Huffman codes, we keep the bit order in reverse. For fixed-length fields like integers, we reverse again into “normal” binary order. I’ll call out the order for each field.
  • Byte 10: 1 1010011. Is it the last block? Yes.
    • 1: Last block. The last block flag here means that after this block ends, the DEFLATE stream is over
  • Byte 10: 1 10 10011. Fixed huffman coding. We reverse the bits (because it’s always 2 bits, and we reverse any fixed number of bits) to get 01.
    • 00: Not compressed
    • 01: Fixed huffman coding.
    • 10: Dynamic huffman coding.
    • 11: Not allowed (error)
  • So we’re using “fixed” huffman coding. That means there’s a static, fixed encoding scheme being used, defined by the DEFLATE standard. The scheme is given by the tables below. Note that Length/Distance codes are special–after you read one, you may read some extra bits according to the length/distance lookup tables.
BinaryBitsExtra bitsTypeCode
00110000-1011111180Literal byte0-143
110010000-11111111190Literal byte144-255
000000070End of block256
0000001-00101117variesLength257-279
11000000-110001118variesLength280-285
Literal/End of Block/Length Huffman codes
Binary CodeBitsExtra bitsTypeValue
00000-1111115variesDistance0-31
Distance Huffman codes
CodeBinaryMeaningExtra bits
2670001011Length 15-161
Length lookup (abridged)
CodeBinaryMeaningExtra bits
400100Distance 5-61
Distance lookup (abridged)
  • Now we read a series of codes. Each code might be
    • a literal (one binary byte), which is directly copied to the output
    • “end of block”. either another block is read, or if this was the last block, DEFLATE stops.
    • a length-distance pair. first code is a length, then a distance is read. then some of the output is copied–this reduces the size of repetitive content. the compressor/decompressor can look up to 32KB backwards for duplicate content. This copying scheme is called LZ77.
  • Huffman codes are a “prefix-free code” (confusingly also called a “prefix code”). What that means is that, even though the code words are different lengths from one another, you can always unambigously tell which binary codeword is next. For example, suppose the bits you’re reading starts with: 0101. Is the next binary codeword 0, 01, 010, or 0101? In a prefix-free code, only one of those is a valid codeword, so it’s easy to tell. You don’t need any special separator to tell you the codeword is over. The space savings from not having a separator is really important for good compression. The “huffman” codes used by DEFLATE are prefix-free codes, but they’re not really optimal Huffman codes–it’s a common misnomer.
  • Byte 10-11: 110 10011000 10010: A literal. 10011000 (152) minus 00110000 (48) is 104. 104 in ASCII is ‘h’.
  • Byte 11-12: 000 10010101 10011: A literal. 10010101 (149) minus 00110000 (48) is 101. 101 in ASCII is ‘e’.
  • Byte 12-13: 101 10011100 10011: A literal. 10011100 (156) minus 00110000 (48) is 108. 108 in ASCII is ‘l’.
  • Byte 13-14: 100 10011100 10011: Another literal ‘l’
  • Byte 14-15: 100 10011111 01010: A literal. 10011111 (159) minus 00110000 (48) is 111. 111 in ASCII is ‘o’.
  • Byte 15-16: 111 01010000 10011: A literal. 01010000 (80) minus 00110000 (48) is 32. 32 in ASCII is ‘ ‘ (space).
  • Byte 16-17: 000 10011000 00010: Another literal ‘h’.
  • Byte 17: 000 0001011: A length. 0001011 (11) minus 0000001 (1) is 10, plus 257 is 267. We look up distance 256 in the “length lookup” table. The length is 15-16, a range.
  • Byte 18: 1 00100: Because the length is a range, we read extra bits. The “length lookup” table says to read 1 extra bit: 1. The extra bits need to be re-flipped back to normal binary order to decode them, but 0b1 flipped is still 0b1. 15 (bottom of range) plus 0b1 = 1 (extra bits) is 16, so the final length is 16.
  • Byte 18-19: 111 00100 10011101: After a length, we always read a distance next. Distances are encoded using a second huffman table. 00100 is code 4, which using the “distance lookup” table is distance 5-6.
  • Byte 18-19: 11100100 1 0011101. Using the “distance lookup” table, we need to read 1 extra bit: 0b1. Again, we reverse it, and add 5 (bottom end of range) to 0b1 (extra bits read), to get a distance of 6.
  • We copy from 6 characters ago in the output stream. The stream so far is “hello h”, so 6 characters back is starting at “e”. We copy 16 characters, resulting in “hello hello hello hello“. Why this copy didn’t start with the second “h” instead of the second “e”, I’m not sure.
  • Byte 19-20: 1 00111010 0000000: A literal. 00111010 (58) minus 00110000 (48) is 10. 10 in ASCII is “\n” (new line)
  • Byte 20: 0 0000000: End of block. In this case we ended nicely on the block boundry, too. This is the final block, so we’re done decoding entirely.
  • At this point we’d check the CRC32 and length match what’s in the gzip footer right after the block.

Our final output is “hello hello hello hello\n”, which is exactly what we expected.

Gzip format: Compressing a file

Let’s generate a second example using a file.

echo -en "\xff\xfe\xfd\xfc\xfb\xfa\xf9\xf8\xf7\xf6\xf5\xf4\xf3\xf2\xf1" >test.bin
gzip test.bin

This input file is pretty weird. In fact, it’s so weird that gzip compression will fail to reduce its size at all. We’ll take a look at what happens when compression fails in the next DEFLATE section below. But first, let’s see how gzip changes with a file instead of a stdin stream.

Byte012345678910111213141516171819-383940414243444546
Hex1f8b08089f08ea600003746573742e62696e00see belowc6d3157e0f000000
binary garbage (2) – abridged gzip contents

Okay, let’s take a look at how the header and footer changed.

  • Byte 0+1 (1f8b): Two fixed bytes that indicate “this is a gzip file”. These file-type indicators are also called “magic bytes”.
  • Byte 2 (08): Indicates “the compression format is DEFLATE”. DEFLATE is the only format supported by gzip.
  • Byte 3 (08): Flags. 8 single-bit flags.
    • Not set: TEXT (indicates this is ASCII text. hint to the decompressor only. i think gzip never sets this flag)
    • Not set: HCRC (adds a 16-bit CRC to the header)
    • Not set: EXTRA (adds an “extras” field to the header)
    • Set: NAME (adds a filename to the header)
    • Not set: COMMENT (adds a comment to the header)
    • There are also three reserved bits which are not used.
  • Byte 4-7 (9f08ea60) . Mtime. This is in little-endian order: 0x60ea089f is 1625950367. This is a unix timestamp — 1625950367 seconds after midnight, Jan 1, 1970 is 2021-07-10 20:52:47 UTC, which is indeed earlier today. This is the time the original file was last changed, not when compression happened. This is here so we can restore the original modification time if we want.
  • Byte 8 (00): Extra flags. None are set.
  • Byte 9 (03): OS. OS “03” is Unix.
  • Byte 10-18 (74 65 73 74 2e 62 69 6e 00): Zero-terminated string. The string is “test.bin”, the name of the file to decompress. We know this field is present because of the flag set.
  • Byte 19-38: The compressed DEFLATE stream.
  • Byte 39-42 (c6d3157e): CRC32 of the uncompressed data. Again, I’ll just assume this is correct.
  • Byte 25-28 (0f000000): Size of the uncompressed data. 0x0000000f = 15 bytes, which is correct.

DEFLATE format: Uncompressed data

Uncompressed data is fairly rare in the wild from what I’ve seen, but for the sake of completeness we’ll cover it.

Byte192021222324-38
Hex010f00f0ffff fe fd fc fa f9 f8 f7 f6 f5 f4 f3 f2 f1
Binary0000000100001111000000001111000011111111omitted
R. Binary1000000011110000000000000000111111111111omitted
binary garbage (2) – DEFLATE contents
  • Again, we start reading “r. binary” — the binary bits in reversed order.
  • Byte 19: 10000000. The first three bits are the most important bits in the stream:
    • 1: Last block. The last block flag here means that after this block ends, the DEFLATE stream is over
  • Byte 19: 100 00000. Not compressed. For a non-compressed block only, we also skip until the end of the byte.
    • 00: Not compressed
    • 01: Fixed huffman coding.
    • 10: Dynamic huffman coding.
  • Byte 20-21: 11110000 00000000. Copy 15 uncompressed bytes. We reverse the binary bits as usual for fixed fields. 0b0000000000001111 = 0x000f = 15.
  • Byte 22-23: 00001111 11111111. This is just the NOT (compliment) of byte 20-21 as a check. It can be ignored.
  • Byte 24-38: ff fe fd fc fb fa f9 f8 f7 f6 f5 f4 f3 f2 f1: 15 literal bytes of data, which are directly copied to the decompressed output with no processing. Since we only have one block, this is the whole of the decompressed data.

DEFLATE format: Dynamic huffman coding

Dynamic huffman coding is by far the most complicated part of the DEFLATE and gzip specs. It also shows up a lot in practice, so we need to learn this too. Let’s take a look with a third and final example.

echo -n "abaabbbabaababbaababaaaabaaabbbbbaa" | gzip

The bytes we get are:

  • Byte 0-9 (1f 8b 08 00 00 00 00 00 00 03): Header
  • Byte 10-32 (1d c6 49 01 00 00 10 40 c0 ac a3 7f 88 3d 3c 20 2a 97 9d 37 5e 1d 0c): DEFLATE contents
  • Byte 33-40 (6e 29 34 94 23 00 00 00): Footer. The uncompressed data is 35 bytes.

We’ve already seen everything interesting in the gzip format, so we’ll skip the header and footer, and move straight to looking at DEFLATE this time.

Byte1011121314151617181920212223242526272829303132
Hex1dc6490100001040c0aca37f883d3c202a979d375e1d0c
Binary0001110111000110010010010000000100000000000000000001000001000000110000001010110010100011011111111000100000111101001111000010000000101010100101111001110100110111010111100001110100001100
R. Binary1011100001100011100100101000000000000000000000001000000000000010000000110011010111000101111111100001000110111100001111000000010001010100111010011011100111101100011110101011100000110000
abaa stream – DEFLATE contents
  • As usual, we read “r. binary” — the binary bits in reversed order.
  • Byte 10: 10111000. Last (only) block. The DEFLATE stream is over after this block.
  • Byte 10: 10111000. 10=Dynamic huffman coding
    • 00: Not compressed
    • 01: Fixed huffman coding.
    • 10: Dynamic huffman coding.

Which parts are dynamic?

Okay, so what does “dynamic” huffman coding mean? A fixed huffman code had several hardcoded values defined by the spec. Some are still hardcoded, but some will now be defined by the gzip file.

  1. The available literals are all single-byte literals. The literals remain fixed by the spec.
  2. There is a “special” literal indicating the end of the block in both.
  3. The lengths (how far to look backwards when copying) were given as ranges whose size was a power of two. For example, there would be one binary code (0001011) for the length range 15-16. Then, we would read one extra bit (because the range is 2^1 elements long) to find the specific length within that range. In a dynamic coding, the length ranges remain fixed by the spec. (“length lookup” table)
  4. Again, the actual ranges and literals are fixed by the spec. The binary codewords to represent (lengths/literals/end-of-block) are defined in the gzip stream instead of hardcoded. (“literal/end-of-block/length huffman codes” table)
  5. Like the literal ranges, the distance ranges remain fixed by the spec. (“distance lookup” table)
  6. Although the distance ranges themselves are fixed, the binary codewords to represent distance ranges are defined in the gzip stream instead of hardcoded. (“distance huffman codes” table)

So basically, the possible lengths and distances are still the same (fixed) ranges, and the literals are still the same fixed literals. But where we had two hardcoded tables before, now we will load these two tables from the file. Since storing a table is bulky, the DEFLATE authors heavily compressed the representation of the tables, which is why dynamic huffman coding is so complicated.

Aside: Storing Prefix-Free Codewords as a List of Lengths

Suppose we have a set of prefix-free codewords: 0, 10, 1100, 1101, 1110, 1111. Forget about what each codeword means for a second, we’re just going to look at the codewords themselves.

We can store the lengths as a list: 1, 2, 4, 4, 4, 4.

  • You could make another set of codewords with the same list of lengths. But for our purposes, as long as each value gets the same length of codeword, we don’t really care which of those codes we pick–the compressed content will be the same length.
  • Since we don’t really care how if the bits change, any code is fine. For simplicity, we pick a unique “standard” code. When we list the codewords, the standard one can be listed BOTH in order of length, AND in normal sorted order. That is, the those two orders are the same. The example code above is a standard code. Here’s one that isn’t: 1, 01, 00.
  • It turns out that if we have the lengths, we can generate a set of prefix-free codewords with those lengths. There’s an easy algorithm to generate the “standard” code from the list of lengths (see RFC 1951, it’s not very interesting)
  • Since we picked the standard codewords, we can switch back and forth between codewords and codeword lengths without losing any information.
  • It’s more compact to store the codeword lengths than the actual codewords. DEFLATE just stores codeword lengths everywhere (and uses the corresponding generated code).

Finally, we need to make them correspond to symbols, so we actually store

  • We store lengths for each symbol: A=4, B=1, C=4, D=4, E=2, F=4
  • We can get the correct codewords by going through the symbols in order, and grabbing the first available standard codeword: A=1100, B=0, C=1101, D=1110, E=10, F=1111.

Dynamic Huffman: Code Lengths

What’s a “code length”? It’s yet another hardcoded lookup table, which explains how to compress the dynamic huffman code tree itself. We’ll get to it in a second–the important thing about it for now is that there are 19 rows in the table. The binary column (not yet filled in) is what we’re about to decode.

BinaryCodeWhat it meansExtra bits
?0-15Code length 0-150
?16Copy the previous code length 3-6 times2
?17Copy “0” code length 3-10 times3
?18Copy “0” code length 11-138 times7
Code Lengths (static)
  • Byte 10: 101 11000. Number of literal/end-of-block/length codes (257-286). Read bits in forward order, 0b00011=3, plus 257 is 260 length/end-of-block/literal codes.
  • Byte 11: 01100 011. Number of distance codes (1-32). Read bits in forward order, 0b00110=6, plus 1 is 7 distance codes.
  • Byte 11-12: 01100 0111 0010010. Number of code length codes used (4-19). Read bits in forward order, 0b1110=14, plus 4 is 18.
  • Byte 12-18 1 001 001 010 000 000 000 000 000 000 000 000 001 000 000 000 100 000 001 1: There are 18 codes used (out of 19 available). For each code length code, we read a 3-bit number (in big-endian order) called the “code length code length”, and fill the end with 0s: 4, 4, 2, 0, 0, 0, 0, 0, 0, 0, 0, 4, 0, 0, 0, 1, 0, 4[, 0]
  • Next, we re-order the codes in the order 16, 17, 18, 0, 8, 7, 9, 6, 10, 5, 11, 4, 12, 3, 13, 2, 14, 1, 15. This re-order is just part of the spec, don’t ask why–it’s to save a small amount of space.
    The old order is: 16: 4, 17: 4, 18: 2, 0:0, 8:0, 7:0, 9:0, 6:0, 10:0, 5:0, 11:0, 4:4, 12:0, 3:0, 13:0, 2:1, 14:0, 1:4, 15:0
    The new order is: 0:0, 1:4, 2:1, 3:0, 4:4, 5:0, 6:0, 7:0, 8:0, 9:0, 10:0, 11:0, 12:0, 13:0, 14:0, 15:0, 16: 4, 17: 4, 18: 2
  • 0s indicate the row is not used (no codeword needed). Let’s re-write it without those.
    1:4, 2:1, 4:4, 16: 4, 17: 4, 18: 2
  • Now we assign a binary codewords of length N, to each length N in the list.
    1:1100,2:0,4:1101,16:1110,17:1111,18:10
  • Finally, let’s take a look at the whole table again.
BinaryCodeWhat it meansExtra bits
11001Code length 10
02Code length 20
11014Code length 40
111016Copy the previous code length 3-6 times2
111117Copy “0” code length 3-10 times3
1018Copy “0” code length 11-138 times7
Code Lengths
  • Great, we’ve parsed the code lengths table.

Dynamic Huffman: Parsing the Huffman tree

  • As a reminder, in bytes 10-12 we found there was a 260-row literal/end-of-block/length table and a 7-row distance table. Let’s read 267 numbers: the lengths of the codeword for each row.
  • Byte 18-19: 0000001 10 0110101. Copy “0” code length 11-138 times
    0b1010110=86, plus 11 is 97. Literals 0-96 are not present.
  • Byte 20: 1100 0101: Literal 1. Literal 97 (‘a’) has a codeword of length 1.
  • Byte 20: 1100 0 101: Literal 2. Number 98 (‘b’) has a codeword of length 2.
  • Byte 20-21: 11000 10 1111111 10. Copy “0” code length 11-138 times. 0b1111111=127, plus 11 is 138. Literals 99-236 are not present.
  • Byte 21-22: 111111 10 0001000 1. Copy “0” code length 11-138 times. 0b0001000=8, plus 11 is 19. Literals 237-255 are not present.
  • Bytes 22-23: 0001000 1101 11100. Literal 256 (end-of-block) has a codeword of length 4.
  • Byte 23-24: 101 1110 00 0111100. Copy previous code 3-6 times. 0b00=0, plus 3 is 3. “Literals” 257-259 (all lengths) have codewords of length 4.
  • We read 260 numbers, that’s the whole literal/end-of-block/length table. Assign the “standard” binary codewords based on the lengths to generate the following table:
Literal CodeCode LengthBinaryMeaningExtra bits
9710Literal ‘a’0
98210Literal ‘b’0
25641100End-of-block0
25741101Length 30
25841110Length 40
25941111Length 50
abaa dynamic literal/end-of-block/length Huffman codes
  • Now we read 7 more numbers in the same format: the 7-row distances table.
  • Byte 24: 0 0 111100. Distance 0 has a codeword of length 2.
  • Byte 24-25: 00 1111 000 0000100. Copy “0” code length 3-10 times. 0b000=0, plus 3 is 3. Distances 1-3 are not present.
  • Byte 25: 0 0 0 0 0100: Distances 4-6 have length 2.
  • We read 7 numbers, that’s the whole distances table. Assign the “standard” binary codewords to generate the following table:
CodeBitsBinaryMeaningExtra Bits
0200Distance 10
4201Distance 5-61
5210Distance 7-81
6211Distance 9-122
abaa dynamic literal/end-of-block/length Huffman codes

Dynamic Huffman: Data stream decoding

  • Now we’re ready to actually decode the data. Again, we’re reading a series of codes from the literal/end-of-block/length Huffman code table.
  • Byte 25: 00000 10 0: Literal ‘a’, ‘b’, ‘a’
  • Byte 26: 0 10 10 10 0: Literal ‘a’, ‘b’, ‘b’, ‘b’, ‘a’.
  • Byte 27: 1110 10 0 1. Length 4. Whenever we read a length, we read a distance. The distance is a range, 7-8. The extra bit we read is 0b0=0, plus 7 is Distance 7. So we look back 7 bytes and copy 4. The new output is: baabbbabaab
  • Byte 27-28: 1110100 1101 11 00 1: Length 3, Distance 9. We look back 9 bytes and copy 3. The new output is: abbabaababb
  • Byte 28-29: 1011100 1111 01 1 00. Length 5, Distance 6. We look back 6 bytes and copy 5. The new output is: aababbaabab
  • Byte 29: 111011 0 0. Literal ‘a’, ‘a’.
  • Byte 30: 0 1111010. Literal ‘a’.
  • Byte 30: 0 1111 01 0. Length 5, Distance 5. We look back 5 bytes and copy 5. The new output is: abaaaabaaa
  • Byte 31: 10 111000: Literal ‘b’
  • Byte 31: 10 1110 00: Length 4, Distance 1. We look back 1 byte and copy 4. The new output is: bbbbb
  • Byte 32: 0 0 110000: Literal ‘a’, ‘a’.
  • Byte 32: 00 1100 00: End-of block. Since this is the final block it’s also the end of the stream. This didn’t come up in the first example, but we zero-pad until the end of the byte when the block ends.
  • The final output is a b a a b b b a baab abb aabab a a a abaaa b bbbb a a (spaces added for clarity), which is exactly what we expected.

Encrypted root on debian part 2: unattended boot

I want my debian boot to work as follows:

  1. If it’s in my house, it can boot without my being there. To make that happen, I’ll put the root disk key on a USB stick, which I keep in the computer.
  2. If it’s not in my house, it needs a password to boot. This is the normal boot process.

As in part 1, this guide is debian-specific. To learn more about the Linux boot process, see part 1.

First, we need to prepare the USB stick. Use ‘dmesg’ and/or ‘lsblk’ to make a note of the USB stick’s path (/dev/sdae for me). I chose to write to a filesystem rather than a raw block device.

sudo mkfs.ext4 /dev/sdae # Make a filesystem directly on the device. No partition table.
sudo blkid /dev/sdae # Make a note of the filesystem UUID for later

Next, we’ll generate a key.

sudo mount /dev/sdae /mnt
sudo dd if=/dev/urandom of=/mnt/root-disk.key bs=1000 count=8

Add the key to your root so it can actually decrypt things. You’ll be prompted for your password:

sudo cryptsetup luksAddKey ROOT_DISK_DEVICE /mnt/root-disk.key

Make a script at /usr/local/sbin/unlockusbkey.sh

#!/bin/sh
USB_DEVICE=/dev/disk/by-uuid/a4b190b8-39d0-43cd-b3c9-7f13d807da48 # copy from blkid's output UUID=XXXX

if [ -b $USB_DEVICE ]; then
  # if device exists then output the keyfile from the usb key
  mkdir -p /usb
  mount $USB_DEVICE -t ext4 -o ro /usb
  cat /usb/root-disk.key
  umount /usb
  rmdir /usb
  echo "Loaded decryption key from USB key." >&2
else
  echo "FAILED to get USB key file ..." >&2
  /lib/cryptsetup/askpass "Enter passphrase"
fi

Mark the script as executable, and optionally test it.

chmod +x /usr/local/sbin/unlockusbkey.sh
sudo /usr/local/sbin/unlockusbkey.sh | cmp /mnt/root-disk.key

Edit /etc/crypttab to add the script.

root PARTLABEL=root_cipher none luks,keyscript=/usr/local/sbin/unlockusbkey.sh

Finally, re-generate your initramfs. I recommend either having a live USB or keeping a backup initramfs.

sudo update-initramfs -u

[1] This post is loosely based on a chain of tutorials based on each other, including this
[2] However, those collectively looked both out of date and like they were written without true understanding, and I wanted to clean up the mess. More definitive information was sourced from the actual cryptsetup documentation.

Migrating an existing debian installation to encrypted root

In this article, I migrate an existing debian 10 buster release, from an unencrypted root drive, to an encrypted root. I used a second hard drive because it’s safer–this is NOT an in-place migration guide. We will be encrypting / (root) only, not /boot. My computer uses UEFI. This guide is specific to debian–I happen to know these steps would be different on Arch Linux, for example. They probably work great on a different debian version, and might even work on something debian-based like Ubuntu.

In part 2, I add an optional extra where root decrypts using a special USB stick rather than a keyboard passphrase, for unattended boot.

Apologies if I forget any steps–I wrote this after I did the migration, and not during, so it’s not copy-paste.

Q: Why aren’t we encrypting /boot too?

  1. Encrypting /boot doesn’t add much security. Anyone can guess what’s on my /boot–it’s the same as on everyone debian distro. And encrypting /boot doesn’t prevent tampering–someone can easily replace my encrypted partition by an unencrypted one without my noticing. Something like Secure Boot would resist tampering, but still doesn’t require an encrypted /boot.
  2. I pull a special trick in part 2. Grub2’s has new built-in encryption support, which is what would allow encrypting /boot. But grub2 can’t handle keyfiles or keyscripts as of writing, which I use.

How boot works

For anyone that doesn’t know, here’s how a typical boot process works:

  1. Your computer has built-in firmware, which on my computer meets a standard called UEFI. On older computers this is called BIOS. The firmware is built-in, closed-source, and often specific to your computer. You can replace it with something open-source if you wish.
  2. The firmware has some settings for what order to boot hard disks, CD drives, and USB sticks in. The firmware tries each option in turn, failing and using the next if needed.
  3. At the beginning of each hard disk is a partition table, a VERY short info section containing information about what partitions are on the disk, and where they are. There are two partition table types: MBR (older) and GPT (newer). UEFI can only read GPT partition tables. The first thing the firmware does for each boot disk is read the partition table, to figure out which partitions are there.
  4. For UEFI, the firmware looks for an “EFI” partition on the boot disk–a special partition which contains bootloader executables. EFI always has a FAT filesystem on it. The firmware runs an EFI executable from the partition–which one is configured in the UEFI settings. In my setup there’s only one executable–the grub2 bootloader–so it runs that without special configuration.
  5. Grub2 starts. The first thing Grub2 does is… read the partition table(s) again. It finds the /boot partition, which contains grub.cfg, and reads grub.cfg. (There is a file in the efi partition right next to the executable, which tells grub where and how to find /boot/grub.cfg. This second file is confusingly also called grub.cfg, so let’s forget it exists, we don’t care about it).
  6. Grub2 invokes the Linux Kernel specified in grub.cfg, with the options specified in grub.cfg, including the an option to use a particular initramfs. Both the Linux kernel and the initramfs are also in /boot.
  7. Now the kernel starts, using the initramfs. initramfs is a tiny, compressed, read-only filesystem only used in the bootloading process. The initramfs’s only job is to find the real root filesystem and open it. grub2 is pretty smart/big, which means initramfs may not have anything left to do on your system before you added encryption. If you’re doing decryption, it happens here. This is also how Linux handles weird filesystems (ZFS, btrfs, squashfs), some network filesystems, or hardware the bootloader doesn’t know about. At the end of the process, we now have switched over to the REAL root filesystem.
  8. The kernel starts. We are now big boys who can take care of ourselves, and the bootloading process is over. The kernel always runs /bin/init from the filesystem, which on my system is a symlink to systemd. This does all the usual startup stuff (start any SSH server, print a bunch of messages to the console, show a graphical login, etc).

Setting up the encrypted disk

First off, I used TWO hard drives–this is not an in-place migration, and that way nothing is broken if you mess up. One disk was in my root, and stayed there the whole time. The other I connected via USB.

Here’s the output of gdisk -l on my original disk:

Number  Start (sector)    End (sector)  Size       Code  Name
   1            2048         1050623   512.0 MiB   EF00  # EFI, mounted at /boot/efi
   2         1050624       354803711   168.7 GiB   8300  # ext4, mounted at /
   3       354803712       488396799   63.7 GiB    8200  # swap

Here will be the final output of gdisk -l on the new disk:

Number  Start (sector)    End (sector)  Size       Code  Name
   1            2048          526335   256.0 MiB   EF00  efi # EFI, mounted at /boot/efi
   2         1050624       135268351   64.0 GiB    8200  swap # swap
   3       135268352       937703054   382.6 GiB   8300  root_cipher # ext4-on-LUKS. ext4 mounted at /
   4          526336         1050623   256.0 MiB   8300  boot # ext4, mounted at /boot
  1. Stop anything else running. We’re going to do a “live” copy from the running system, so at least stop doing anything else. Also most of the commands in this guide need root (sudo).
  2. Format the new disk. I used gdisk and you must select a gpt partition table. Basically I just made everything match the original. The one change I need is to add a /boot partition, so grub2 will be able to do the second stage. I also added partition labels with the c gdisk command to all partitions: boot, root_cipher, efi, and swap. I decided I’d like to be able to migrate to a larger disk later without updating a bunch of GUIDs, and filesystem or partition labels are a good method.
  3. Add encryption. I like filesystem-on-LUKS, but most other debian guides use filesystem-in-LVM-on-LUKS. You’ll enter your new disk password twice–once to make an encrypted partition, once to open the partition.
    cryptsetup luksFormat /dev/disk/by-partlabel/root_cipher
    cryptsetup open /dev/disk-by-partlabel/root_cipher root
  4. Make the filesystems. For my setup:
    mkfs.ext4 /dev/disk/by-partlabel/root
    mkfs.ext4 /dev/disk/by-partlabel/boot
    mkfs.vfat /dev/disk/by-partlabel/efi
  5. Mount all the new filesystems at /mnt. Make sure everything (cryptsetup included) uses EXACTLY the same mount paths (ex /dev/disk/by-partlabel/boot instead of /dev/sda1) as your final system will, because debian will examine your mounts to generate boot config files.
    mount /dev/disk/by-partlabel/root /mnt
    mkdir /mnt/boot && mount /dev/disk/by-partlabel/boot /mnt/boot
    mkdir /mnt/boot/efi && mount /dev/disk/by-partlabel/efi /mnt/boot/efi
    mkdir /mnt/dev && mount --bind /dev /mnt/dev # for chroot
    mkdir /mnt/sys && mount --bind /sys /mnt/sys
    mkdir /mnt/proc && mount --bind /dev /mnt/proc
  6. Copy everything over. I used rsync -axAX, but you can also use cp -ax. To learn what all these options are, read the man page. Make sure to keep the trailing slashes in the folder paths for rsync.
    rsync -xavHAX / /mnt/ --no-i-r --info=progress2
    rsync -xavHAX /boot/ /mnt/boot/
    rsync -xavHAX /boot/efi/ /mnt/boot/efi/
  7. Chroot in. You will now be “in” the new system using your existing kernel.
    chroot /mnt
  8. Edit /etc/crypttab. Add:
    root PARTLABEL=root_cipher none luks
  9. Edit /etc/fstab. Mine looks like this:
    /dev/mapper/root / ext4 errors=remount-ro 0 1
    PARTLABEL=boot /boot ext4 defaults,nofail 0 1
    PARTLABEL=efi /boot/efi vfat umask=0077,nofail
    PARTLABEL=swap none swap sw,nofail 0 0
    tmpfs /tmp tmpfs mode=1777,nosuid,nodev 0 0
  10. Edit /etc/default/grub. On debian you don’t need to edit GRUB_CMDLINE_LINUX.
    GRUB_DISABLE_LINUX_UUID=true
    GRUB_ENABLE_LINUX_PARTLABEL=true
  11. Run grub-install. This will install the bootloader to efi. I forget the options to run it with… sorry!
  12. Run update-grub (with no options). This will update /boot/grub.cfg so it knows how to find your new drive. You can verify the file by hand if you know how.
  13. Run update-initramfs (with no options). This will update the initramfs so it can decrypt your root drive.
  14. If there were any warnings or errors printed in the last three steps, something is wrong. Figure out what–it won’t boot otherwise. Especially make sure your /etc/fstab and /etc/crypttab exactly match what you’ve already used to mount filesystems.
  15. Exit the chroot. Make sure any changes are synced to disk (you can unmount everything under /mnt in reverse order to make sure if you want)
  16. Shut down your computer. Remove your root disk and boot from the new one. It should work now, asking for your password during boot.
  17. Once you boot successfully and verify everything mounted, you can remove the nofail from /etc/fstab if you want.
  18. (In my case, I also set up the swap partition after successful boot.) Edit: Oh, also don’t use unencrypted swap with encrypted root. That was dumb.

Making a hardware random number generator

If you want a really good source of random numbers, you should get a hardware generator. But there’s not a lot of great options out there, and most people looking into this get (understandably) paranoid about backdoors. But, there’s a nice trick: if you combine multiple random sources together with xor, it doesn’t matter if one is backdoored, as long as they aren’t all backdoored. There are some exceptions–if the backdoor is actively looking at the output, it can still break your system. But as long as you’re just generating some random pads, instead of making a kernel entropy pool, you’re fine with this trick.

So! We just need a bunch of sources of randomness. Here’s the options I’ve tried:

  • /dev/urandom (40,000KB/s) – this is nearly a pseudo-random number generator, so it’s not that good. But it’s good to throw in just in case. [Learn about /dev/random vs /dev/urandom if you haven’t. Then unlearn it again.]
  • random-stream (1,000 KB/s), an implementation of the merenne twister pseudo-random-number generator. A worse version of /dev/urandom, use that unless you don’t trust the Linux kernel for some reason.
  • infnoise (20-23 KB/s), a USB hardware random number generator. Optionally whitens using keccak. Mine is unfortunately broken (probably?) and outputs “USB read error” after a while
  • OneRNG (55 KiB/s), a USB hardware random number generator. I use a custom script which outputs raw data instead of the provided scripts (although they look totally innocuous, do recommend
  • /dev/hwrng (123 KB/s), which accesses the hardware random number generator built into the raspberry pi. this device is provided by the raspbian package rng-tools. I learned about this option here
  • rdrand-gen (5,800 KB/s), a command-line tool to output random numbers from the Intel hardware generator instruction, RDRAND.

At the end, you can use my xor program to combine the streams/files. Make sure to use limit the output size if using files–by default it does not stop outputting data until EVERY file ends. The speed of the combined stream is at most going to be the slowest component (plus a little slowdown to xor everything). Here’s my final command line:

#!/bin/bash
# Fill up the folder with 1 GB one-time pads. Requires 'rng-tools' and a raspberry pi. Run as sudo to access /dev/hwrng.
while true; do
  sh onerng.sh | dd bs=1K count=1000000 of=tmp-onerng.pad 2>/dev/null
  infnoise --raw | dd bs=1K count=1000000 of=tmp-infnoise.pad 2>/dev/null
  xor tmp-onerng.pad tmp-infnoise.pad /dev/urandom /dev/hwrng | dd bs=1K count=1000000 of=/home/pi/pads/1GB-`\date +%Y-%m-%d-%H%M%S`.pad 2>/dev/null;
done

Great, now you have a good one-time-pad and can join ok-mixnet 🙂

P.S. If you really know what you’re doing and like shooting yourself in the foot, you could try combining and whitening entropy sources with a randomness sponge like keccak instead.