You can test with evtest. Pick the XBox controller. If it shows up and shows events when you press buttons, that's good. Especially test holding left and right at the same time -- you should see two "1" events. There's a bug in most USB adapters, because most controllers don't let you hold dpad left and dpad right at the same time. You want to make sure both work at the same time for DDR.
Assuming that works fine, you can play now! Let's add it to systemd. Make these two files as root in any text editor.
# /etc/systemd/system/xboxdrv-dancepad.service
[Unit]
Description=Xbox controller driver for dance pad

[Service]
Type=simple
ExecStart=/usr/bin/xboxdrv --detach-kernel-driver --dpad-as-button
Restart=on-failure

[Install]
WantedBy=multi-user.target
And then you need to restart or run:
sudo systemctl daemon-reload
sudo udevadm control --reload-rules
It should work now. If you have the EXACT same pad and it doesn't, drop me a comment/email and I'll try to help.
Some failed attempts:
The raphnet controller sold on DDRPad.com doesn't add anything -- it shows up as XBox. I didn't actually re-check after the above, but you shouldn't need to order it.
The Wingman FGC retro (ZPP006M) didn't work. Nothing showed up.
The very cheap Amazon controllers (mine was sold as "Xahpower" but the hardware presents as SHANWAN). They work, but they can't do left+right together.
I even tried a kernel patch, which does seem like it works, but not on this pad (not that it's needed).
When you click an email address, it automatically opens in your email client. But I don’t have an email client, I use webmail. I wrote a custom handler for Linux.
First write a program to open mailto links. Mailto links look like “mailto:me@mail.com” or maybe even “mailto:me@mail.com?subject=mysubject&body=mybody“. Test it by hand on a few links. Mine (mailto-opener) composes a new message using my webmail.
Next, write a desktop file for the opener. Here’s one:
#/usr/local/share/applications/mailto-opener.desktop
[Desktop Entry]
Type=Application
Name=mailto: link opener (github.com/za3k/short-programs)

# The executable of the application, possibly with arguments.
Exec=/home/zachary/.projects/short-programs/mailto-opener %u
Note the %u in the Exec= line. That’s required.
Now update your system mimetype database. On my Arch Linux install, I run
Finally, restart your browser. Really. Firefox and Chromium/Chrome both cache mimetype openers.
A related opener I added recently was for magnet links, such as are popularly used for bittorrent.
~ $ cat /usr/local/share/applications/transmission-remote.desktop
[Desktop Entry]
Type=Application
Name=transmission-remote magnet link opener
Exec=transmission-remote <TRANSMISSION INSTANCE> -a
transmission-remote is the name of a command-line Linux program. It connects to an instance of Tranmission (a popular torrent client) running on another machine.
Hello, Linux terminal users! Let me present you a simple feature you’ve all seen, but might not have noticed.
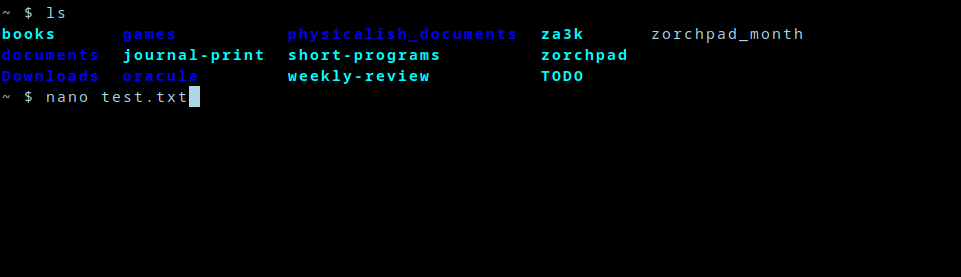
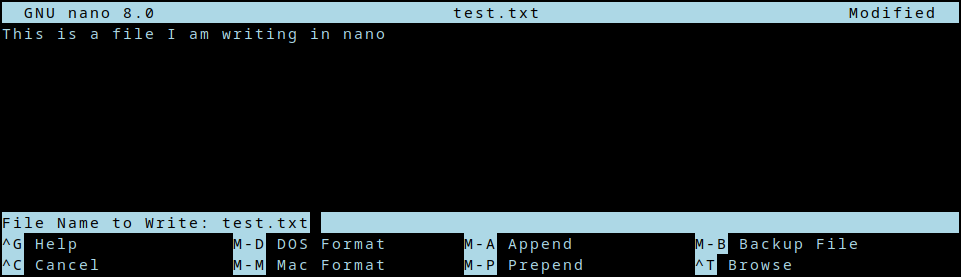
You’re on the terminal, and you open a text editor of chice–nano, vim, emacs, acme etc.
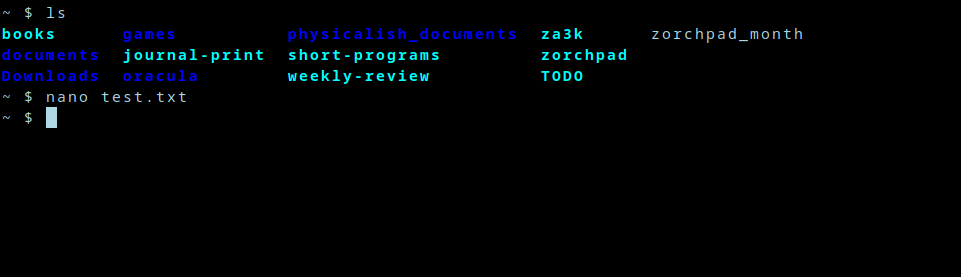
After you edit for a bit, you close the editor.
Now you’re back where you left off. My question is, how? How does nano remember what used to be on screen? How does it get restored? Is nano doing this, or bash?
Well, I took at look at the source code to nano. Then I thought, “whoa! that’s way too complicated.” So I found a much simpler project called ted someone made to educate themselves. That was also a little complicated, but both seemed to use ncurses. So I wrote the following simple program, which also displays something and then restores the screen. Even though it’s very simple, it still works.
Aha, so it’s something in ncurses, maybe. Let’s dive deeper.
So initscr() presumably saves the state in some fashion. endwin() definitely restores it, because if we comment that out, the terminal stops being restored. Since initscr() probably does lots of other irrelevant logic, we could take a look at endwin() to dive in. But let’s do something even simpler first.
As background, the linux command line is pretending to be an obsolete piece of hardware called a terminal. Specifically, it’s pretending to be a model called the DEC VT100 (or a later one, but they’re mostly backwards compatible). The terminal accepted text over a wire, and printed it to the screen.
When it got special text, it would do special things. These are captured today as “escape codes”–special non-printable characters, which cause your software terminal to also do special things. What kind of special things? Well one example escape code is “Backspace”, which deletes the last character. Another code is “\r\n” (carriage return; new line), which goes to the beginning of the line, and down one.
I suspect the answer to what’s happening with save and restore of my terminal might be some magic escape codes. So let’s just redirect the output to a file, and see what data is being center over the virtual wire to our virtual terminal.
Well, that’s certainly a bunch of magic. Now something cool happens:
$ cat magic.txt
This command does nothing visible. It doesn’t print “Hello world”, even though that’s in the file. In other words, it’s printing Hello world, then really quick resetting the terminal. Just too fast for my poor human eyes to see.
We’ve confirmed the escape code theory! This file has everything we need. We can look at the source code to ncurses if we’re curious, but we don’t need to (and I won’t).
One thing I immediately see in this file, is that it doesn’t seem to contain the words that were on screen. So it’s not that the program read what was on screen, and printed it back later. Rather, there are some magic escape sequences happening to save and restore the terminal.
Okay, so somewhere in those 70 bytes is a magic code or two we want. Let’s examine all the bytes.
What kinds of escape codes appear here? Hex 0x1b is ESC, basically the escape sequence–it cues the terminal in that a special escape code is coming. 0x1b9b ( ESC followed by [) is the CSI escape code. DEC private codes refer to other escape sequences used by the DEC terminals like the VT00 (I’ll just shorten this to “DEC” below).
Without further ado, let’s break down those 70 bytes. Apologies for any errors below–correct me in the comments.
Set second character set to “DEC Special Character and Line Drawing Set” [xterm DEC guide]
0x1b9b ?1049h
Save cursor as in DECSC and use Alternate Screen Buffer, clearing it first. [xterm CSI guide]
0x1b9b 1;49r
DECSTBM: Set scrolling region to rows 1-49 [xterm CSI guide]
(When I ran the program, my terminal was 49 lines tall inside tmux–so the whole terminal in other words.)
0x1b9b m
(Empty) color and style set comand [ANSI/CSI]
I think this could be left out entirely.
OK, solved. The magic save bytes are 1b 9b 3f 31 30 34 39 68 (<ESC> [?1049h). The magic restore bytes are 1b 9b 3f 31 30 34 39 6c (<ESC> [?1049l). And xterm or tmux is doing the save/restore magic, based on seeing this escape mode.
Hmm, how minimal can we get a working file, I wonder?
#!/bin/sh
echo -ne '\x1b[?1049h' # Save terminal
echo -ne '\x1b[H'      # Home the cursor
echo "Hello world"
sleep 1
echo -ne '\x1b[?1049l' # Restore terminal
It’s november, and I’ve decided this month that I’m going to do 30 projects in 30 days. It’s an all-month hack-a-thon!
Today’s project is Hack-A-Farm (demo, source). It’s a simple tile-based RPG. You can walk around as a chicken, admire your house, and plant and harvest two types of crops.
My main goal with this project was to work with spritesheets or animation before, which I had never done. Showing off the individual tiles is deliberate. Also, the game should respond well to smaller and larger screens, I hope.
I had a good time with this one, and I’m happy with how much I got done in a day. I originally planned to do more fluid walking (it was called Hack-A-Walk), but it was more fun to add crops instead.
I re-used some of the logic from Hack-A-Minigame and Hack-A-Snake. I’ve been finding d3 to be mildly useful, if a little annoying.
I recently wrote a program that records all tty activity. That means bash sessions, ssh, raw tty access, screen and tmux sessions, the lot. I used script. The latest version of my software can be found on github.
Note that it’s been tested only with bash so far, and there’s no encryption built in.
To just record all shell commands typed, use the standard eternal history tricks (bash).
One of the more useful things I did was to start logging all my technical problems. Whenever I hit a problem, I write an entry in problem-log.txt. Here’s an example
2022-08-02
Q: Why isn't the printer working? [ SOLVED ]
A: sudo cupsenable HL-2270DW

// This isn't in the problem log, but the issue is that CUPS will silently disable the printer if it thinks there's an issue. This can happen if you pull a USB cord mid-print.
I write the date, the question, and the answer. Later, when I have a tough or annoying problem, I try to grep problem-log.txt. I’ll add a note if I solve a problem using the log, too.
This was an interesting project to look at 5 years later. I didn’t see benefits until 1-2 years later. It does not help me think through a problem. It’s hard to remember to do. But, over time it’s built up and become invaluable to me. I hit a tricky problem, and I can’t immediately find an answer on the web. I find out it’s in problem-log.txt. And, someone’s written it exactly with my hardware (and sometimes even my folder names) correctly in there. Cool!
Here’s another example:
2018-10-21
Q: How do I connect to the small yellow router?
I scan each and every piece of paper that passes through my hands. All my old to-do lists, bills people send me in the mail, the manual for my microwave, everything. I have a lot of scans.
scan-organizer is a tool I wrote to help me neatly organize and label everything, and make it searchable. It’s designed for going through a huge backlog by hand over the course of weeks, and then dumping a new set of raw scans in whenever afterwards. I have a specific processing pipeline discussed below. However if you have even a little programming skill, I’ve designed this to be modified to suit your own workflow.
Input and output
The input is some raw scans. They could be handwritten notes, printed computer documents, photos, or whatever.
The final product is that for each file like ticket.jpg, we end up with ticket.txt. This has metadata about the file (tags, category, notes) and a transcription of any text in the image, to make it searchable with grep & co.
---
category: movie tickets
filename: seven psychopaths ticket.jpg
tags:
- cleaned
- categorized
- named
- hand_transcribe
- transcribed
- verified
---
Rialto Cinemas Elmwood
SEVEN PSYCHOPAT
R
Sun Oct 28 1
7:15 PM
Adult $10.50
00504-3102812185308

Rialto Cinemas Gift Cards
Perfect For Movie Lovers!
Here are some screenshots of the process. Apologizies if they’re a little big! I just took actual screenshots.
At any point I can exit the program, and all progress is saved. I have 6000 photos in the backlog–this isn’t going to be a one-session thing for me! Also, everything has keyboard shortcuts, which I prefer.
Phase 1: Rotating and Cropping
First, I clean up the images. Crop them, rotate them if they’re not facing the right way. I can rotate images with keyboard shortcuts, although there are also buttons at the bottom. Once I’m done, I press a button, and scan-organizer advanced to the next un-cleaned photo.
Phase 2: Sorting into folders
Next, I sort things into folders, or “categories”. As I browse folders, I can preview what’s already in that folder.
Phase 3: Renaming Images
Renaming images comes next. For convenience, I can browse existing images in the folder, to help name everything in a standard way.
Phase 4: Tagging images
I tag my images with the type of text. They might be handwritten. Or they might be printed computer documents. You can imagine extending the process with other types of tagging for your use case.
Not yet done: OCR
Printed documents are run through OCR. This isn’t actually done yet, but it will be easy to plug in. I will probably use tesseract.
Phase 5: Transcribing by hand
I write up all my handwritten documents. I have not found any useful handwriting recognition software. I just do it all by hand.
The point of scan-organizer is to filter based on tags. So only images I’ve marked as needing hand transcription are shown in this phase.
Phase 6: Verification
At the end of the whole process, I verify that each image looks good, and is correctly tagged and transcribed.
One of my archiving and backup contingencies is taking one screenshot per minute. You can also use this to get a good idea of how you spend your day, by turning it into a movie. Although with a tiling window manager like I use, it’s a headache to watch.
I send the screenshots over to another machine for storage, so they’re not cluttering my laptop. It uses up 10-20GB per year.
I’ll go over my exact setup below in case anyone is interested in doing the same:
Prints everything to stderr if you run it manually
Makes a per-day directory. We store everything in /var/screenlog/2022-07-10/ for the day
Takes a screenshot. By default, crontab doesn’t have X Windows (graphics) access. To allow it, the XAuthority file which allows access needs to be somewhere my crontab can reliably access. I picked /tmp/XAuthority. It doesn’t need any unusual permissions, but the default location has some random characters in it.
GPG-encrypts the screenshot with a public key and deletes the original. This is extra protection in case my backups somehow get shared, so I don’t literally leak all my habits, passwords, etc. I just use my standard key so I don’t lose it. It’s public-key crypto, so put the public key on your laptop. Put the private key on neither, one, or both, depending on which you want to be able to read the photos.
If it’s in my house, it can boot without my being there. To make that happen, I’ll put the root disk key on a USB stick, which I keep in the computer.
If it’s not in my house, it needs a password to boot. This is the normal boot process.
As in part 1, this guide is debian-specific. To learn more about the Linux boot process, see part 1.
First, we need to prepare the USB stick. Use ‘dmesg’ and/or ‘lsblk’ to make a note of the USB stick’s path (/dev/sdae for me). I chose to write to a filesystem rather than a raw block device.
sudo mkfs.ext4 /dev/sdae # Make a filesystem directly on the device. No partition table.
sudo blkid /dev/sdae # Make a note of the filesystem UUID for later
Next, we’ll generate a key.
sudo mount /dev/sdae /mnt
sudo dd if=/dev/urandom of=/mnt/root-disk.key bs=1000 count=8
Add the key to your root so it can actually decrypt things. You’ll be prompted for your password:
#!/bin/sh
USB_DEVICE=/dev/disk/by-uuid/a4b190b8-39d0-43cd-b3c9-7f13d807da48 # copy from blkid's output UUID=XXXX

if [ -b $USB_DEVICE ]; then
  # if device exists then output the keyfile from the usb key
  mkdir -p /usb
  mount $USB_DEVICE -t ext4 -o ro /usb
  cat /usb/root-disk.key
  umount /usb
  rmdir /usb
  echo "Loaded decryption key from USB key." >&2
else
  echo "FAILED to get USB key file ..." >&2
  /lib/cryptsetup/askpass "Enter passphrase"
fi
Mark the script as executable, and optionally test it.
Finally, re-generate your initramfs. I recommend either having a live USB or keeping a backup initramfs.
sudo update-initramfs -u
[1] This post is loosely based on a chain of tutorials based on each other, including this
[2] However, those collectively looked both out of date and like they were written without true understanding, and I wanted to clean up the mess. More definitive information was sourced from the actual cryptsetup documentation.


