It’s november, and I’ve decided this month that I’m going to do 30 projects in 30 days. It’s an all-month hack-a-thon!
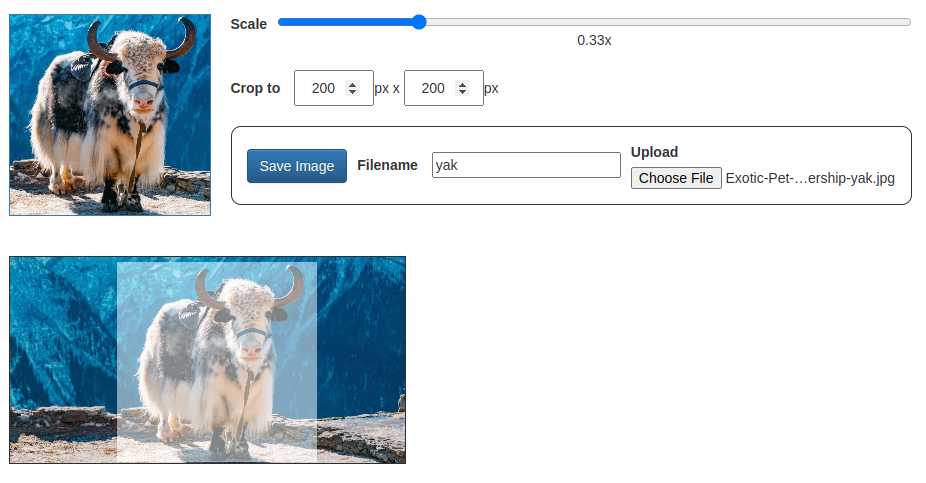
Today’s project is Hack-A-Crop (demo, source). It crops an image to a fixed size.
I got help from several people on the CSS, thanks to instantly sharing my work via ngrok from my laptop. Thanks people! Thanks ngrok!
Today’s project was in anticipation of showing off what I did at the end of the month. I want a small thumbnail for each project.