As previously mentioned, I have switched off wordpress. Hopefully, you can't tell. It's meant to be behind-the-scenes.
The only change should be the new comment system. Feel free to try it out by commenting below. You could be the very first commenter!
The rest of this post is for anyone curious why and how, which I skipped last time.
If all is well, my blog looks exactly the same. All links should continue to work. The RSS feed should keep working. Basically it should be a behind-the-scenes change.
Why make this change, and why make it now?
- I read the glorious IRCPuzzles writeup by Amal Murali, which is gorgeously presented. I wanted that!
- I want to edit markdown locally, not use the Wordpress editor, which is getting increasingly bloated.
- My server (a VPS) has previously been hacked due to an insecure wordpress installation. Hopefully it can't happen again due to some security changes I made, but that's always a danger. Static sites have almost no security problems.
- Static site generators are just nice.
- After some discussion with folks on IRC, I realized I could do the migration easier than I thought. (I didn't do it the easy way, but I could have.)
Why not make the change?
- It's a lot of work. Not doing things is easier than doing them. Specifically, I have about 200 posts here, so migrating would be a lot of work. Starting a new blog is a valid avenue I didn't take either.
- Really, seriously, it's a lot of work.
- Comments are hard to deal with on a static site generator. You can not have them (but I like comments), you can have someone else like disqus host them (which is icky), or you can host them yourself (which leaves security problems). In addition, most static-site comment systems require javascript, which is sort of a shame.
- It's pretty hard to check whether you've done it right. Reviewing 200 posts is no joke. If you want a computer to check, you'd need the before and after to match exactly, which may not be quite the right goal -- an exact match is only a reasonable goal is it was perfect before.
Nonetheless, I forged on and decided to change. It was probably not worth the work, but since I put in the work, I'll at least share what I did.
Let's talk about how, rather than why, for the rest of the post. This took the better part of a month.
I thought about what I wanted to use. There were a few good options -- Jekyll and Hugo both came recommended, and I've used Jekyll before. They both use a format called frontmatter. Below is an example of a frontmatter document. The top is YAML and the bottom is HTML.
---
type: blog post
title: The worst types of pizza
---
<ol>
<li> Ham and Pineapple
<li> Anchovy
<li> Reheated in the microwave
</ol>
Basically, frontmatter consists of a "front" metadata section, in YAML or TOML or JSON, all of which are different ways of representing metadata. Metadata for a blog post includes things like the title of the blog post, when it was published and updated, and the author. And then below that, is a main content section in HTML or markdown. For a blog post, the main section is the text of the blog post.
I wasn't sure what engine I wanted to use, but I decided to use frontmatter. The content would just be the HTML, verbatim and unchanged from my existing blog. That way, everything would display right. I could write new posts in a new format. Old posts would be ugly behind the scenes, but it work, and I wouldn't have to migrate 200 posts.
I also really, really, didn't want to break the blog. I hate people who break a website changing things halfway. My work would only see the light of day once it was ready to wholly replace my existing blog. All the old links would work perfectly, even if I had to hand-code 200 redirects.
First, I wanted to have my existing posts in some format. Wordpress stores everything in a database. There are a couple options to get them out: - We could do a database dump. (This is very ugly. Don't do it.) - You can export them as an XML file. This is probably the best option. - You can download your website as HTML by crawling it. This is what I did, because I wanted to be sure I could have a blog that looked the same as my current one, and it seemed pretty foolproof.
So I had a big directory full of HTML blog posts, images, comments, etc. Next, I wrote an extractor. It looked at each file corresponding to a post, and grabbed the <article> element with the content of the post, together with any comments. It also extracted some relevant info like the author, publication date, title, and so on. It put them all together into a file. Now I had something that Jekyll and Hugo could use.
I took a look at Hugo. Wow, was it big. It supported YAML, TOML, JSON, HTML, Markdown. It had an asset pipeline. It had three different module systems to extend it. It did overlay filesystem mounts. Templating in Golang's templates. I slowly backed away.
I took a look at Jekyll--small, very opinioned. I generally like that in software. But, absolutely no customization. You had to put everything in a folder called _posts, and the publication date had to be the first part of the name. YAML only for the top. Etc. It seemd good, but I wasn't quite feeling it.
I decided I would roll my own. This was a small project. I only wanted a very limited set of functionality.
I wrote a template. It was an HTML page with a hole in it. You put the blog article HTML in the hole, and you got a finished HTML document. Looked fine. I used mustache from the templating, because I remembered liking it in the past. I got a blog showing. It looked great. It loaded lots of files (like icons images and styling) from the live site, rather than having a local copy. Most of the links went to the live site too.
I converted all the links. I wrote a checker to search for dead links. I decided to generate a page for each tag, since those would change over time. I noticed the tag pages and the post pages had most of the layout in common, so I factored that out. I discovered my python mustache library didn't do "factoring out", and only the javascript library did. I realized I had never liked mustache--I had been thinking of handlebars or spacebars. I decided to put it off--switching templating engines was easy, but it's better not to switch horses mid-stream. I factored out the tag cloud. I got the number of dead links down to just the page of links by one author and the RSS feed. I generated those too. I started generating more of the blog post--the title and author and comments section, too. The HTML shrunk. I had a working version.
I started feeling super disheartened. This was a giant mess. I just wasn't feeling motivated. I took a step back. Was it the work? No, I decided. It was that I didn't want to put in a ton of work, to get a system I wasn't all that happy with. Wordpress was already okay. It wasn't perfect, but it was alright. If I was going to put in work, I wanted the new system to be better. I wanted... I think I wanted to convert the old HTML posts to markdown?
Hoo boy. That was going to be a lot of work.
I took a look around. A year ago (the last time I saw a gorgeous Amal Murali blog post), I had tried a wordpress conversion. I had tried wordpress-export-to-markdown, but I had remembered not liking the output that much. Things had been missing. They hadn't looked right. But it done 80% of things correctly. I checked what it used. Hmm, turndown. A javascript tool to convert HTML to markdown. Sounded promising.
I converted everything to markdown. I took at look at the output. Seemed... reasonable. I'd have to take a look before I decided anything past that. So I needed a tool to convert markdown back to HTML. I was using Python, so I picked markdown2 -- the markdown (1?) page seemed pretty.. theoretical. User comfort seemed like maybe a fourth priority. It hadn't been updated in a few years. markdown2 seemed to care about speed and user comfort. It had lots of plugins. It had been updated last week, though it looked like they hadn't done anything major in a couple years. I gave it a try.
I took HTML, converted it to markdown, converted it back to HTML, and looked at the result. It was... eh. It had some of the same content, but it didn't look quite right. I looked at the HTML. Oh, I had forgotten to wrap it in an <article> tag with all those special wordpress classes. I gave it another try. WOW! That looked almost identical. I made a webpage to look at them side-by-side.
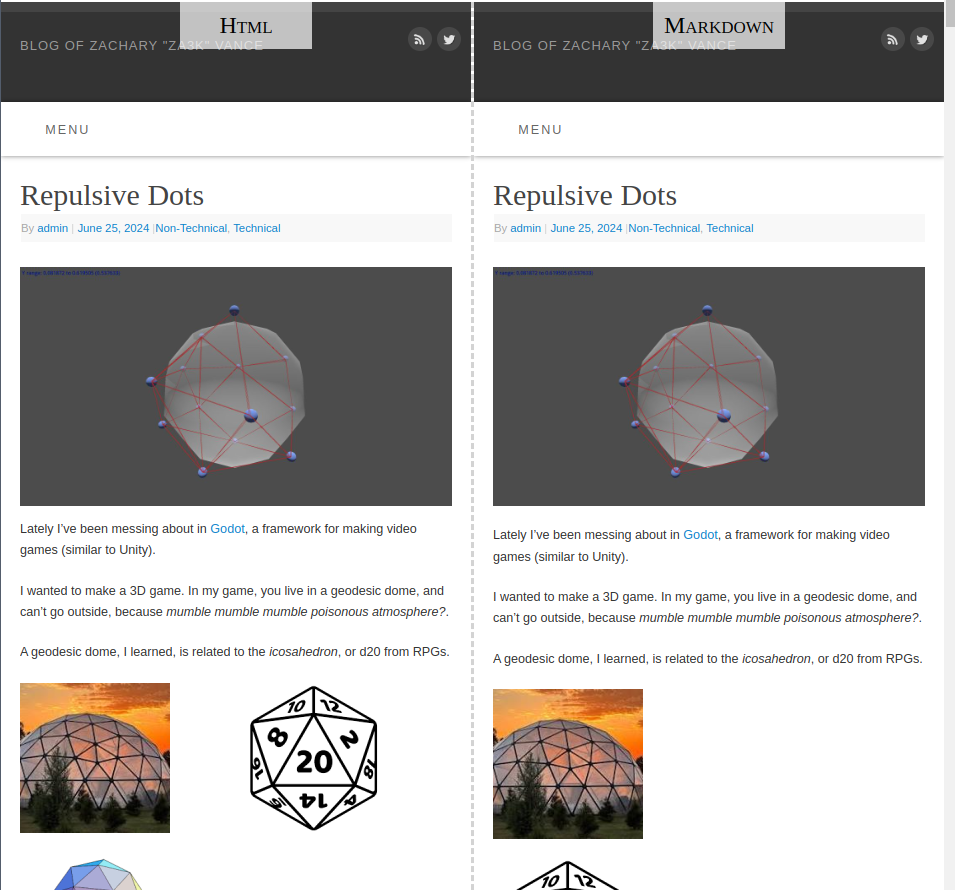
Okay, I could do this. There was going to be a list of problems, but I could get through them one by one.
I started looking at articles. Okay, this was missing a class. Galleries were just a series of images now. iframes were being dropped. This was all stuff I could fix. Some of it would be problems converting HTML to markdown. Cases of stripping vital information was especially problematic, because I couldn't fix it later.
Some problems happened when converting markdown to HTML--code blocks inside lists disappeared and became regular text. I started looking into fixes. I was annoyed how hard it was to extend Turndown. I considered writing my own HTML to markdown converter. That was the easy direction--anyone can parse HTML, there are libraries for it. Outputting is easy in any language. Wait, I thought. Turndown would disappear in the final version. Once I had converted the old HTML, that was it. How many problems were there, really? If it was just a few articles, I should fix it by hand instead. That would be easier. I decided I'd wait until I had a better overview.
Other problems happened when converting markdown back to HTML. Parsing markdown would be a nightmare, so I crossed my fingers and prayed I wouldn't have to. I hoped markdown2 was easy to extend. I started thinking with distaste about if I would have to... rewrite the HTML output shudder. I put things off--disappearing information was more important.
I decided to take stock. How would I tell if I was making progress? What if fixing one thing broke another? I had some kind of visual diff tool in mind. If the HTML and markdown versions looked the same, that was good enough for me. But would they? I don't care about little changes. One font slightly different, a section a few pixels to the left. I was worried I would compare the before and after, and none of them would match. I don't know how to tell a computer to ignore that stuff. Oh well, I'd check. Maybe it would work.
I ran a first check using puppeteer to take Chrome screenshots. 24% of posts were identical, right out the gate. That was more than 0%. That meant that yes, this method would actually let me make a TODO list. 0% would have been bad. OK. I started opening up articles. Yes, they actually looked different. It wasn't a few pixels. Every page I opened, seemed to have genuine differences I wanted to fix.
I started fixing the problems. Some big problems got fixed. Smaller ones started cropping up. The first one I found was these. They were comparing different. Was that right?
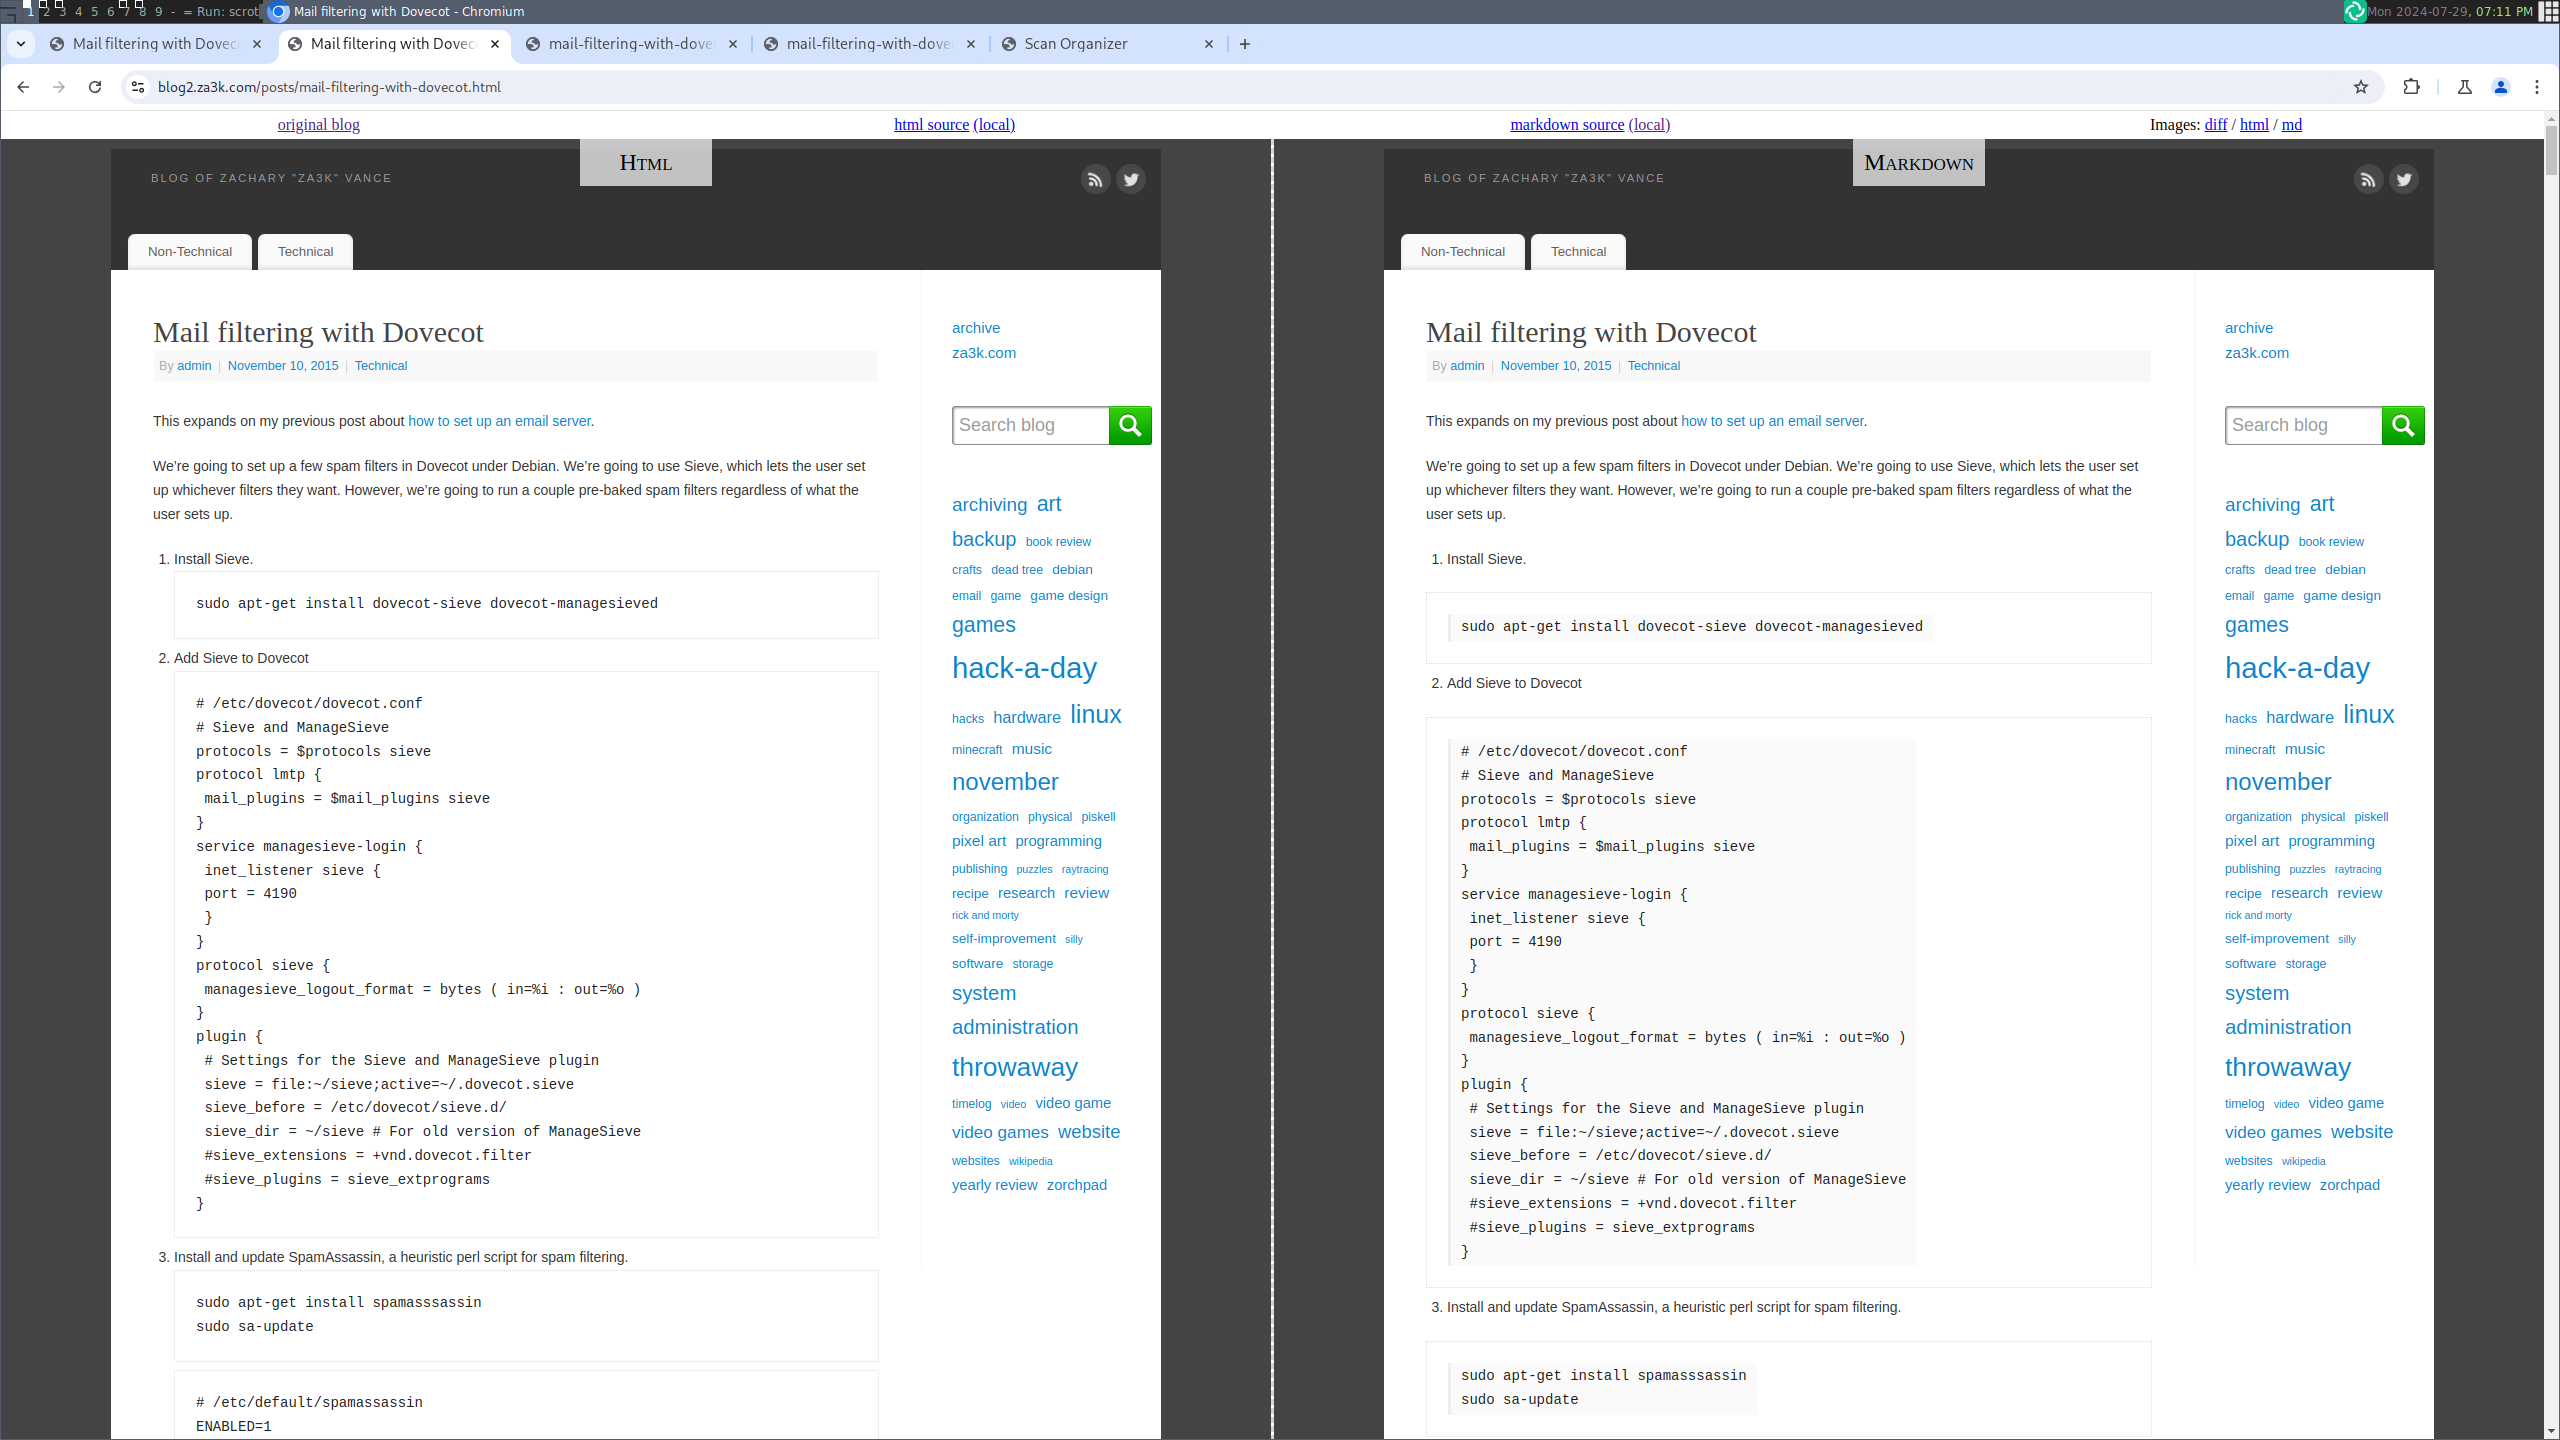
I stared. I saw nothing. I visually showed the difference. The fonts were highlighted in red. Was it a font issue? I looked at the HTML. Oh, one gray was 10% lighter. Should I fix it? No wait, I didn't want things to be pixel-perfect identical. That was just a tool to measure how close I was to done, let's not lose track of the actual goal. Hmm.
I was starting to feel burnt-out. I wasn't sure where to go next. I talked to friends. I ended up using a heuristic to rank the pages from most to least similar. I'd tackle the big problems. As it happened, some contractors were jackhammering my basement for a few hours, so I had time to kill where I couldn't focus anyway. I opened all ~100 blog posts in chromium, and make little notes about each problem before I closed the tab. If I would be fine not fixing a problem, I didn't write it down. If I saw the same problem twice, I'd add a little + mark next to it. At the end, I had some problems with a lot of + marks next to them. Those were the ones I'd tackle first. Maybe more importantly, I had a good idea of the total amount of work. It was maybe 10 or 20 things to fix, even if I was very fussy. I was okay with that. I could do it.
I went in and started fixing. I found out that Turndown was pretty unmaintained, just like I suspected. I made about 5 PRs--none had any response, so I used a local fork. pyhon-markdown2 usually worked. Every time I thought I found a bug, it was my fault--I hadn't understood something about the nuances of markdown. In one case a bug was real but already fixed in a newer version.
After fixing a dozen problems, I was done. I took a look through the articles again. Most of them looked fine now. I generated the markdown one more time, and then hand-fixed 5-10 articles with problems. I filed fixed articles into a "finished" folder, so they wouldn't be overwritten if I changed my mind and did an automated rebuild.
It was done. I looked, and looked again. Then I deleted all the HTML sources. The side-by-side view. The visual comparison tools. The side-by-side view. The dead link checker. The crawler that extracted the original HTML. I was left with a single tool--it took markdown, and generated a blog. It was tiny again. I rejoiced, and took a well-needed break.
At this point, I had a working blog. Posts were YAML frontmatter, and markdown content. I could write new posts easily in markdown, and all my old posts were in markdown too. I was pretty happy.
I had two more big tasks. One, which I'm punting indefinitely, is to re-style the blog. My current approach is to just have a copy of the old wordpress CSS in one file. It's 7,838 lines long, which is too long. I could reduce it, but it's probably equally reasonable to just make an entirely new stylesheet from scratch. I'm not sure whether old articles will keep the old stylesheet. Probably yes, just to avoid breaking anything. That is... not urgent. I'll do it sometime.
The other part, which I did care about, was to get comments working again. I looked around at a few static site commenting options, and settled on Isso. The user-friendly front page encouraged me. It didn't require registration, it had email moderation where you click a link to approve a comment, comments could use markdown, there was no database setup. And it supported wordpress comment import (although I didn't do this actually).
Great! Now how to install? Oh... the debian package is discontinued? Okay, it was actually a bit of work.
I started by installing isso.
mkdir /var/www/isso /var/log/isso /var/isso

cd /var/www/isso
python3 -m venv .
source bin/activate
pip install isso gevent
sudo ln -s /var/www/isso/bin/isso /bin/isso

chown -R isso:isso /var/www/isso /var/log/isso /var/isso
I added a config file (/etc/isso.cfg)
[general]
dbpath = /var/isso/comments.db
host = https://blog.za3k.com
notify = smtp
log-file = /var/log/isso/isso.log

[moderation]
enabled = true
purge-after = 10000d

[server]
listen = http://localhost:9007
public-endpoint = https://blog.za3k.com/comments

[smtp]
host = smtp.za3k.com
to = za3k@za3k.com
from = isso@blog.za3k.com
username = za3k@za3k.com
password = hunter1

[hash]
salt = <anything non-default>
I didn't bother with RSS -- no one reads an RSS feed of comments, and they get included in the RSS feed of posts.
I ran isso by hand:
sudo -u isso /bin/isso &
tail -f /var/log/isso
Added an nginx frontend proxy:
# Run as isso.service
upstream isso {
    server 127.0.0.1:9007;
}

server {
    listen [::]:443 ssl;
    server_name blog.za3k.com;

    [... rest of blog.za3k.com ... ]

    # comments
    location = /comments {
        return 302 /comments/;
    }
    location = /comments/ {
        proxy_pass http://isso/;
    }
    location /comments/ {
        proxy_pass http://isso/;
    }
}
Added some code to the static generation:
<script src="https://blog.za3k.com/comments/js/embed.min.js"></script>

<section id="isso-thread">
    <noscript>Javascript needs to be activated to view comments.</noscript>
</section>
And debugged a few errors here and there. Then I added a systemd unit, which I enabled and started:
[Unit]
Description=isso commenting system

[Service]
ExecStart=/bin/isso

Restart=on-failure
TimeoutSec=1
User=isso

[Install]
WantedBy=multi-user.target
Yay! Comments are working again. And with that, my conversion is complete.

