The Zorchpad needs a custom keyboard. Its power budget is only 1mW, and there’s just nothing available in that range. So, I need to make a custom keyboard. I started reading up on how to make your own–especially the electronics.
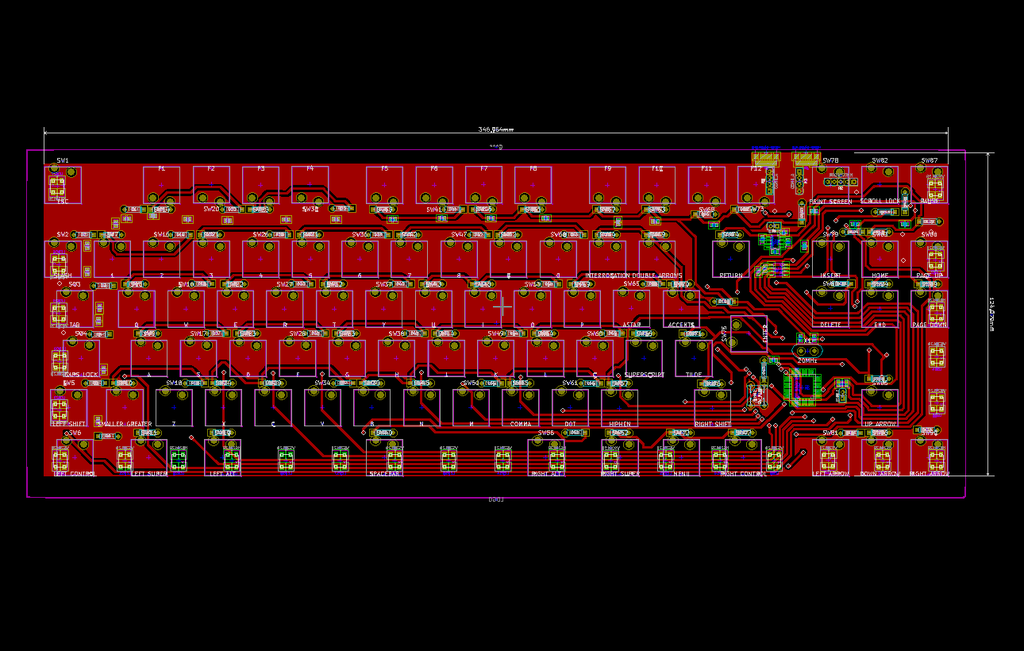
I don’t know how to make a PCB:
PCB from HacKeyboard
Or how to attach headers to the inside of an existing keyboard, which looks like this–:
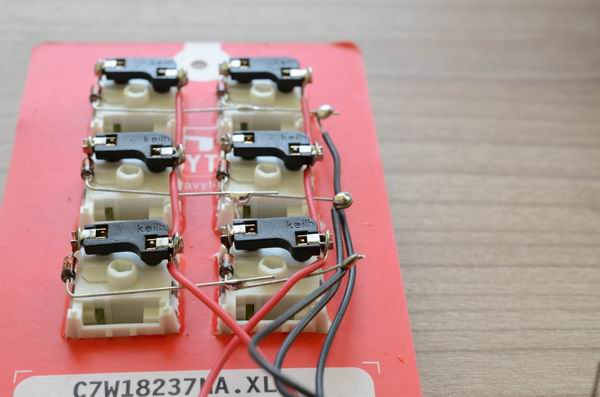
But I found a project called GOLEM with an excellent guide to making your own keyboard. Here is their wiring:
GOLEM Macropad
I can do that! They got me out of a major rut.
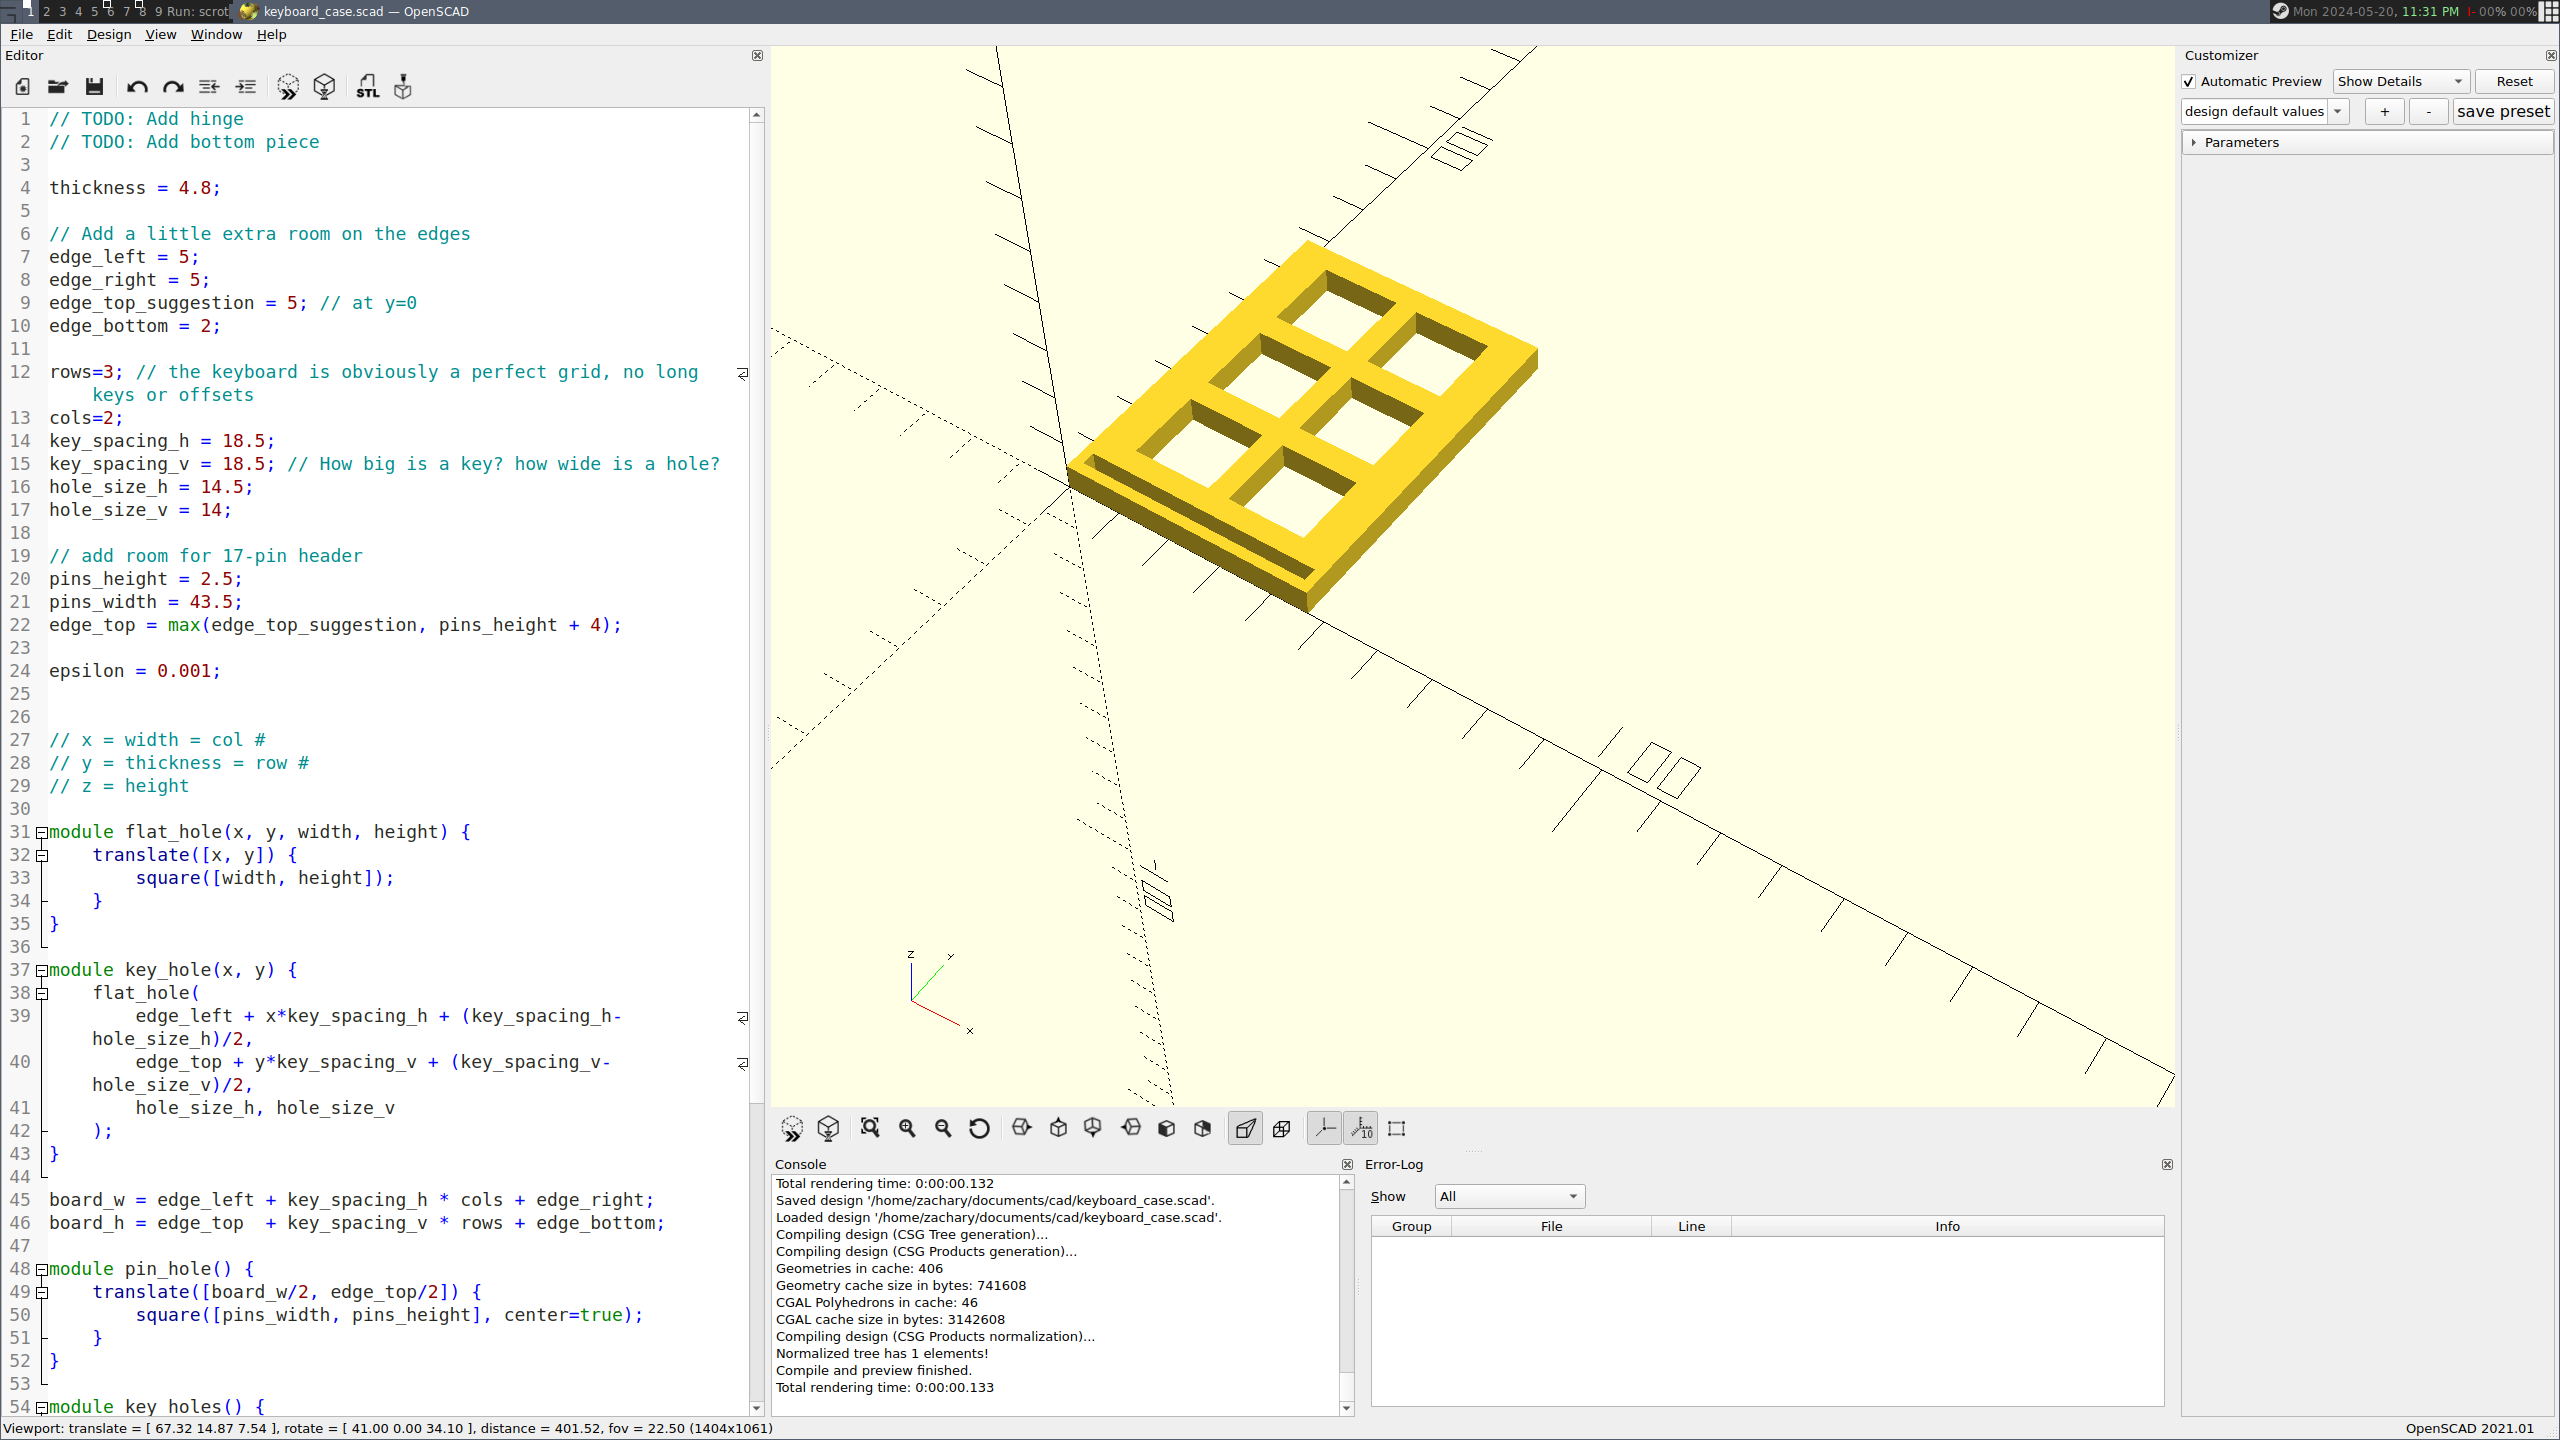
Their advice walks you through how to do a small keyboard in a cardboard plate. I did a few keys, gauged the effort, and decided to use my 3D printer. Cutting out 50-60 keys precisely by hand doesn’t sound easy. Worse, if you mess up, you have to start over. In plastic, I can’t mess up halfway, and the spacers to support the keyboard can be part of the print.
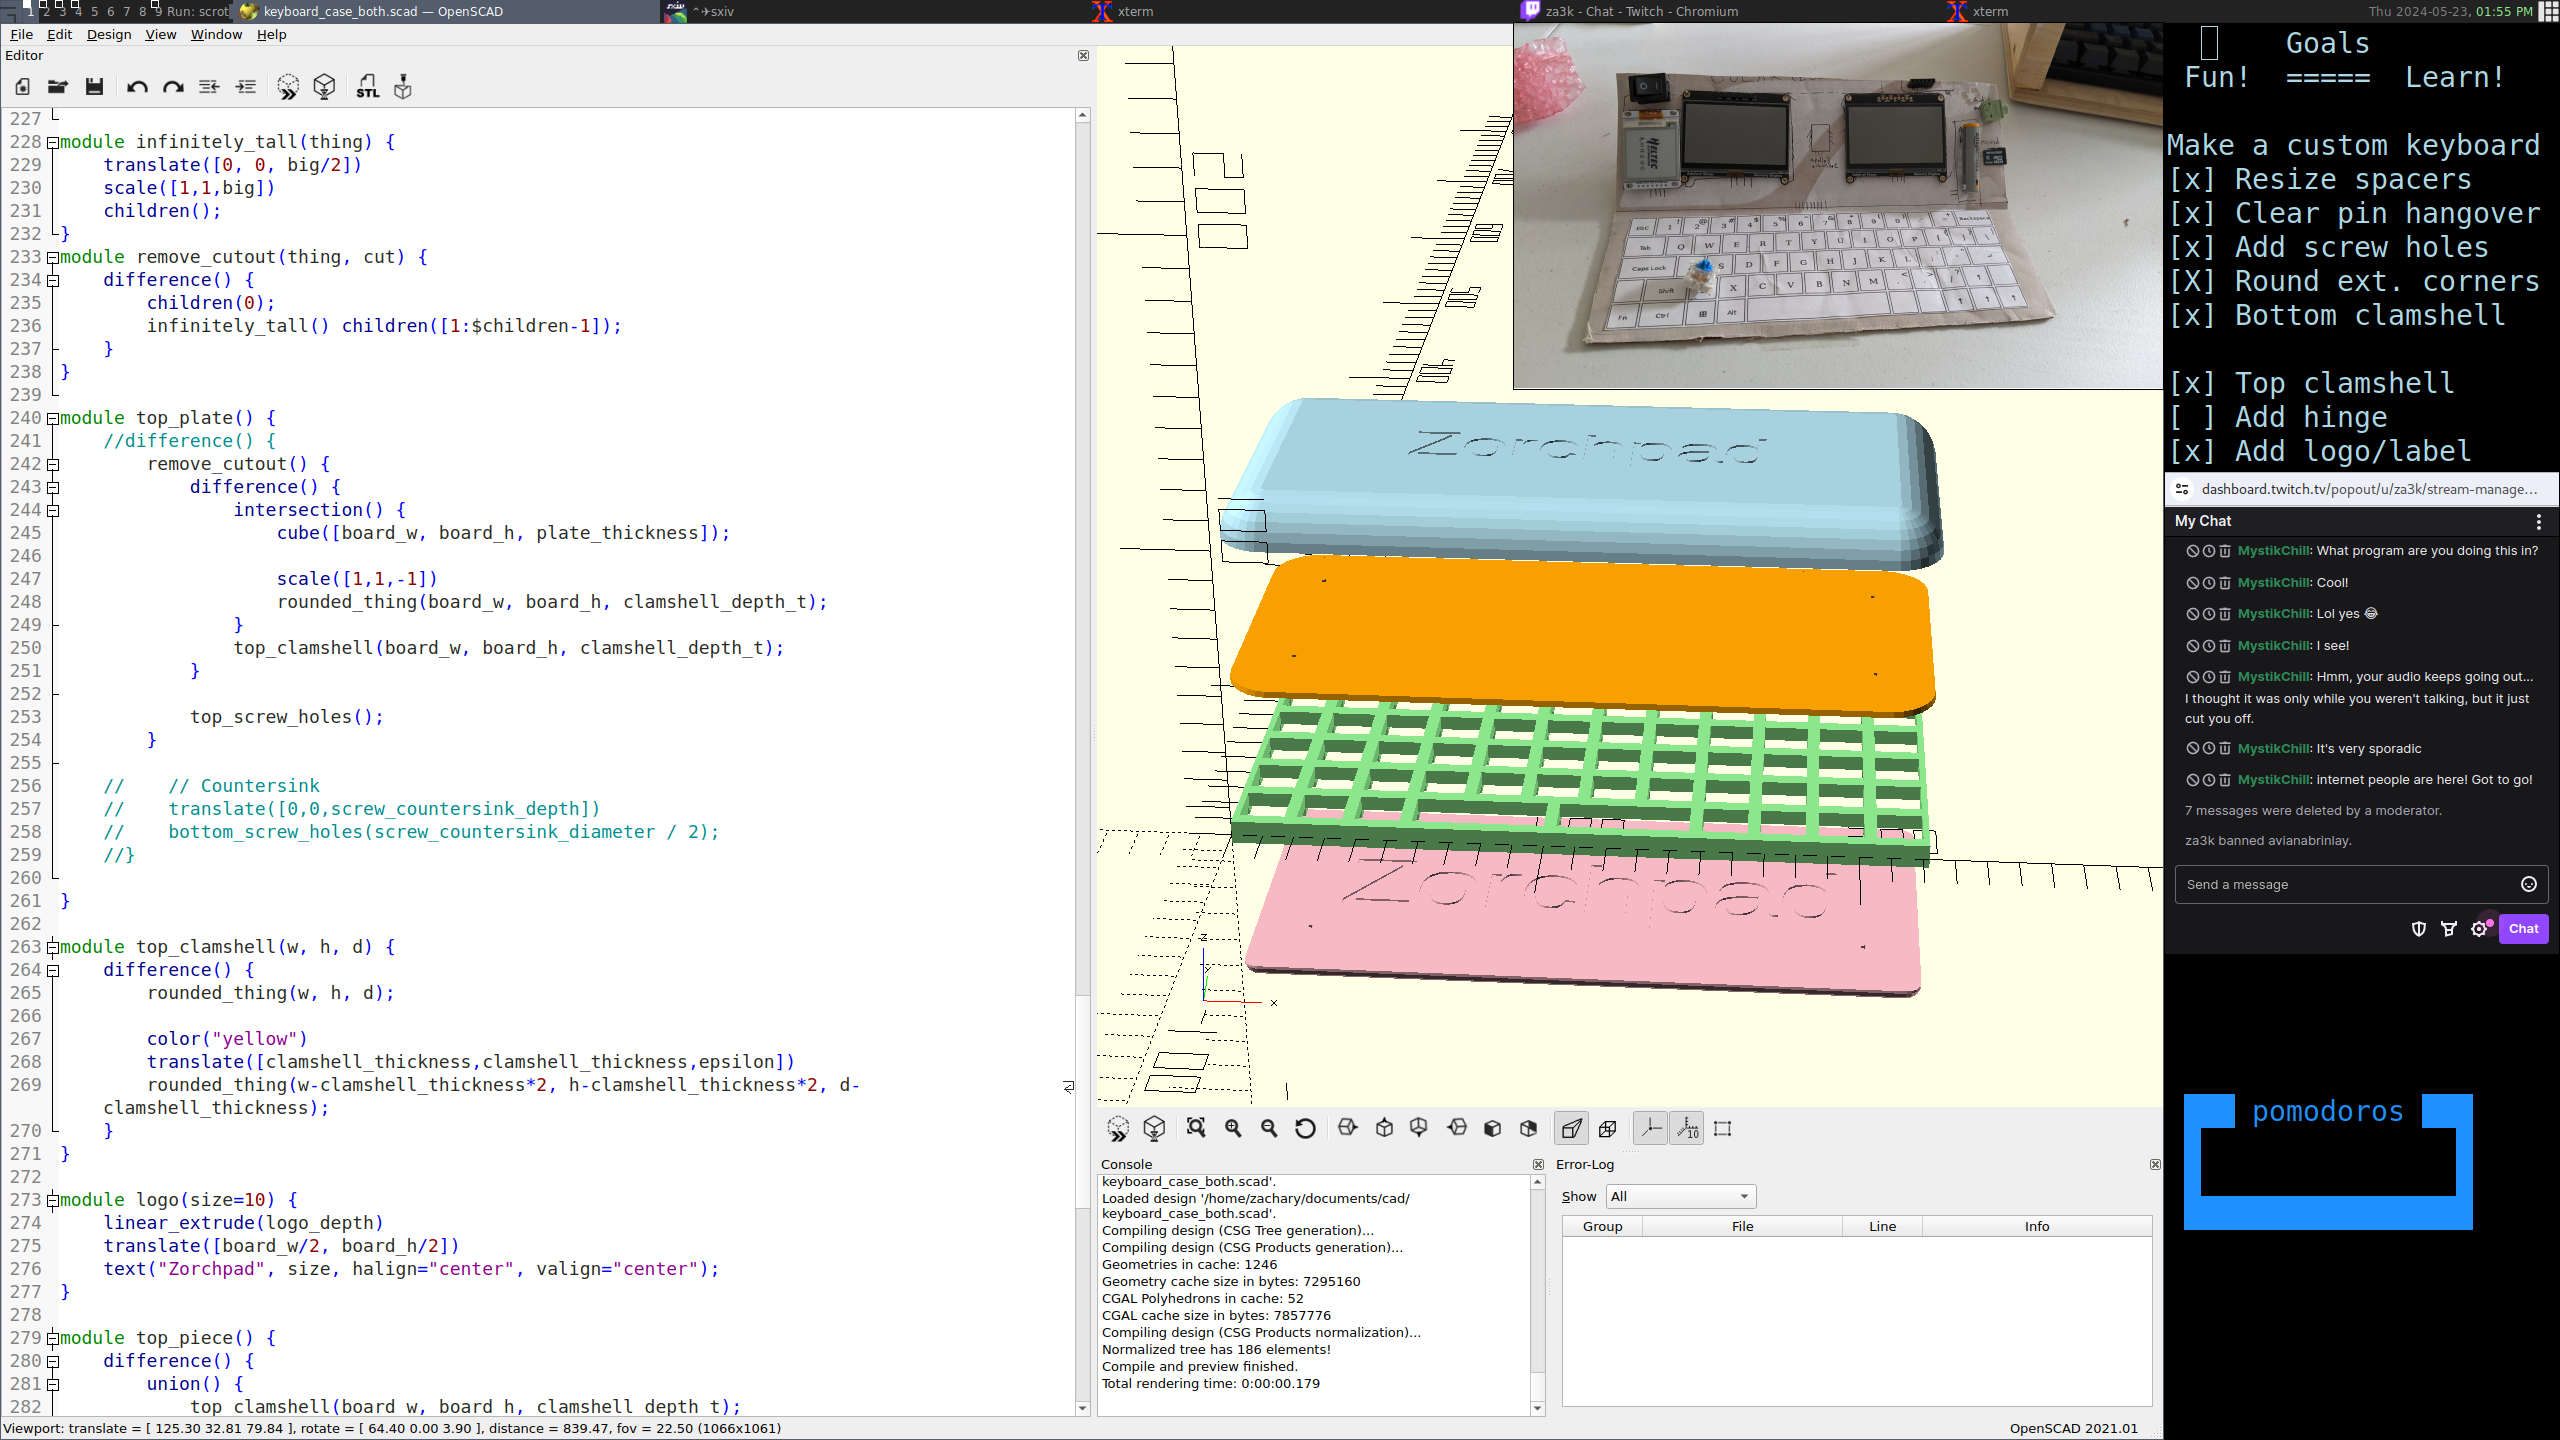
Above, I’m designing a “sampler” keyboard in CAD (OpenSCAD). I want to iron out problems in my process before I try a full-size keyboard. Below, Prusa-Slic3r is slicing the finished model for my 3D printer to print.
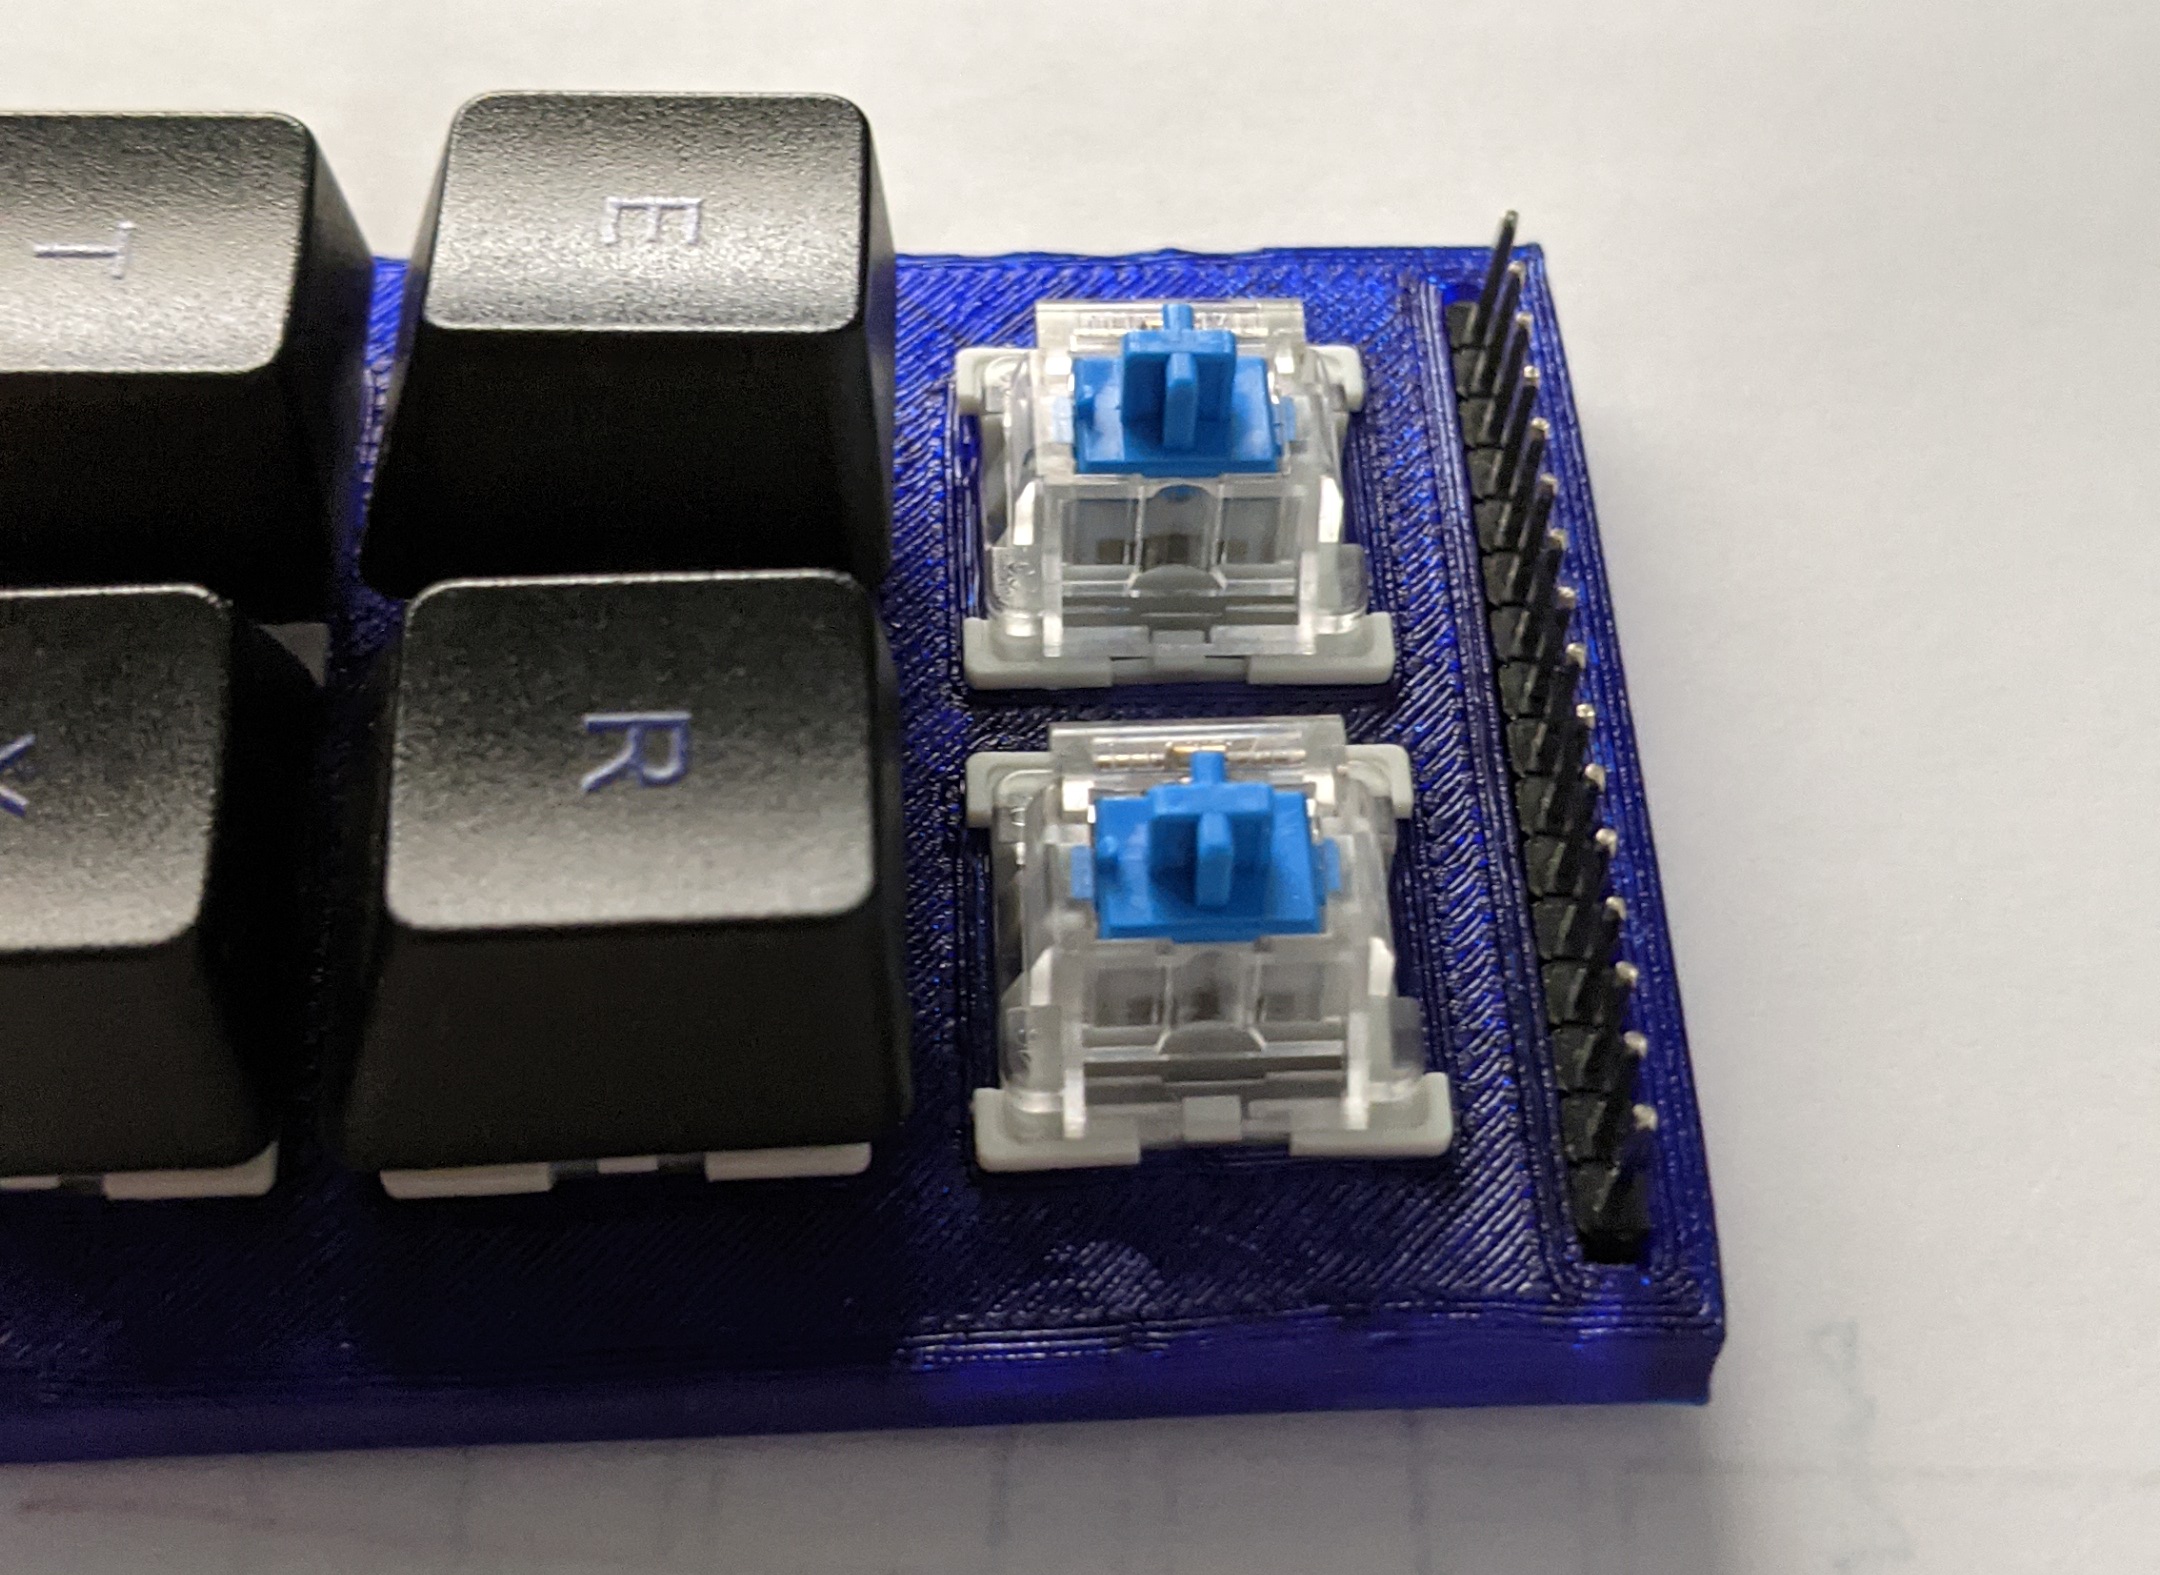
Here’s the finished sampler keyboard:
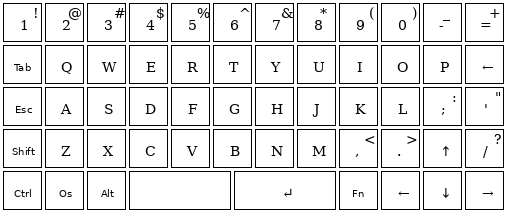
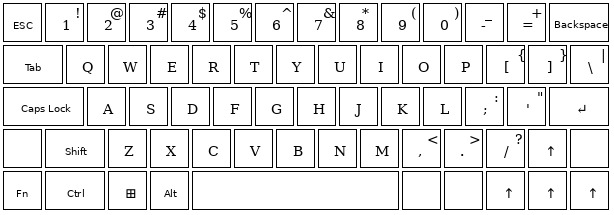
Currently I’m waiting on keycaps and switches ordered from China, and then I’ll put together my finished keyboard. But I have been making some progress in the meantime. Here’s the layout I’m going to try.
And I’ve started streaming some development of a case and keyboard on Twitch (Tue/Thu 12pm noon, EDT). Feel free to join! Anyone can watch, but you need an account to chat.
My friend Callen tried to help me run a DC motor to roll my curtains up and down. We didn’t make a ton of progress, but we had some fun making a little music.
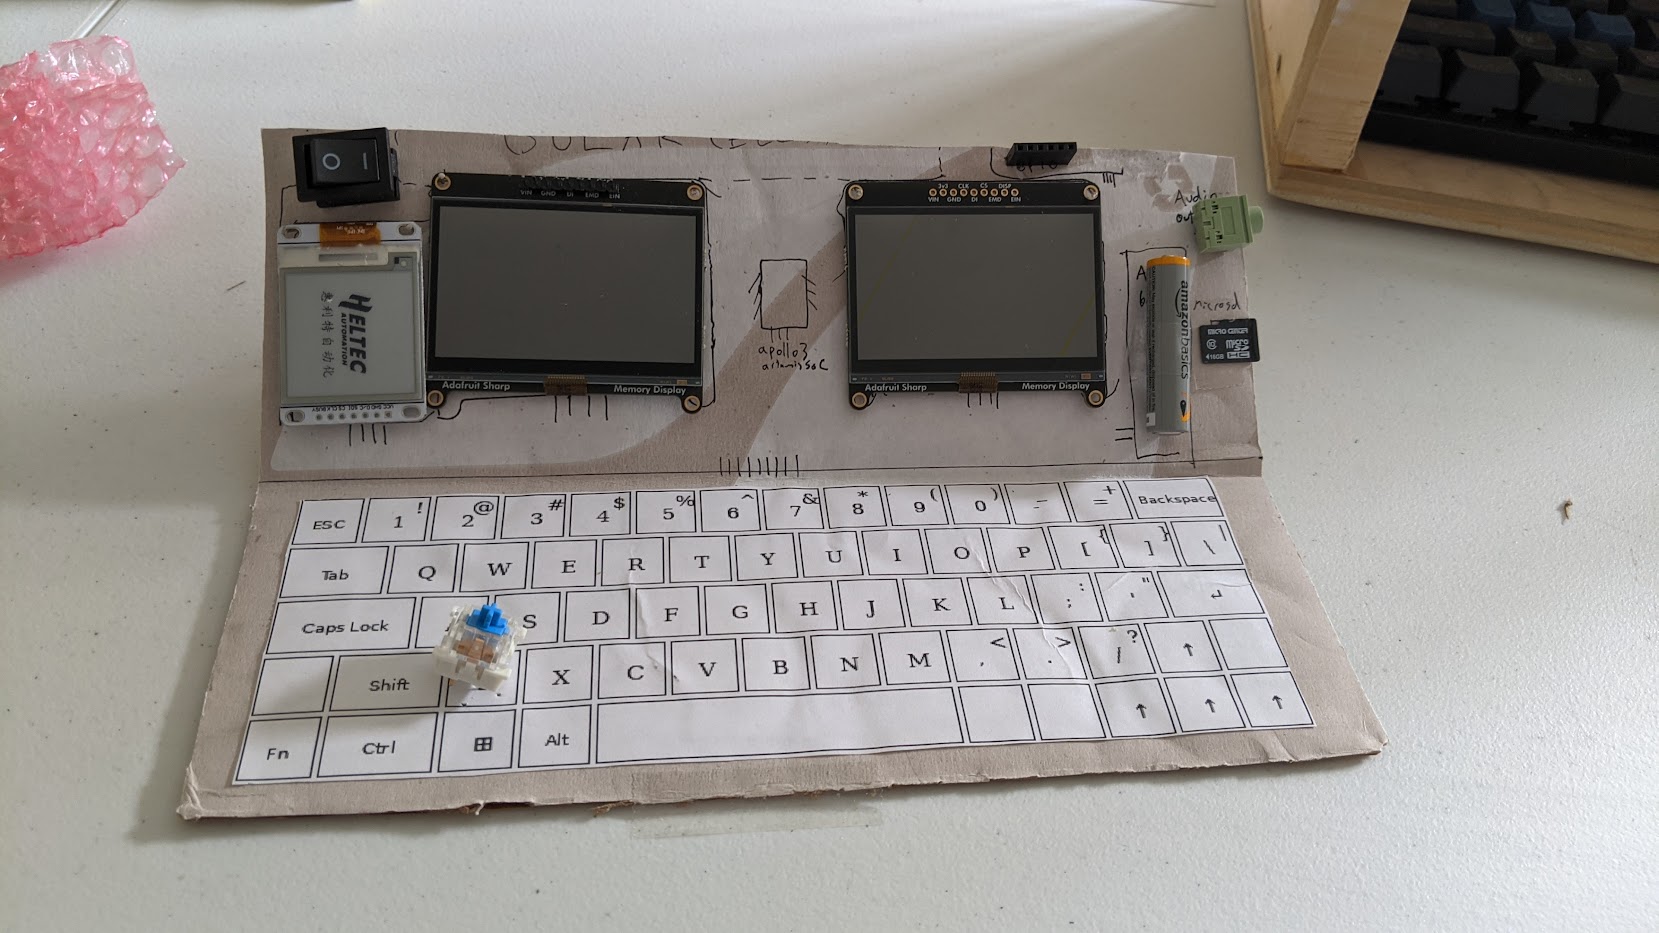
I’ve gotten to the point in Zorchpad development where I’d like to see how the whole thing fits together and if there will be any insurmountable problems. We’re still trying to figure out some things like–will it have one screen or two? What form factor will it be? Will the keyboard fold in half? So I put together a cardboard model.
This model has:
A power switch. I’m assuming the very first prototype will run on battery, not solar like the final one.
Two memory-in-pixel screens (total power usage: 0.001 W)
One e-ink display (total power usage: variable/unknown)
An apollo3 artemis board, which includes RAM, CPU, microphone, and BTLE (not pictured, total power usage about 0.0005 W)
One flash chip (not pictured, power usage variable)
A battery slot. I’m using AAA for my convenience (Holds: 3000 joules = ~20 days power)
An audio jack for headphones
A microSD slot
A custom keyboard (total power usage: variable/unknown)
The keyboard is closely modeled off a standard one, for now.
Immediately, a few problems pop out:
It’s fairly long. This will stick out of my pocket. This is with very closely spaced keys on a somewhat reduced keyboard.
There’s not really a great place to put solar panels. It’s has almost zero free space, plus there’s going to be a lot of wiring. Are we going to drill holes through the solar panel to let wires pass through? Also, I really haven’t been able to figure out how many cm2 of solar we need.
It’s hard to get the screen to stay propped up on my cardboard model. I’d like a solution that doesn’t use hinges, since those tend to loosen over time.
My next step will probably be to make a custom working keyboard. Then, I’ll make an entire working zorchpad. Both will be either cardboard or 3d-printed (whichever is easier).
Hello, Linux terminal users! Let me present you a simple feature you’ve all seen, but might not have noticed.
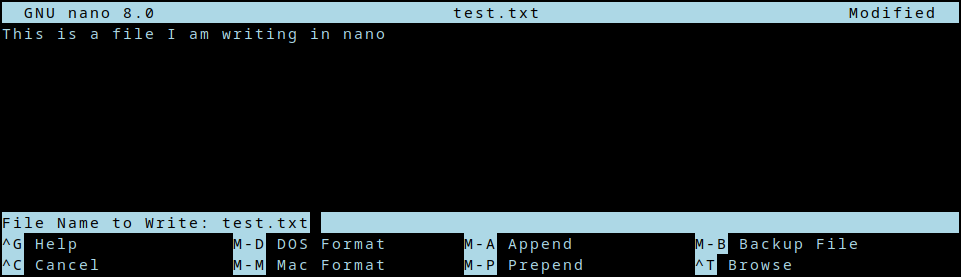
You’re on the terminal, and you open a text editor of chice–nano, vim, emacs, acme etc.
After you edit for a bit, you close the editor.
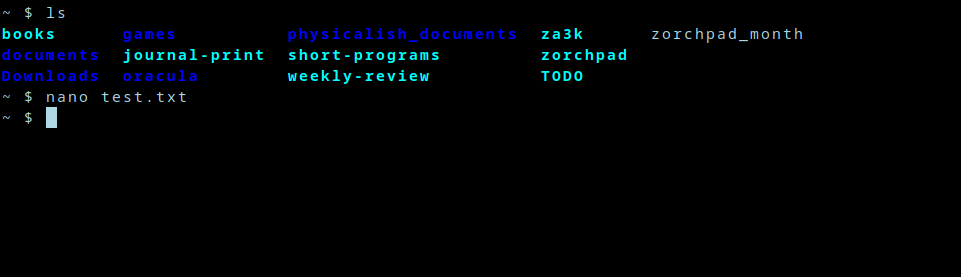
Now you’re back where you left off. My question is, how? How does nano remember what used to be on screen? How does it get restored? Is nano doing this, or bash?
Well, I took at look at the source code to nano. Then I thought, “whoa! that’s way too complicated.” So I found a much simpler project called ted someone made to educate themselves. That was also a little complicated, but both seemed to use ncurses. So I wrote the following simple program, which also displays something and then restores the screen. Even though it’s very simple, it still works.
Aha, so it’s something in ncurses, maybe. Let’s dive deeper.
So initscr() presumably saves the state in some fashion. endwin() definitely restores it, because if we comment that out, the terminal stops being restored. Since initscr() probably does lots of other irrelevant logic, we could take a look at endwin() to dive in. But let’s do something even simpler first.
As background, the linux command line is pretending to be an obsolete piece of hardware called a terminal. Specifically, it’s pretending to be a model called the DEC VT100 (or a later one, but they’re mostly backwards compatible). The terminal accepted text over a wire, and printed it to the screen.
When it got special text, it would do special things. These are captured today as “escape codes”–special non-printable characters, which cause your software terminal to also do special things. What kind of special things? Well one example escape code is “Backspace”, which deletes the last character. Another code is “\r\n” (carriage return; new line), which goes to the beginning of the line, and down one.
I suspect the answer to what’s happening with save and restore of my terminal might be some magic escape codes. So let’s just redirect the output to a file, and see what data is being center over the virtual wire to our virtual terminal.
Well, that’s certainly a bunch of magic. Now something cool happens:
$ cat magic.txt
This command does nothing visible. It doesn’t print “Hello world”, even though that’s in the file. In other words, it’s printing Hello world, then really quick resetting the terminal. Just too fast for my poor human eyes to see.
We’ve confirmed the escape code theory! This file has everything we need. We can look at the source code to ncurses if we’re curious, but we don’t need to (and I won’t).
One thing I immediately see in this file, is that it doesn’t seem to contain the words that were on screen. So it’s not that the program read what was on screen, and printed it back later. Rather, there are some magic escape sequences happening to save and restore the terminal.
Okay, so somewhere in those 70 bytes is a magic code or two we want. Let’s examine all the bytes.
What kinds of escape codes appear here? Hex 0x1b is ESC, basically the escape sequence–it cues the terminal in that a special escape code is coming. 0x1b9b ( ESC followed by [) is the CSI escape code. DEC private codes refer to other escape sequences used by the DEC terminals like the VT00 (I’ll just shorten this to “DEC” below).
Without further ado, let’s break down those 70 bytes. Apologies for any errors below–correct me in the comments.
Set second character set to “DEC Special Character and Line Drawing Set” [xterm DEC guide]
0x1b9b ?1049h
Save cursor as in DECSC and use Alternate Screen Buffer, clearing it first. [xterm CSI guide]
0x1b9b 1;49r
DECSTBM: Set scrolling region to rows 1-49 [xterm CSI guide]
(When I ran the program, my terminal was 49 lines tall inside tmux–so the whole terminal in other words.)
0x1b9b m
(Empty) color and style set comand [ANSI/CSI]
I think this could be left out entirely.
OK, solved. The magic save bytes are 1b 9b 3f 31 30 34 39 68 (<ESC> [?1049h). The magic restore bytes are 1b 9b 3f 31 30 34 39 6c (<ESC> [?1049l). And xterm or tmux is doing the save/restore magic, based on seeing this escape mode.
Hmm, how minimal can we get a working file, I wonder?
#!/bin/sh
echo -ne '\x1b[?1049h' # Save terminal
echo -ne '\x1b[H'      # Home the cursor
echo "Hello world"
sleep 1
echo -ne '\x1b[?1049l' # Restore terminal
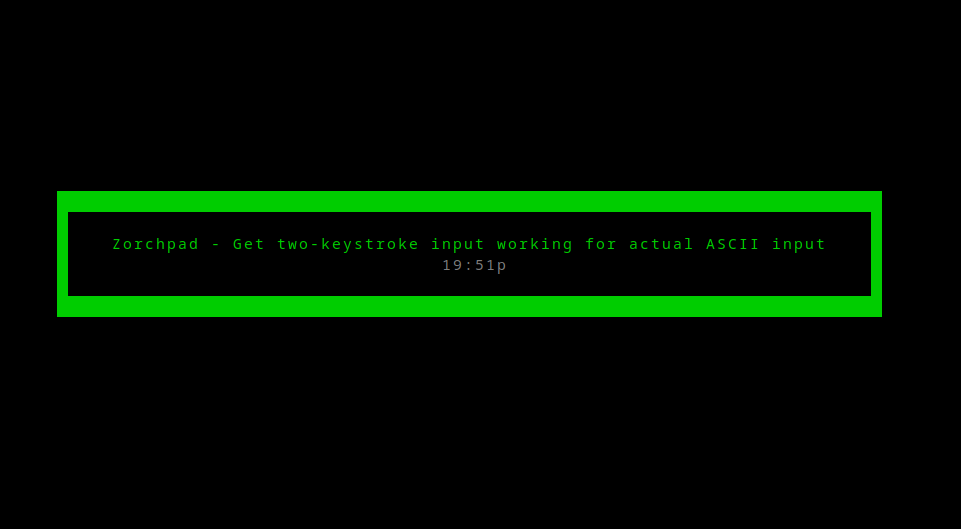
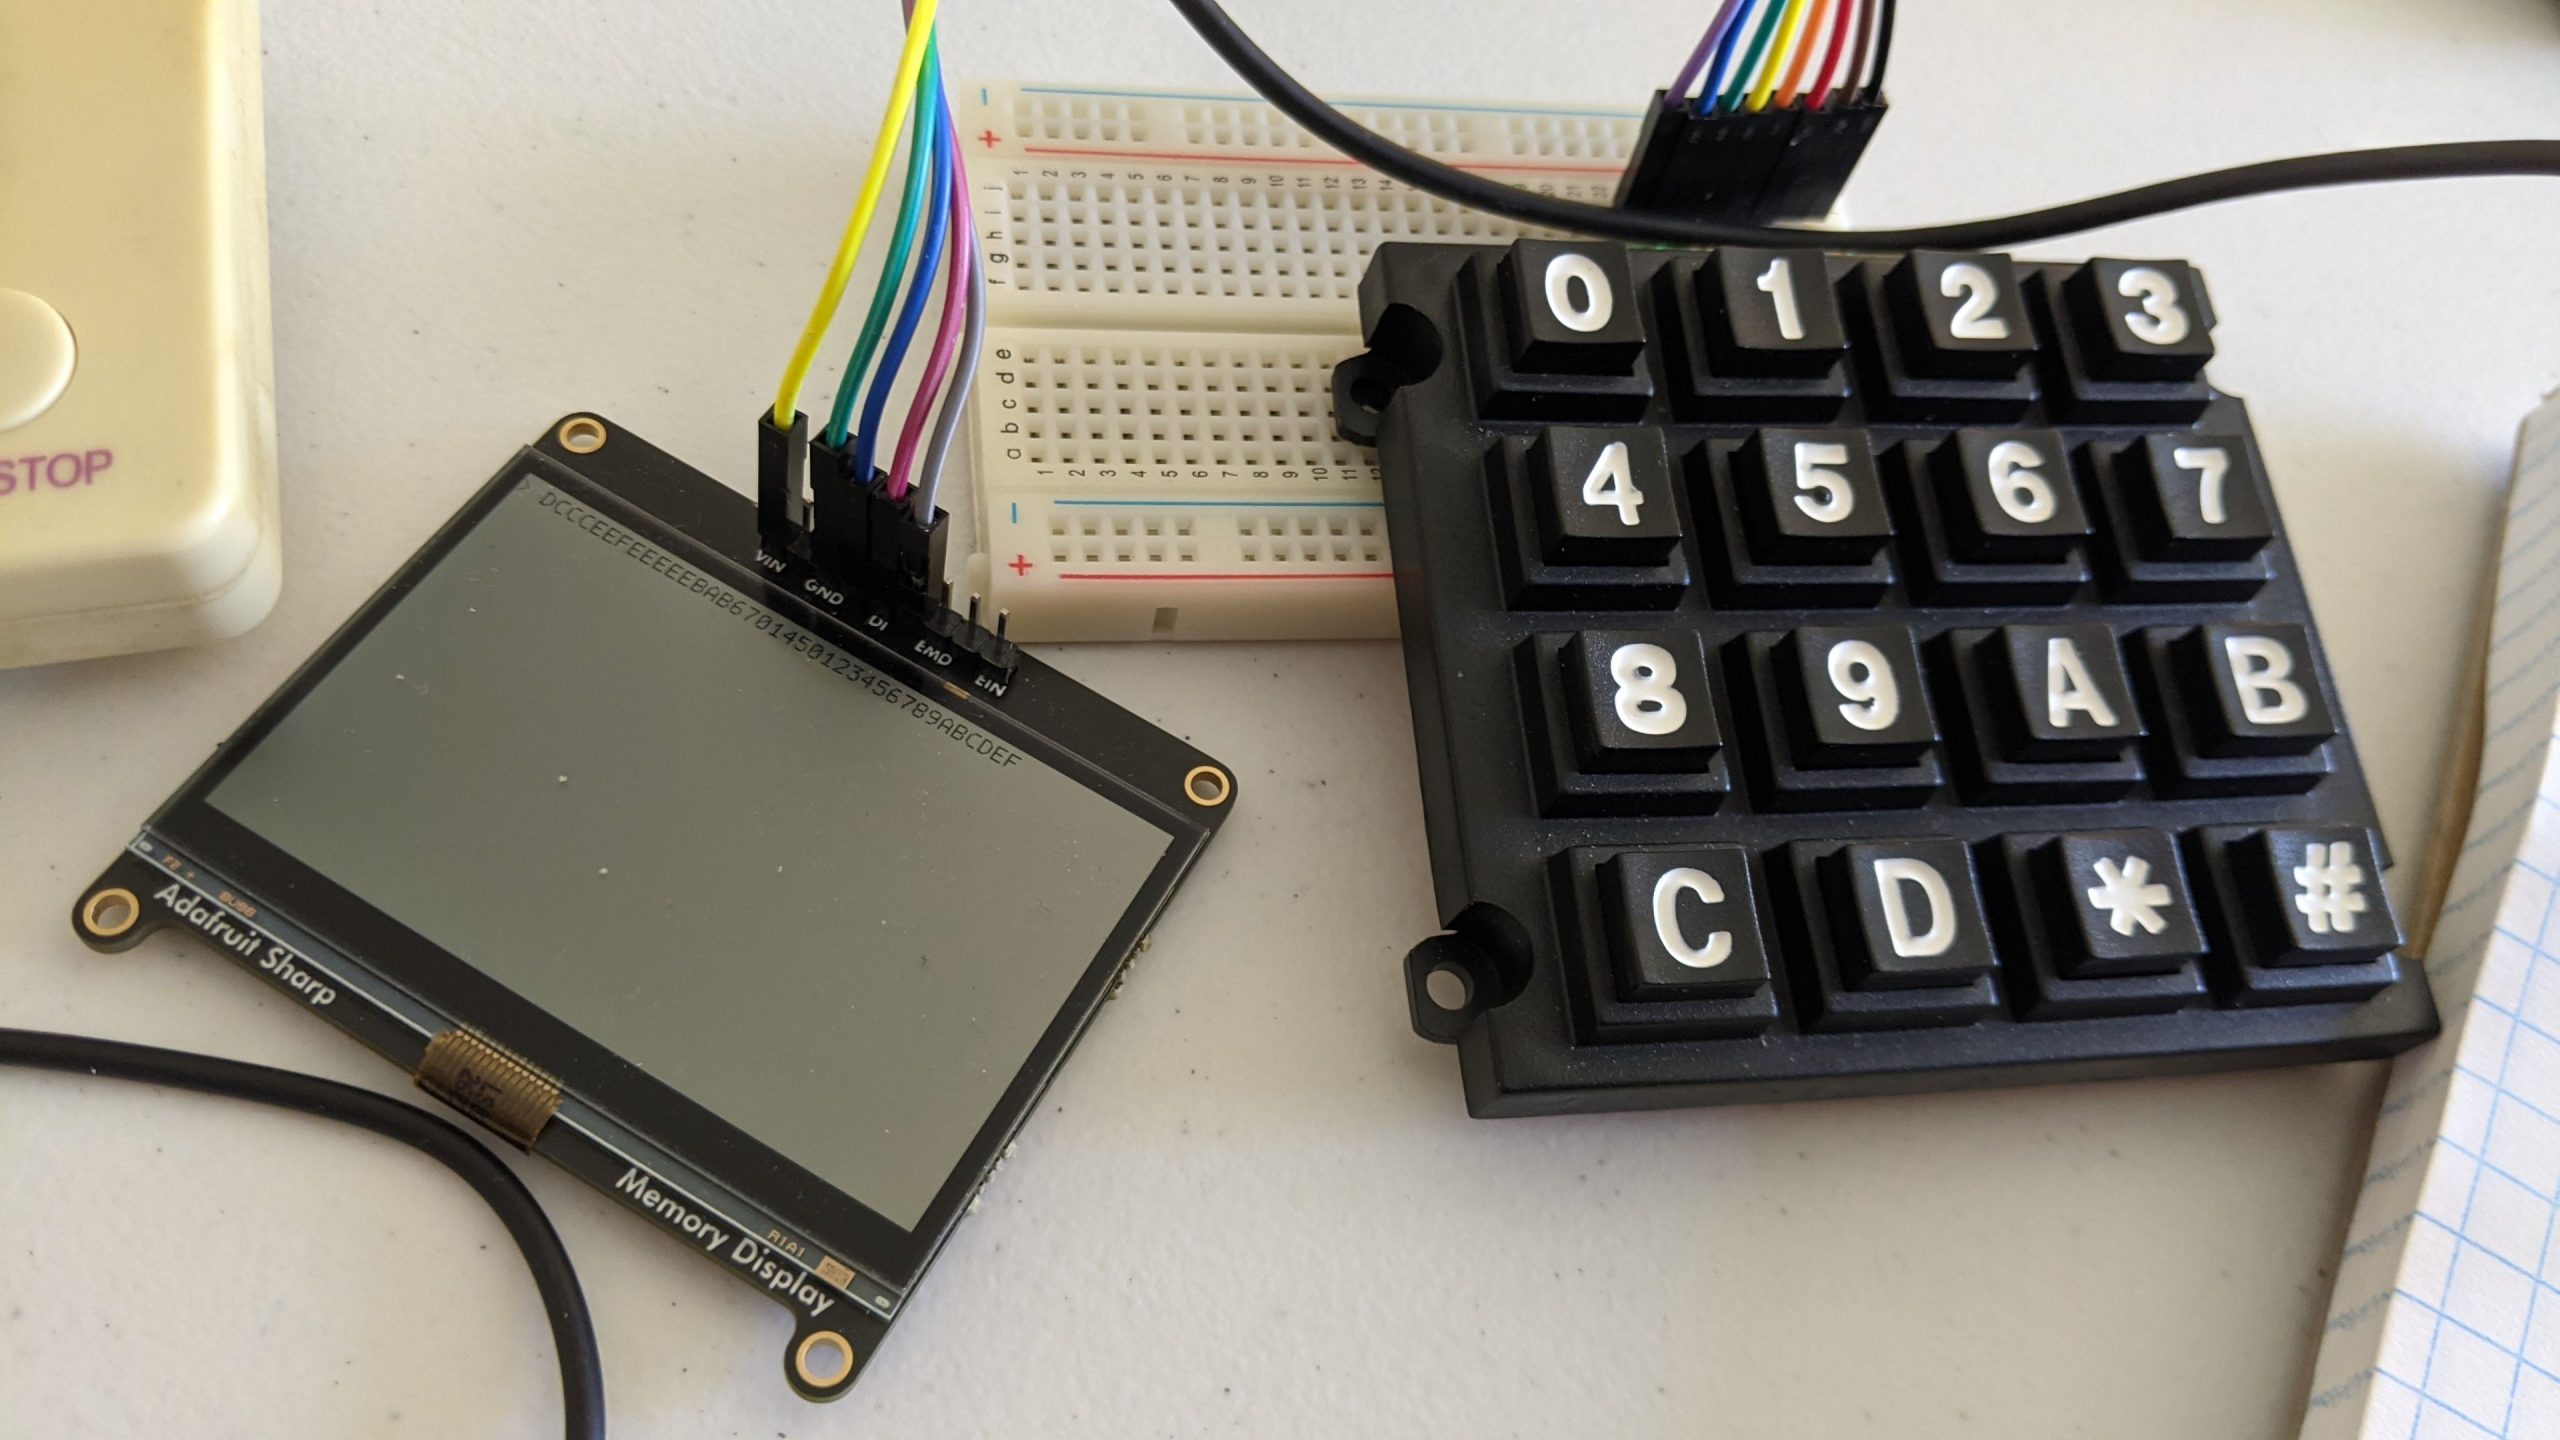
Another update on the zorchpad. We now have a working 16-button keyboard (sadly no QWERTY yet). Here you can see a simple typing program that shows what you type on screen.
As mentioned in a previous post, the reason we’re using a custom keyboard is to stay to low power usage–much lower than a standard keyboard.
Year 0 – I filled 10 32-GB Kingston flash drives with random data.
Year 1 – Tested drive 1, zero bit rot. Re-wrote drive 1 with the same data.
Year 2 – Tested drive 2, zero bit rot. Re-tested drive 1, zero bit rot. Re-wrote drives 1-2 with the same data.
Year 3 – Tested drive 3, zero bit rot. Re-tested drives 1-2, zero bit rot. Re-wrote drives 1-3 with the same data.
Year 4 – Tested drive 4, zero bit rot. Re-tested drives 1-3, zero bit rot. Re-wrote drives 1-4 with the same data.
Will report back in 2 more years when I test the fifth. Since flash drives are likely to last more than 10 years, the plan has never been “test one new one each year”.
The years where I’ll first touch a new drive (assuming no errors) are: 1, 2, 3, 4, 6, 8, 11, 15, 20, 27
The full test plan:
YEAR 1: read+write  1                           [1s]
YEAR 2: read+write  1, 2                        [1s]
YEAR 3: read+write  1, 2, 3                     [1s]
YEAR 4: read+write  1, 2, 3, 4                  [2s] (every 2nd year)
year 5: read+write  1, 2, 3,
YEAR 6: read+write  1, 2, 3, 4  5               [2s]
year 7: read+write  1, 2, 3,
YEAR 8: read+write  1, 2, 3, 4, 5, 6            [2s]
year 9: read+write  1, 2, 3,
year 10: read+write 1, 2, 3, 4, 5, 6
YEAR 11: read+write 1, 2, 3,         7          [4s]
year 12: read+write 1, 2, 3, 4, 5, 6
year 13: read+write 1, 2, 3
year 14: read+write 1, 2, 3, 4, 5, 6
YEAR 15: read+write 1, 2, 3,         7, 8       [4s]
year 16: read+write 1, 2, 3, 4, 5, 6
year 17: read+write 1, 2, 3
year 18: read+write 1, 2, 3, 4, 5, 6
year 19: read+write 1, 2, 3,         7, 8
YEAR 20: read+write 1, 2, 3, 4, 5, 6       9    [8s]
year 21: read+write 1, 2, 3
year 22: read+write 1, 2, 3, 4, 5, 6
read 23: read+write 1, 2, 3          7, 8
year 24: read+write 1, 2, 3, 4, 5, 6
year 25: read+write 1, 2, 3
year 26: read+write 1, 2, 3, 4, 5, 6
YEAR 27: read+write 1, 2, 3          7, 8,   10 [8s]
year 28: read+write 1, 2, 3, 4, 5, 6       9
year 29+: repeat years 21-28
Two friends and I wrote the intro to “Pint-Sized”, a 90s sitcom that never existed.
We used DALL-E and stable diffusion for images, Photopea to add captions, and Google’s AI Test Kitchen for the backing music. Cheers were added with audacity. The video was edited together with ffmpeg.
Today I learned how to make PCBs. I didn’t invent anything here, this is all pretty well known by the PCB-making community, but it’s not well-known to me. So I taught myself a bit!
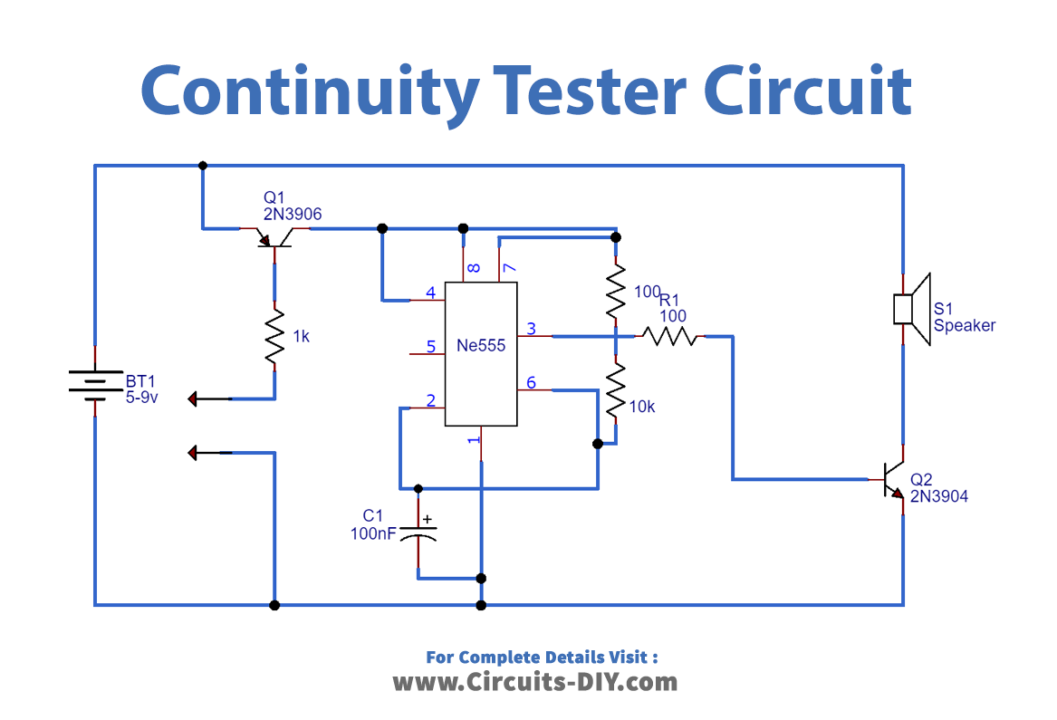
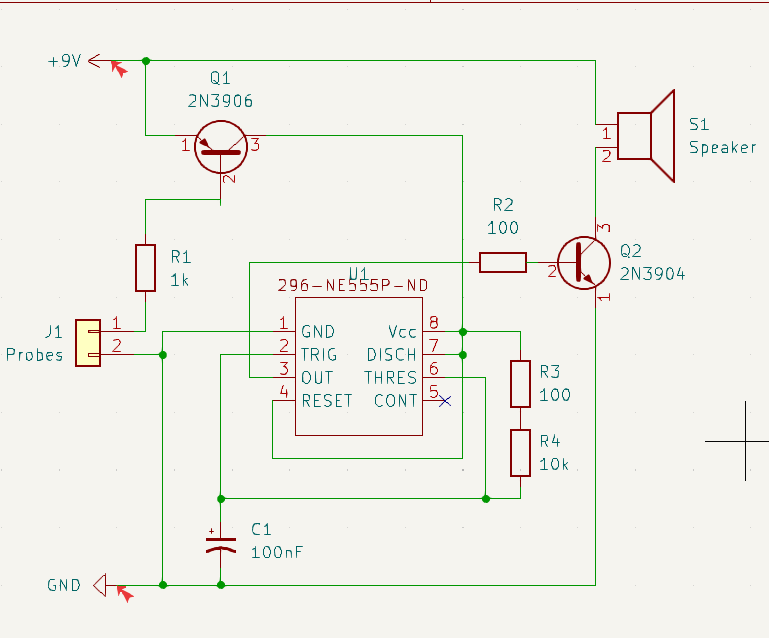
The first part was the design an electronic circuit. I decided I was short on time, so I grabbed an existing schematic.
Next, I downloaded KiCAD, and recreated the circuit there. I found this video tutorial very helpful to learn kicad.
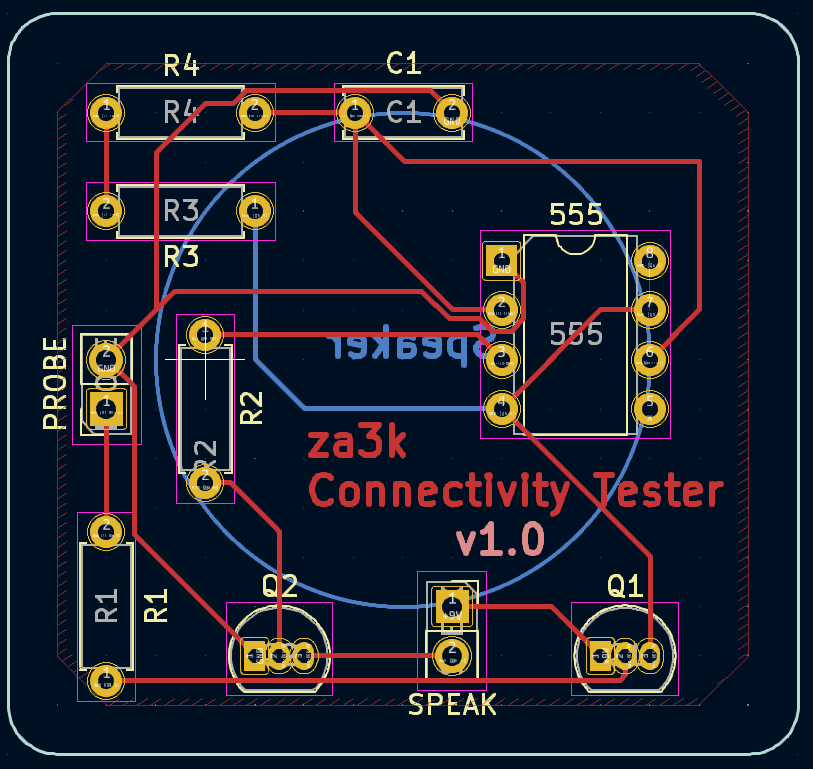
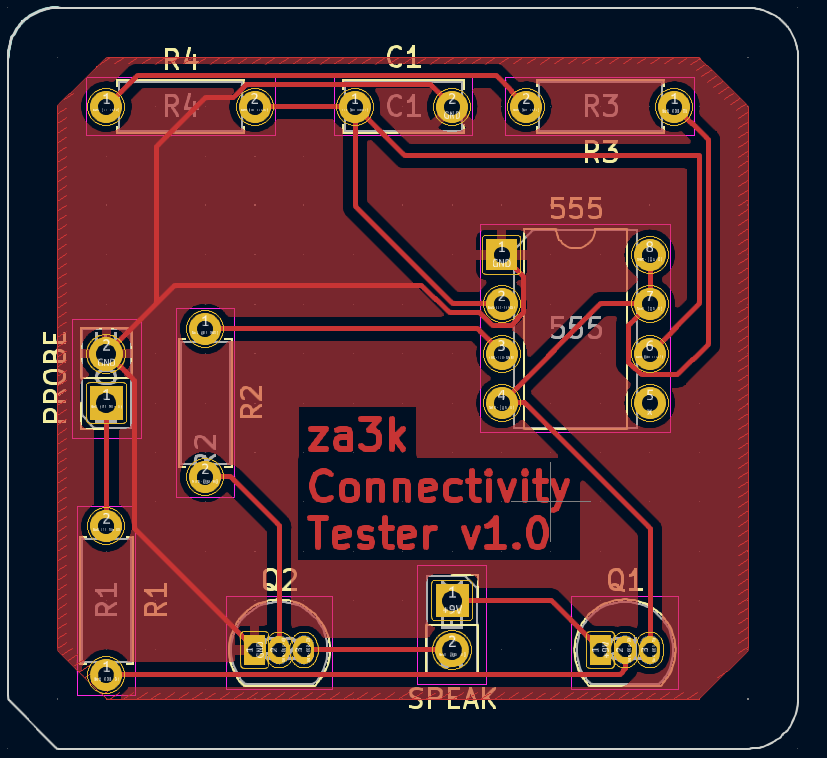
Next, I made the actual PCB layout.
To my surprise, after a little jiggling I got it down to a one-layer design.
That means home-printing would be much easier. No having to line up the two sides carefully.
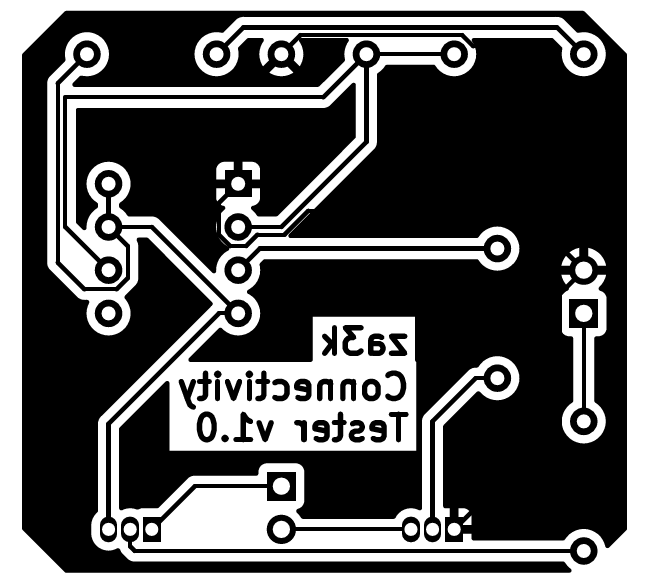
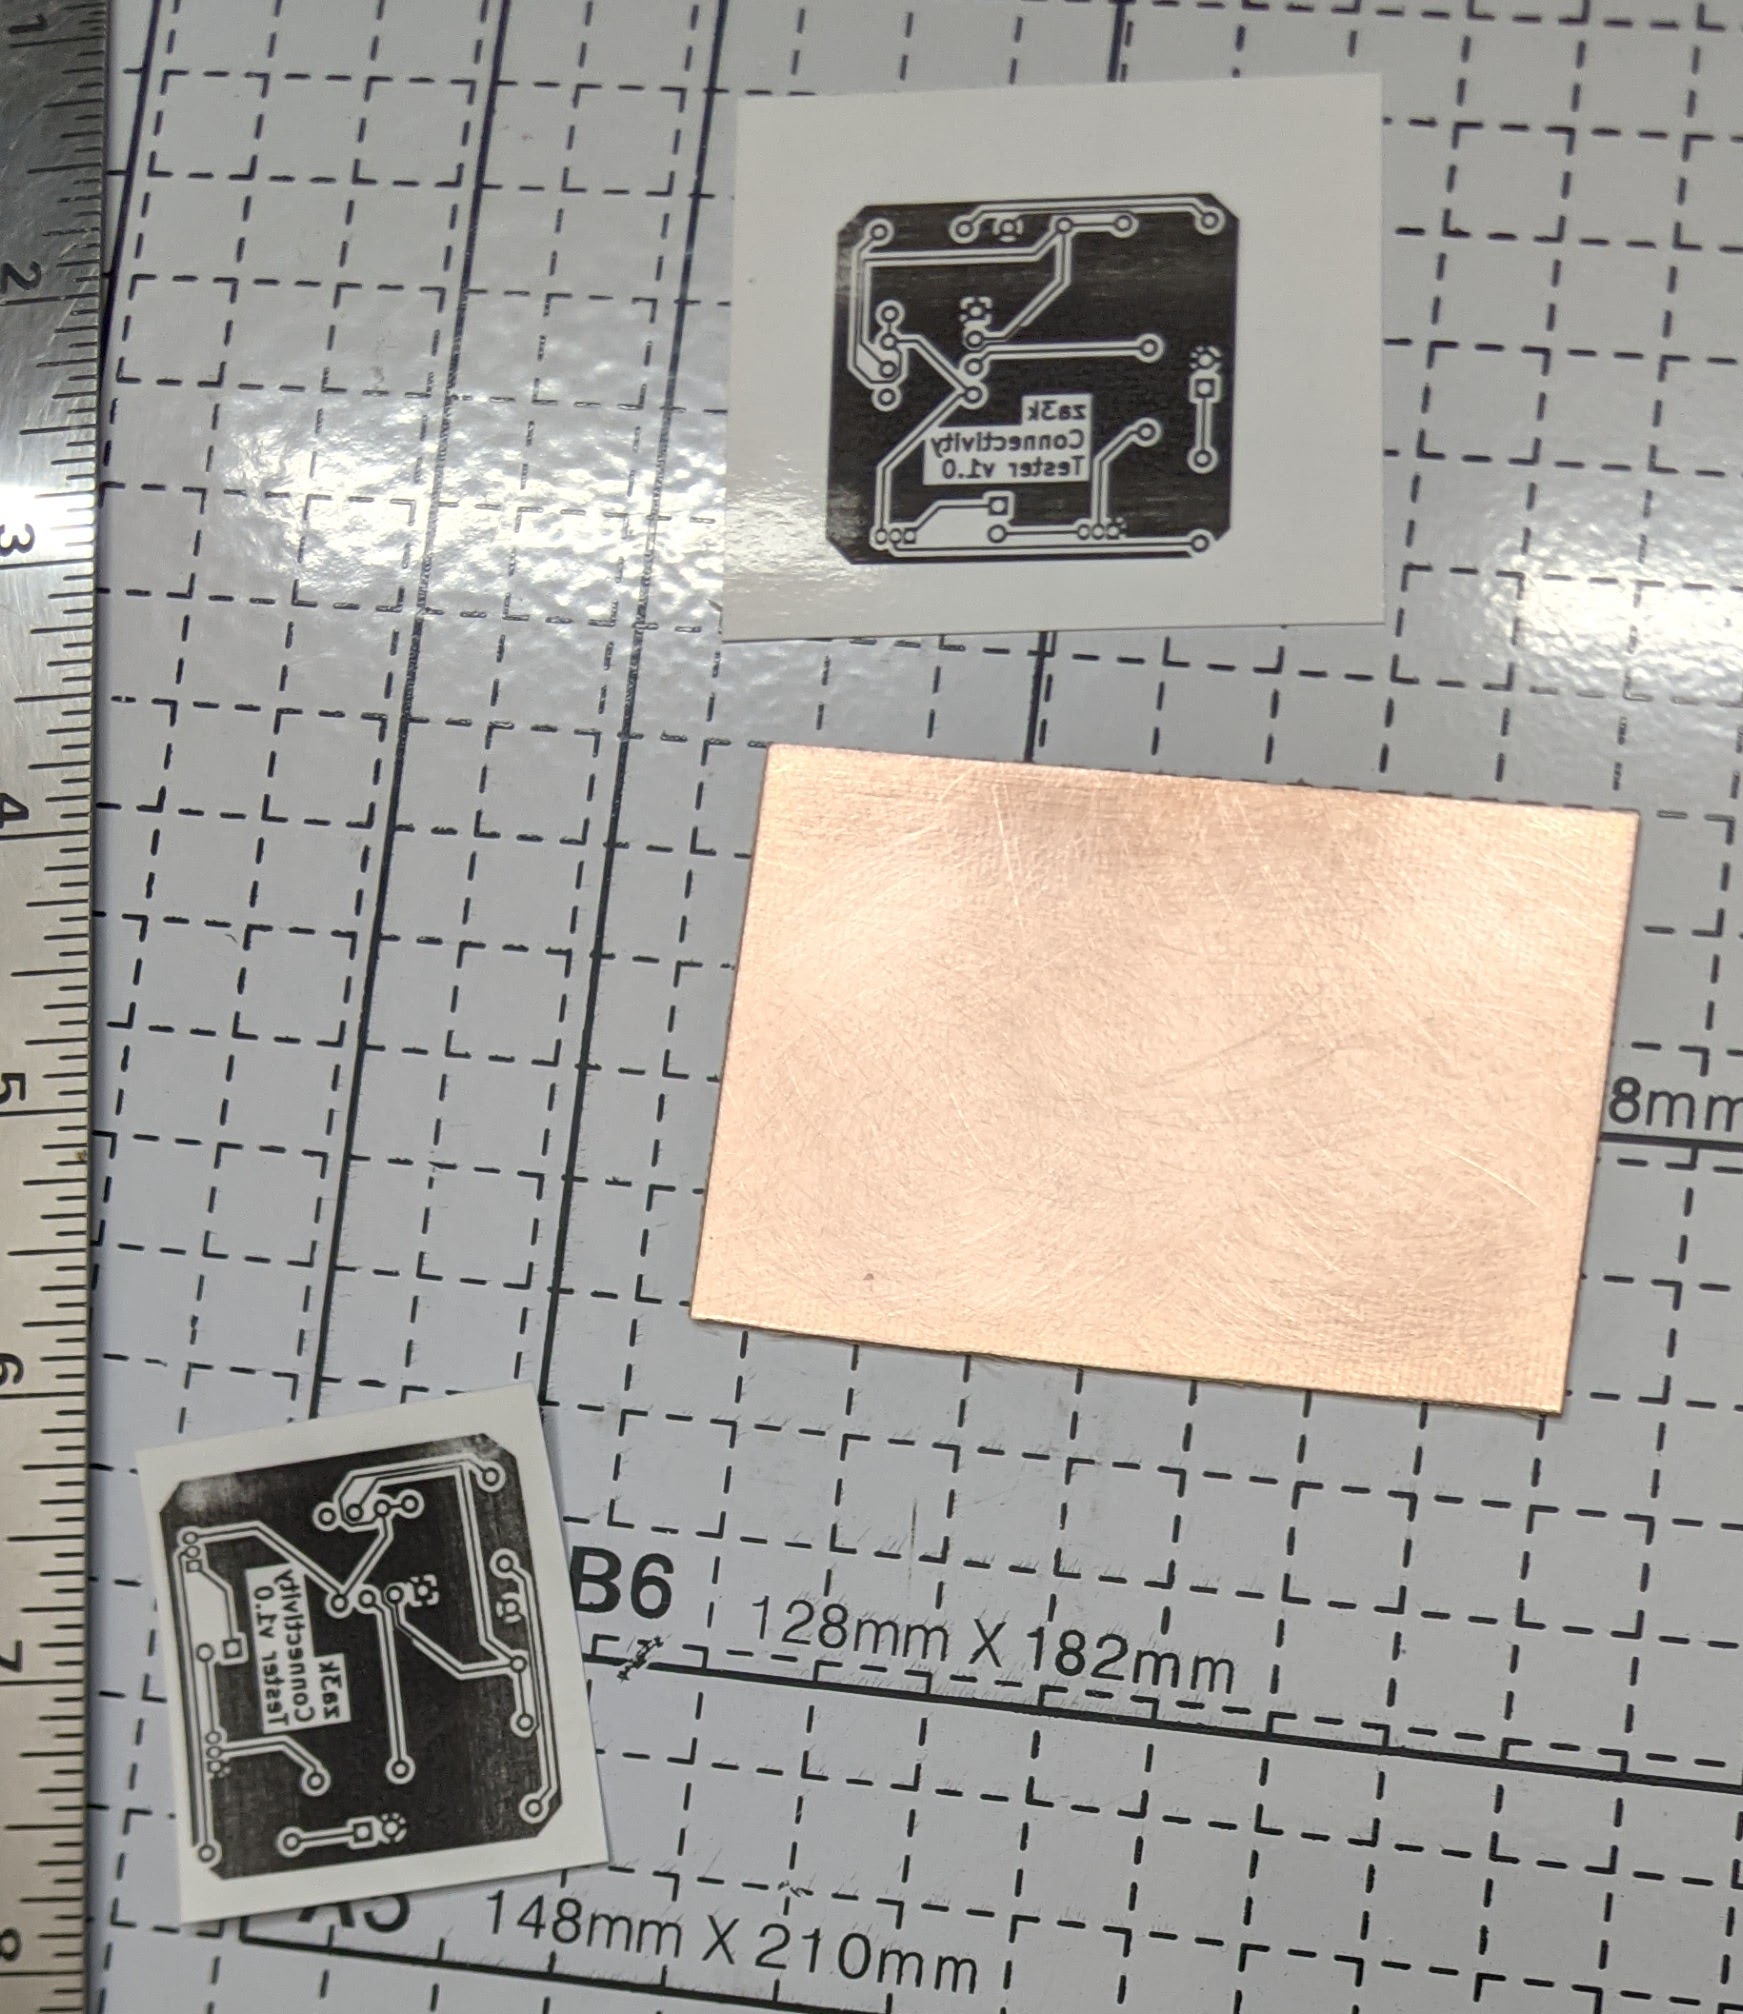
I printed out the image on paper (backwards) on my toner printer, and taped it to the copper-clad PCBs.
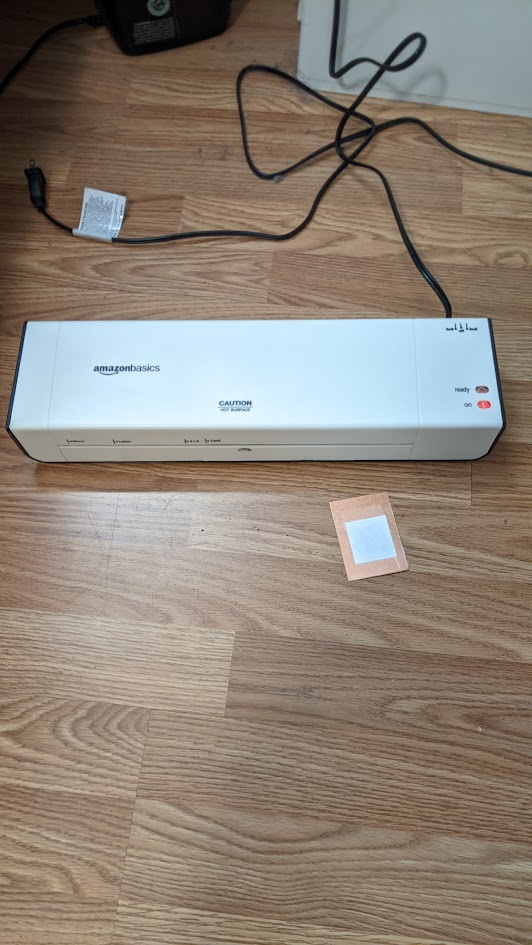
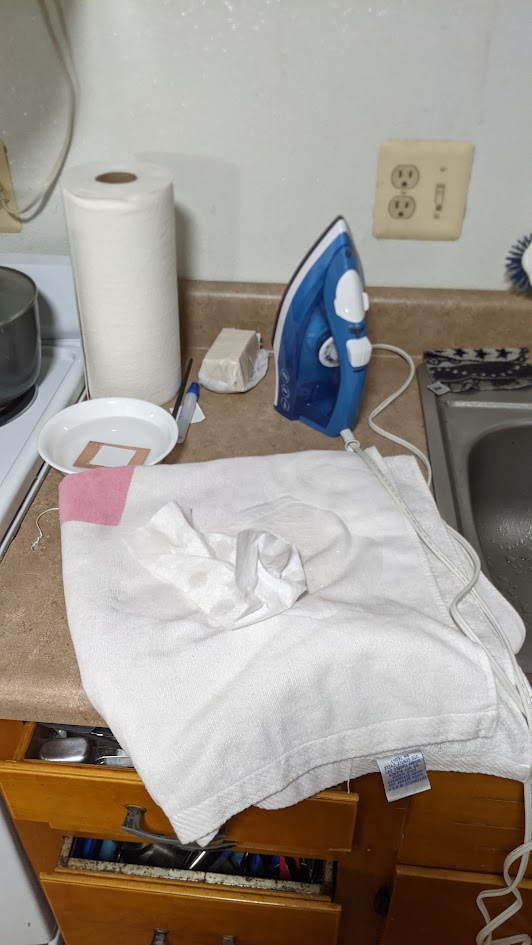
First, I tried laminating it. Almost no ink transferred, and the paper came off easily. Then I tried ironing it, but the paper stick to the iron and not to the PCB. The tape melted on the iron. For both, I dunked them in water after, which is supposed to help loosen the paper.
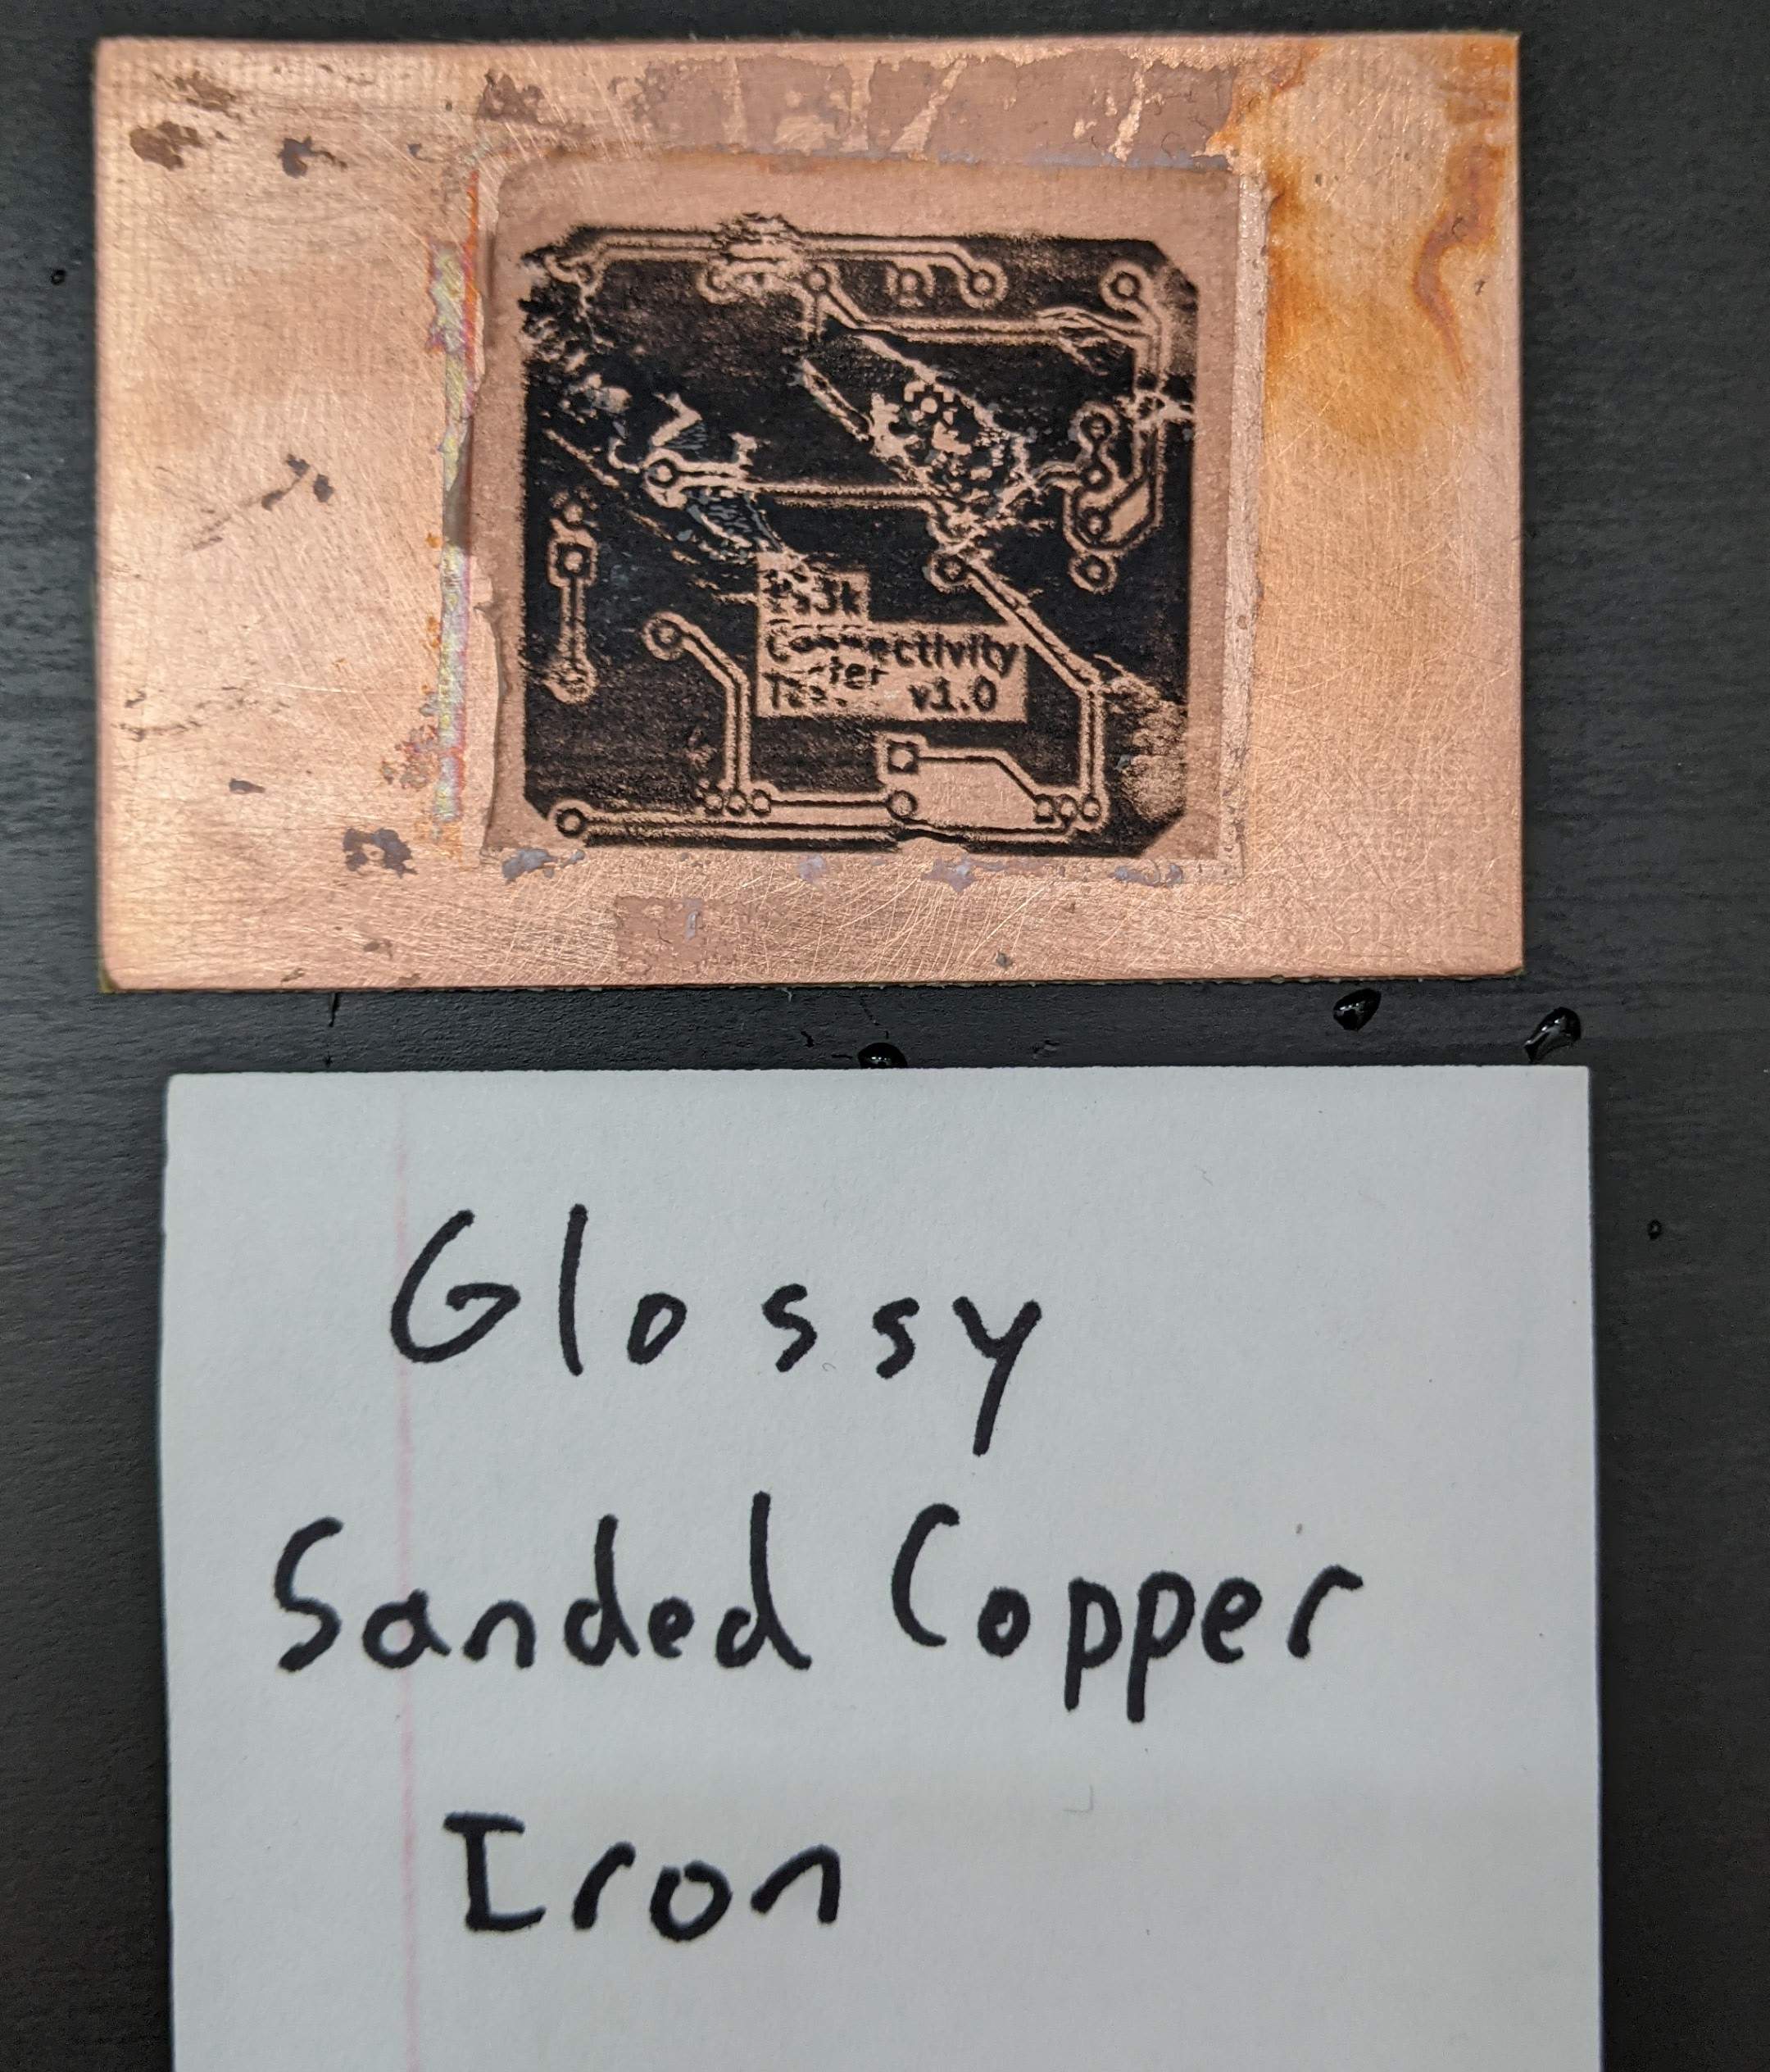
Next, I tried the standard advice–sand the PCBs (I used 320 grit) and use glossy paper. This time, both pieces of paper stuck very well. I was wary about the iron coming off again, so I just left it on place on the highest heat–this worked fine for adhesion, but I had to iron out wrinkles at the end. The laminated piece had lose edges, while the ironed piece was on there totally flat.
I tried peeling off the laminated paper–oops! It peeled back and most of the ink stayed on the paper. I think if I took it off more carefully, it would have worked.
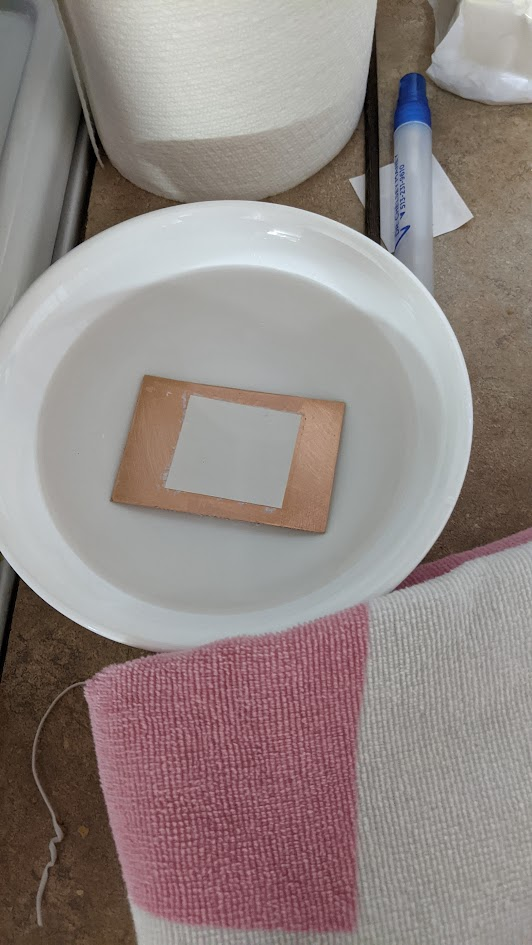
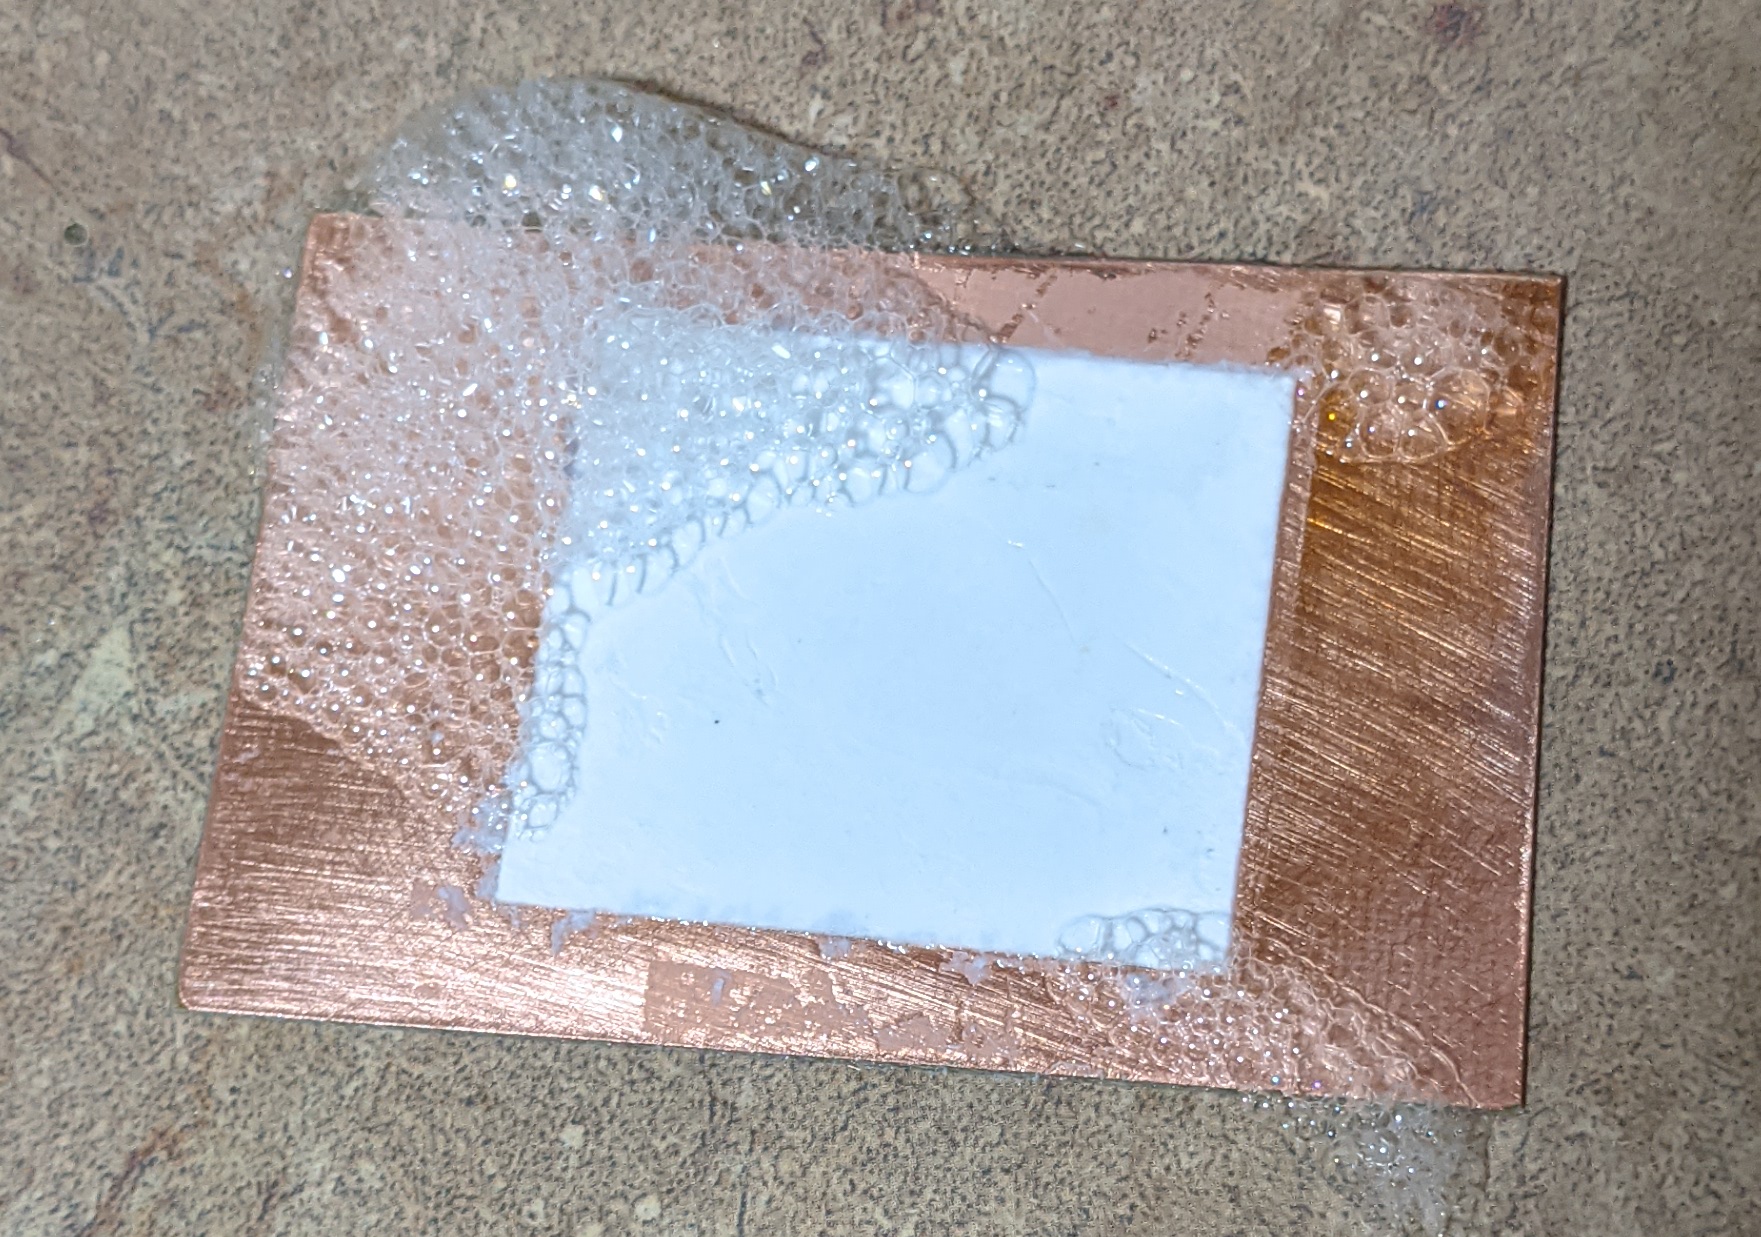
I picked at the ironed paper a bit, but it didn’t budge. I let it sit in dish soap for a while so the paper would fall apart. The first hour didn’t do anything.
Meanwhile, I made an order at PCBWay. It’s still under review.
Edit: after some advice from a friend, I peeled off this paper more aggressively, and scrubbed it off. The ink was fine. It doesn’t look great, but I think this is mostly the wrinkles during transfer. It’s a little blurry, I’ll have to do a third attempt before I try etching.