It’s november, and I’ve decided this month that I’m going to do 30 projects in 30 days. It’s an all-month hack-a-thon!
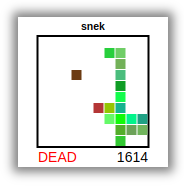
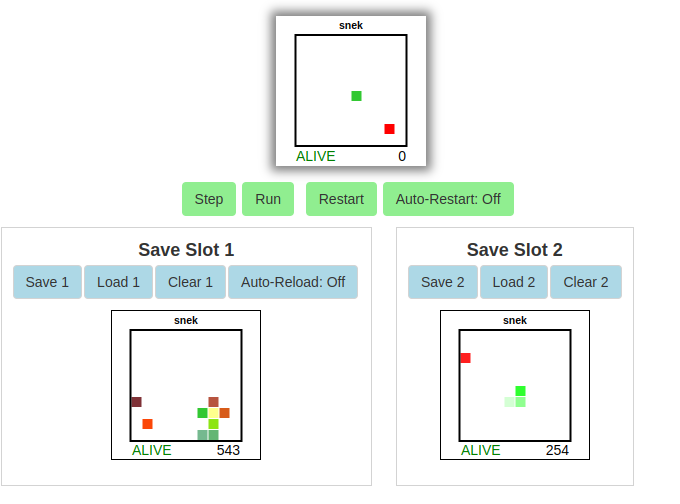
Today’s project is Hack-A-Minigame (demo, source). It’s the classic Snake, but the twist is you can only save and load the game. Rather than controlling the snake, it moves at random under AI control. You have to repeatedly save and load to make progress.
Credit to Jeff Lait’s “Save Scummer” 7-day roguelike for inspiration. Although actually, this whole minigame is mostly for a future project!
It’s november, and I’ve decided this month that I’m going to do 30 projects in 30 days. It’s an all-month hack-a-thon!
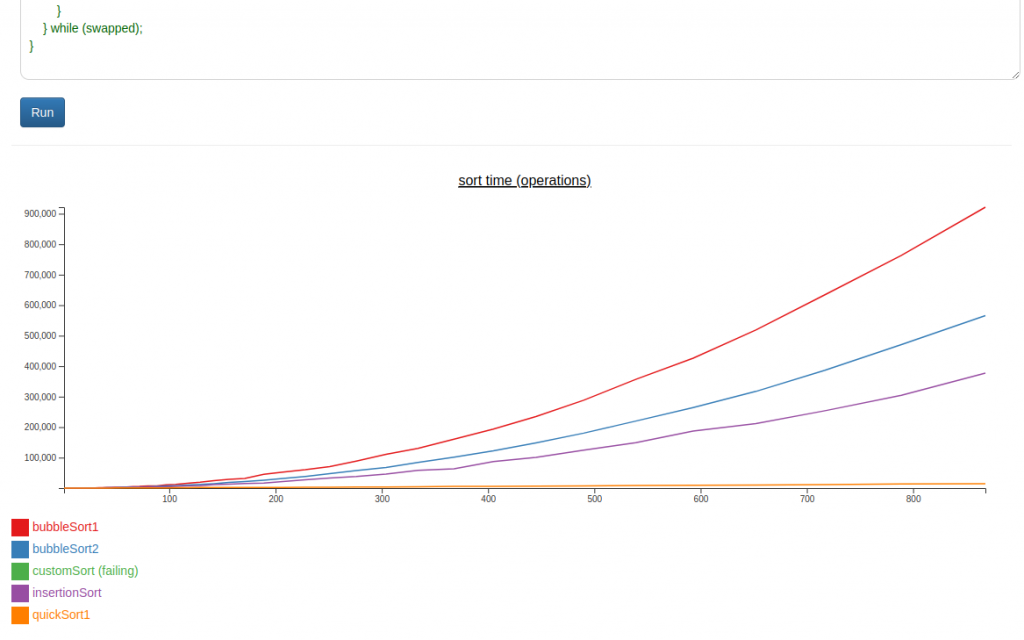
Today’s project was Hack-An-Experiment (demo, source). It’s designed to present the basics of experimental algorithmics, while also getting me acquainted with d3.
I have to say, I keep seeing d3 sold as a “graphing” library. And it’s definitely not. Maybe you could write one on top of it.
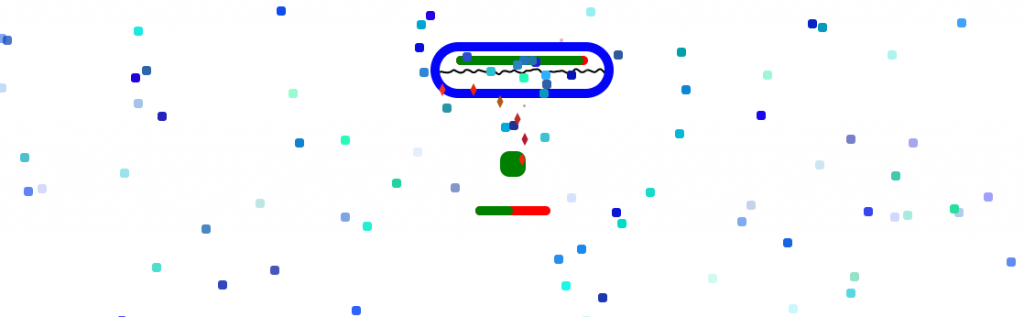
Thursday’s project was Hack-A-Clock (demo, source). It is a decimal time clock, displaying the time in revolutionary french time (minus their weird calendar).
https://tilde.za3k.com/hackaday/clock/
This is another “phone it in” project but I think it would have been okay with more accompanying explanation and better styling.
It’s november, and I’ve decided this month that I’m going to do 30 projects in 30 days. It’s an all-month hack-a-thon!
Today’s project is Hack-A-Hell (demo, source). It’s a bullet hell game combined with a music visualizer.
I’m happy with this one, although it took way too long given yesterday’s project! I keep thinking I’ll be able to modify or re-use things quickly, and it’s not true.
P.S. Taking the next day or two off for thanksgiving
It’s november, and I’ve decided this month that I’m going to do 30 projects in 30 days. It’s an all-month hack-a-thon!
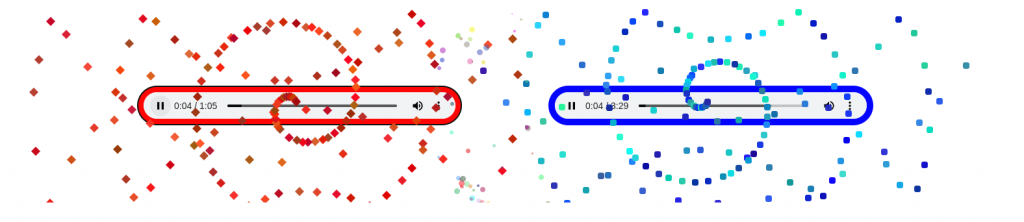
Yesterday’s project was Hack-A-Battle (demo, source). It’s two dueling music visualizers (sound warning!). Red vs blue. As each hits the other with bullets, they lose heath. As a band takes damage, it gets dimmer and quieter. Eventually one band will win out and be the only one playing.
I thought this was a cool idea, but I’m not really happy with the implementation
It’s a little laggy, especially when explosions happen.
It’s probably a little too fast of a battle.
I wanted to the things coming out to actually be linked to a music visualizer, which I almost had time to do.
It would have been better if the “bands” took turns playing instead of both going at once, for the poor listener.
It requires a fairly big display, and beefy computer/phone. It doesn’t work well on a small screen at all.
I wasn’t super pleased with the code. It was so-so
I wanted you to be able to upload your own songs and duel a friend
It’s november, and I’ve decided this month that I’m going to do 30 projects in 30 days. It’s an all-month hack-a-thon!
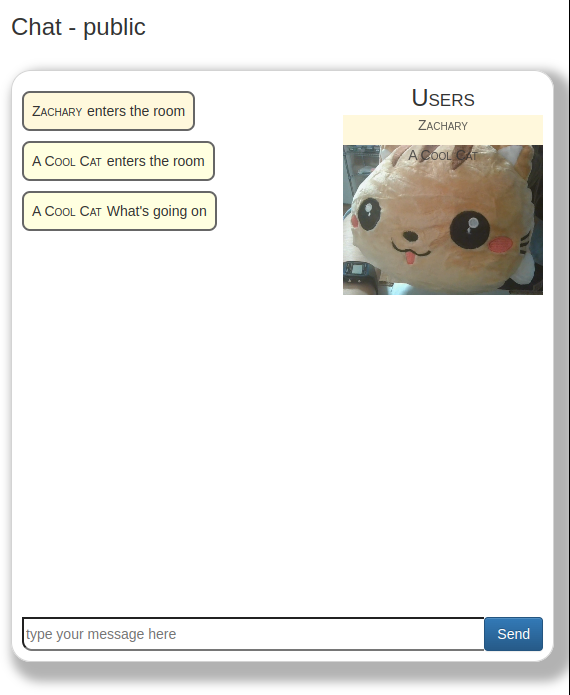
Today’s project is Hack-A-Hang (demo, source). It’s a place to hang out. It has text chat, video, and audio.
Hack-A-Hang is NOT WORKING.
Unfortunately while everything works great on my machine, there’s a bad problem in production, and I ran out of time on this one. I’ll try to get it fixed before the end of the month if it’s easy.
Hoo boy, this was one of the technically hardest ones so far. WebRTC is no joke. And not hard in a way where you have to think, hard in a way where the debugging tools are terrible. (Drag and drop was another tough one)